Chevrolet Silverado: How to Replace Dome Light
Replace the dome lights in your Chevrolet Silverado 1500 in minutes; read more to learn how.
This article applies to the Chevrolet Silverado 1500 (1999-present).
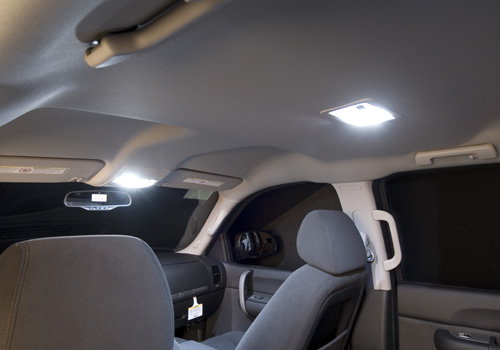
One of the least expensive ways to upgrade the interior cabin of your Silverado 1500 truck is through your interior lighting. You may not realize the difference a high performance LED bulb can make now, but once you upgrade your factory bulbs to LED bulbs, you will be happy you did. Like so many countless other Silverado drivers who have also made the upgrade, you will notice a remarkable improvement in illumination, brightness and general ambiance. Not only that, but you can also expect to change your lights much less frequently using these technologically advanced bulbs. Starting as low as a few dollars for a single bulb, you can upgrade your entire cabin for less than the cost of a tank of fuel. Best of all, LED lights bulbs are readily available online as well as through your local auto parts store. Let's get started!

Materials Needed
- Flat head screwdriver
- Microfiber cloth (optional)
- Replacement bulbs
Step 1 – Gently remove the dome light cover
Remove your dome light cover using a flat head screwdriver. Apply gentle force as you pry off the cover using a back and forth motion.
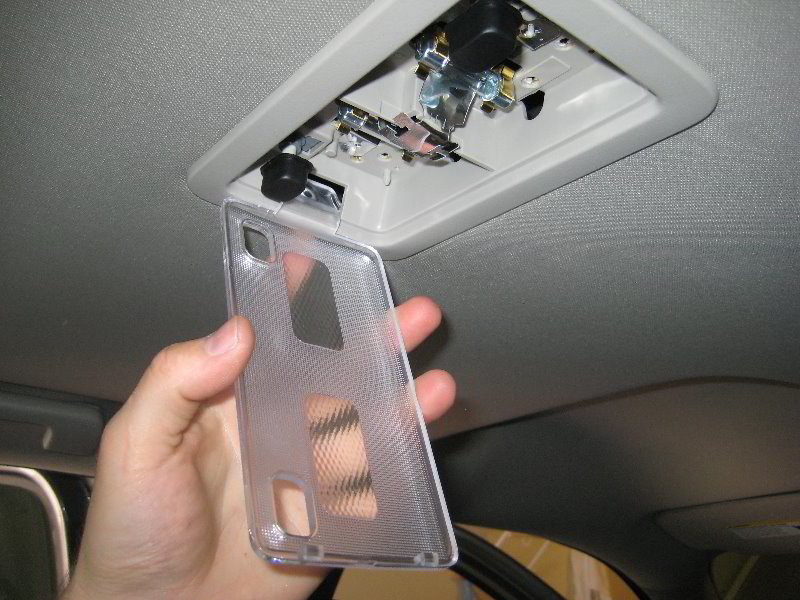
Pro Tip
Removing the light cover should require only a gentle amount of force.
Step 2 – Remove and replace the factory bulbs
Carefully remove your factory bulbs from their sockets. Replace your old factory bulbs with new LED bulbs. Installing LED bulbs is easy. Simply place the metal brackets into the sockets, and then gently push the LED bulb forward. Replace the cover once you are done.

Step 3 – Replace remaining lights
Move on to your console lights. Once again, remove the light cover, detach the old factory bulb inside and replace them with a set of new LED bulbs. Finish the job by snapping the cover back into place.

Pro Tip
Bulb size will vary by light assembly.
Step 4 – Check the lights
Check your new LED bulbs by switching on your lights or opening your doors.
- Check each light to ensure your new bulbs are properly installed. If for some reason one or more of your new bulbs do not work, check your fuses; your fuse panel is located under the hood of your trunk. You might have a blown fuse. Your push button switch could also be faulty.
- Finally, make sure your dome override button has not been activated. The dome override is located near the exterior lamps control; however, it may be easy to overlook, so check the area carefully. If the switch is pushed inward, the dome override feature is activated, and will need to be deactivated.
Featured Video: How to Replace Dome Lights
Related Discussions
- Blown Fuse - ChevroletForum.com
- Dome Override Button - ChevroletForum.com