Chevrolet Silverado: How to Change Oil With No Mess and No Spills
Don't let your aversion to a potential oil bath stop you from changing your Silverado's oil on time. Read on to see how to do this job safely and with no mess.
This article applies to the Chevrolet Silverado (2007-present).
The Vortec engine has a baffle about 6" above the bottom of the dipstick tube that prevents the insertion of an oil extractor hose. So we are stuck with the characteristic messiness of oil pan draining. However, with basic supplies and tools, we can do this job without the mess or oil bath. If you purchase the required materials, you'll save money in the long run by periodically doing this job yourself.

Materials Needed
- 6 quarts of oil and filter
- Strap wrench or toothed oil filter wrench
- 15 mm socket wrench, with 12 inch extension
- Wedco 12.5 quart oil drain pan or similar
- FloTool Giant Funnel or similar
- Standard oil fill funnel
- Aluminum foil
- Piece of cardboard, about 28 x 40"
- Mechanic's gloves or rubber gloves
- Rags
- RhinoRamp Max drive-on ramps or similar
- Wheel chocks
- Jack stands
Step 1 – Raise the truck if needed
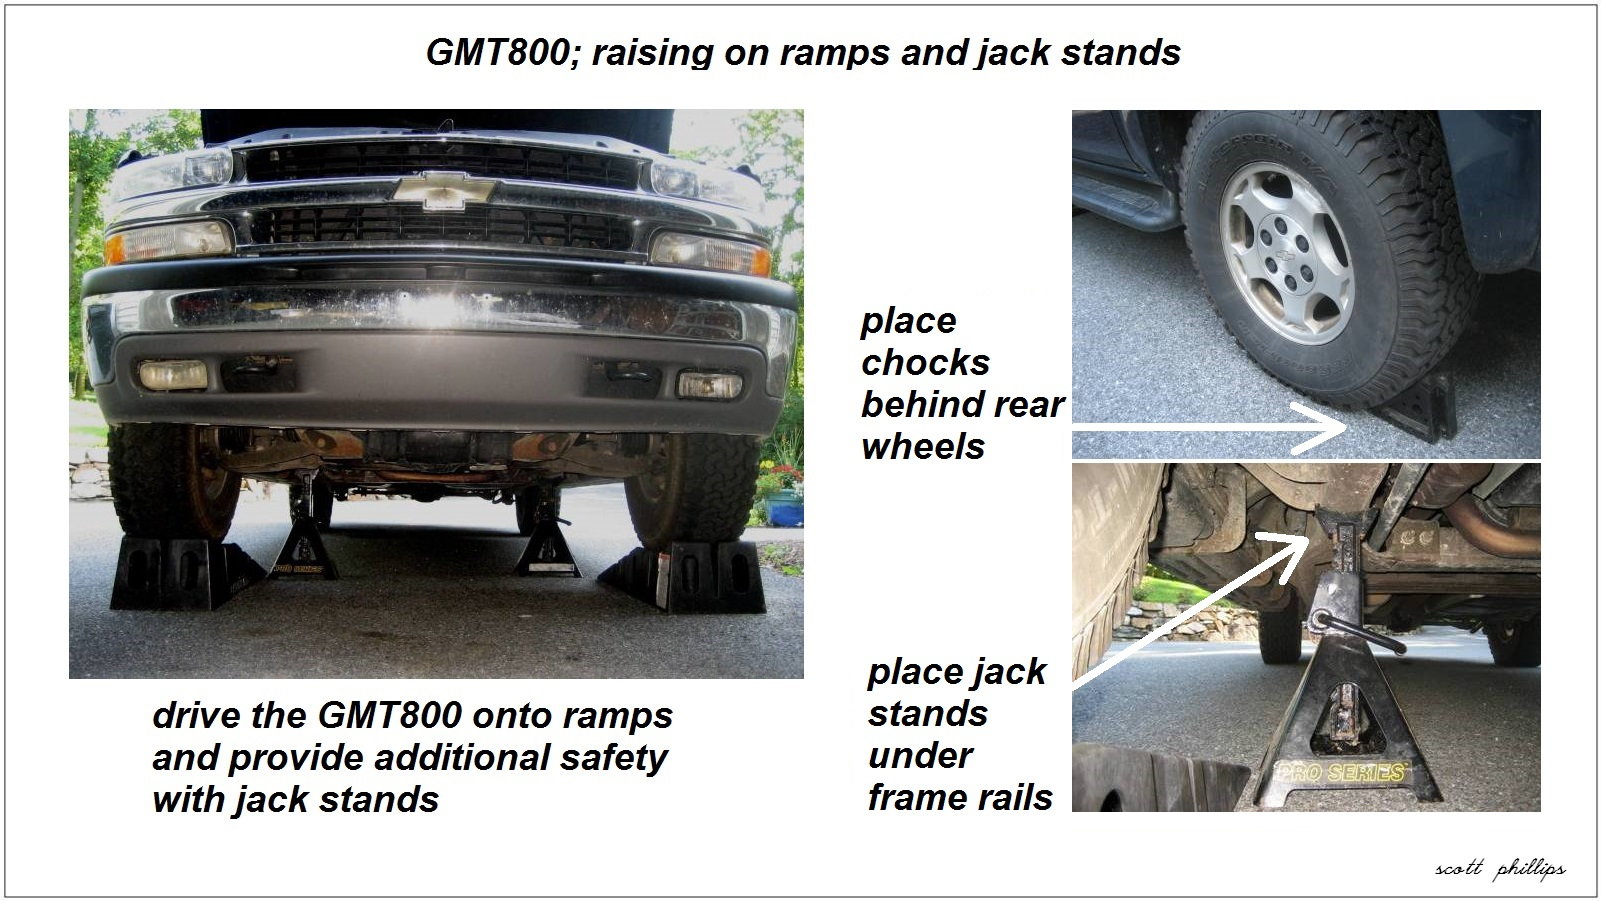
Your Silverado may have adequate ground clearance to work under it. However, raising the truck may provide for a much more comfortable working space. The easiest and safest means of raising the Silverado is to simply drive it onto ramps. The RhinoRamps Max are rated to 16,000 lbs and they are wide enough for most truck tires. Ramps are safer for a new DIY-er than a floor jack, as the jack lifting points are well under the truck, easy to miss and require lifting one side at a time, which could result in imbalance. Additionally, the ramps are much less expensive than a floor jack. For secondary safety, back up the ramps with jack stands and wheel chocks.
- Drive the truck onto the ramps.
- Set the parking brake.
- Place chocks behind the rear wheels.
- Place two jack stands under the front frame rails.
Pro Tip
Before going under any vehicle that is jacked or on ramps, always secure the vehicle with jack stands.
Step 2 – Obtain supplies and prepare
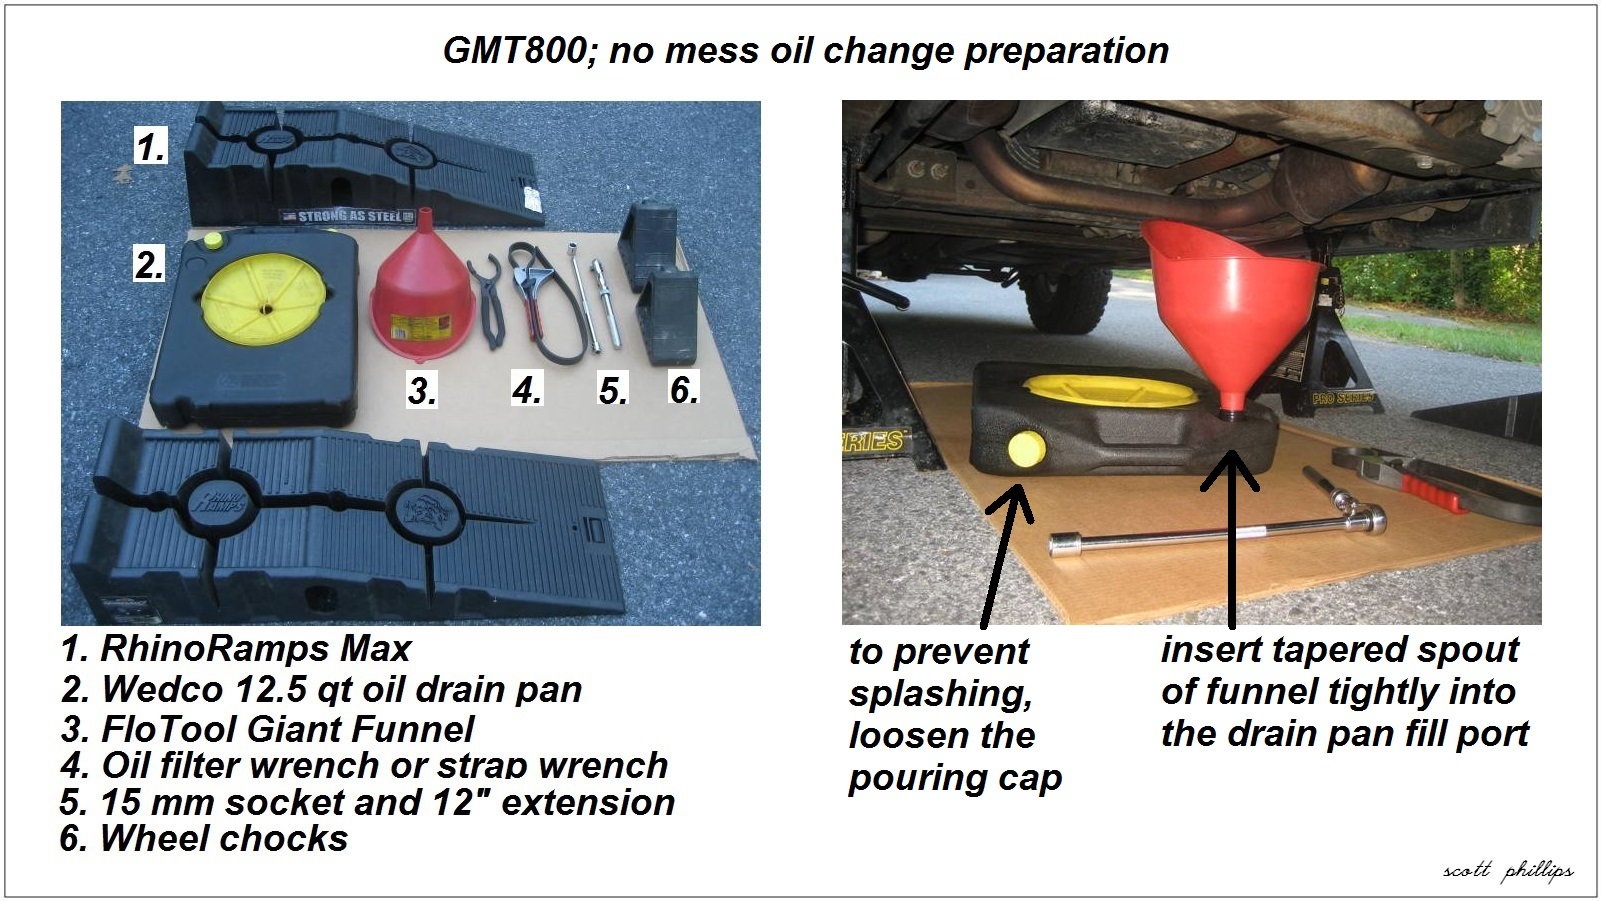
The key to no-mess oil draining is to catch the variable flow from beginning to end. The high and low sides of the Giant Funnel accommodate the variable flow, and the tapered spout of the Giant Funnel fits tightly into the fill port of the Wedco drain pan. Position the Giant Funnel with the low side to the front and under the drain plug.
- The initial strong oil stream will pass over the low side and be caught by the high side. As the flow slows, it will continue to fall right into the Giant Funnel.
- The long socket extension is for reaching over the top of the Giant Funnel, keeping your hand above the oil flow.
- Loosen the pouring cap on the drain pan to allow air entry and prevent glugging and splashing at the funnel.
- Use the cardboard to easily slide the drain pan assembly without spilling.
Note
You may find several brands of high/low funnels and drain pans which will work together to suit this application.
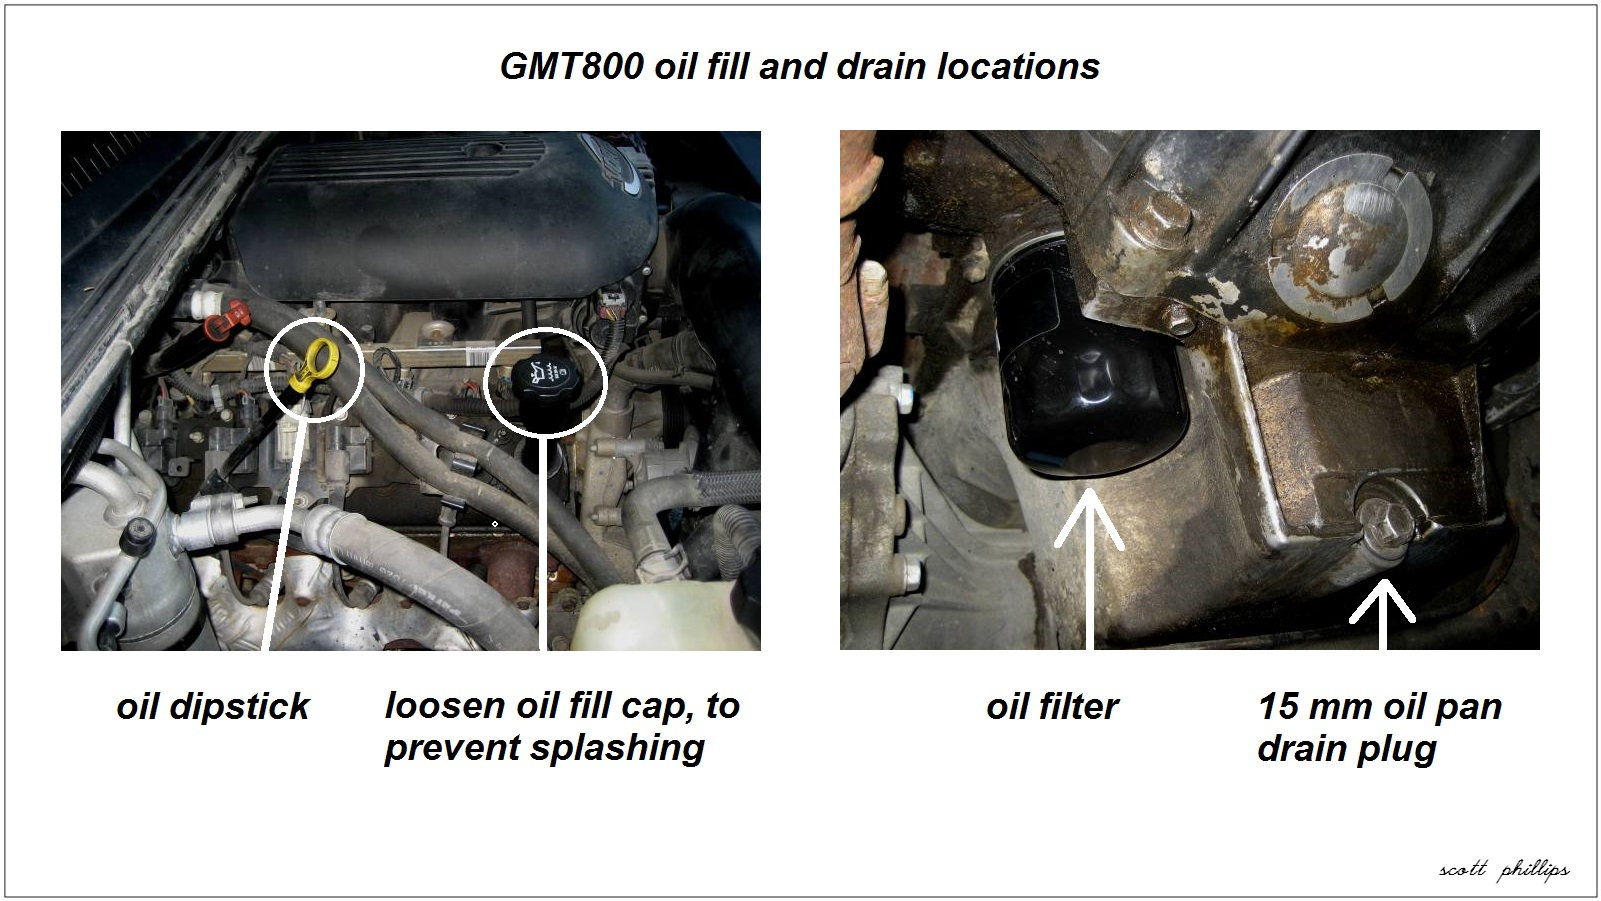
Step 3 – Locate oil fill cap and drain plug
- Loosen the engine oil fill cap to allow air entry and prevent glugging and splashing.
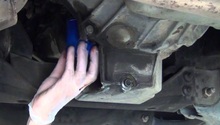
- Note the location of the oil filter and the 15 mm oil pan drain plug.
Step 4 – Protect against oil drip
- Slip aluminum foil above the frame cross-member and below the oil pan.
- Fold the foil up in front of the oil pan to direct oil back into the funnel.

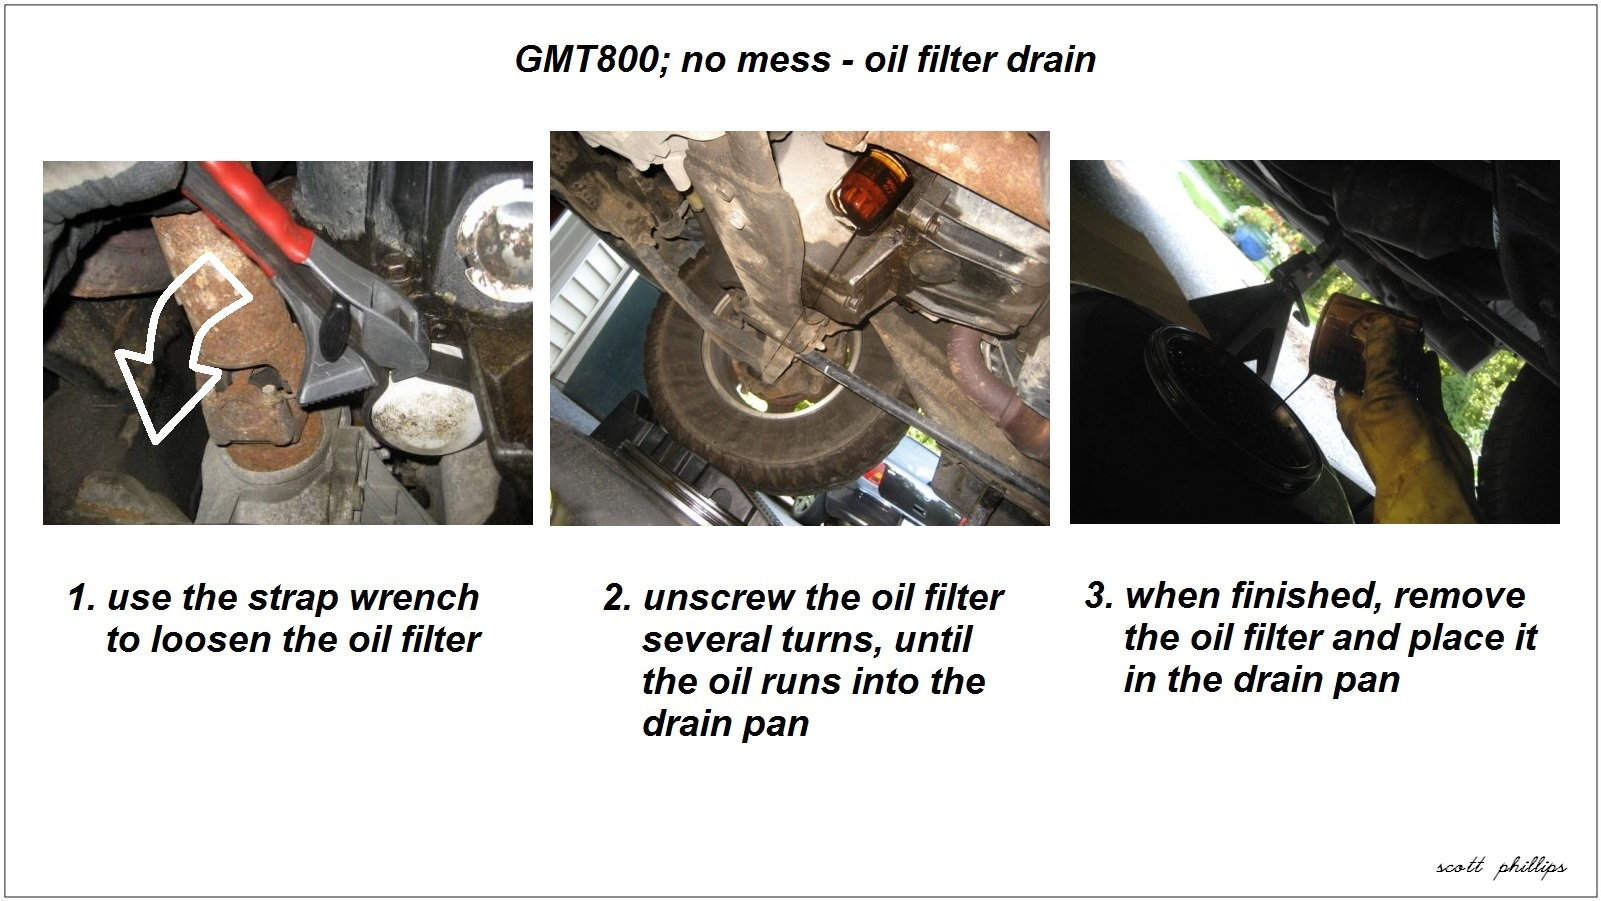
Step 5a – Drain oil filter with no mess
- Position the Giant Funnel under the oil filter. You can easily reach through the low side of the Giant Funnel to work.
- Use the strap wrench to loosen the oil filter.
- Unscrew the oil filter several turns by hand until the oil runs.
- When the oil flow stops, unscrew the filter and remove it.
- Wipe the filter flange clean.
Step 5b – Use toothed pliers for tight oil filters
Oil filter gaskets are designed to seal with about 3/4 to 1 full turn after contact. However, you may encounter an oil filter that is installed so tight that a filter cap wrench or strap wrench just slips. Slip joint, toothed pliers are made to remove stubborn oil filters. They can be adjusted to fit most sizes and the sharp teeth bite to ensure a firm grip. These pliers will remove just about any stuck filter, but the teeth cut into the filter housing and the the filter should never be reused. Once the filter is loose, the procedure is the same.

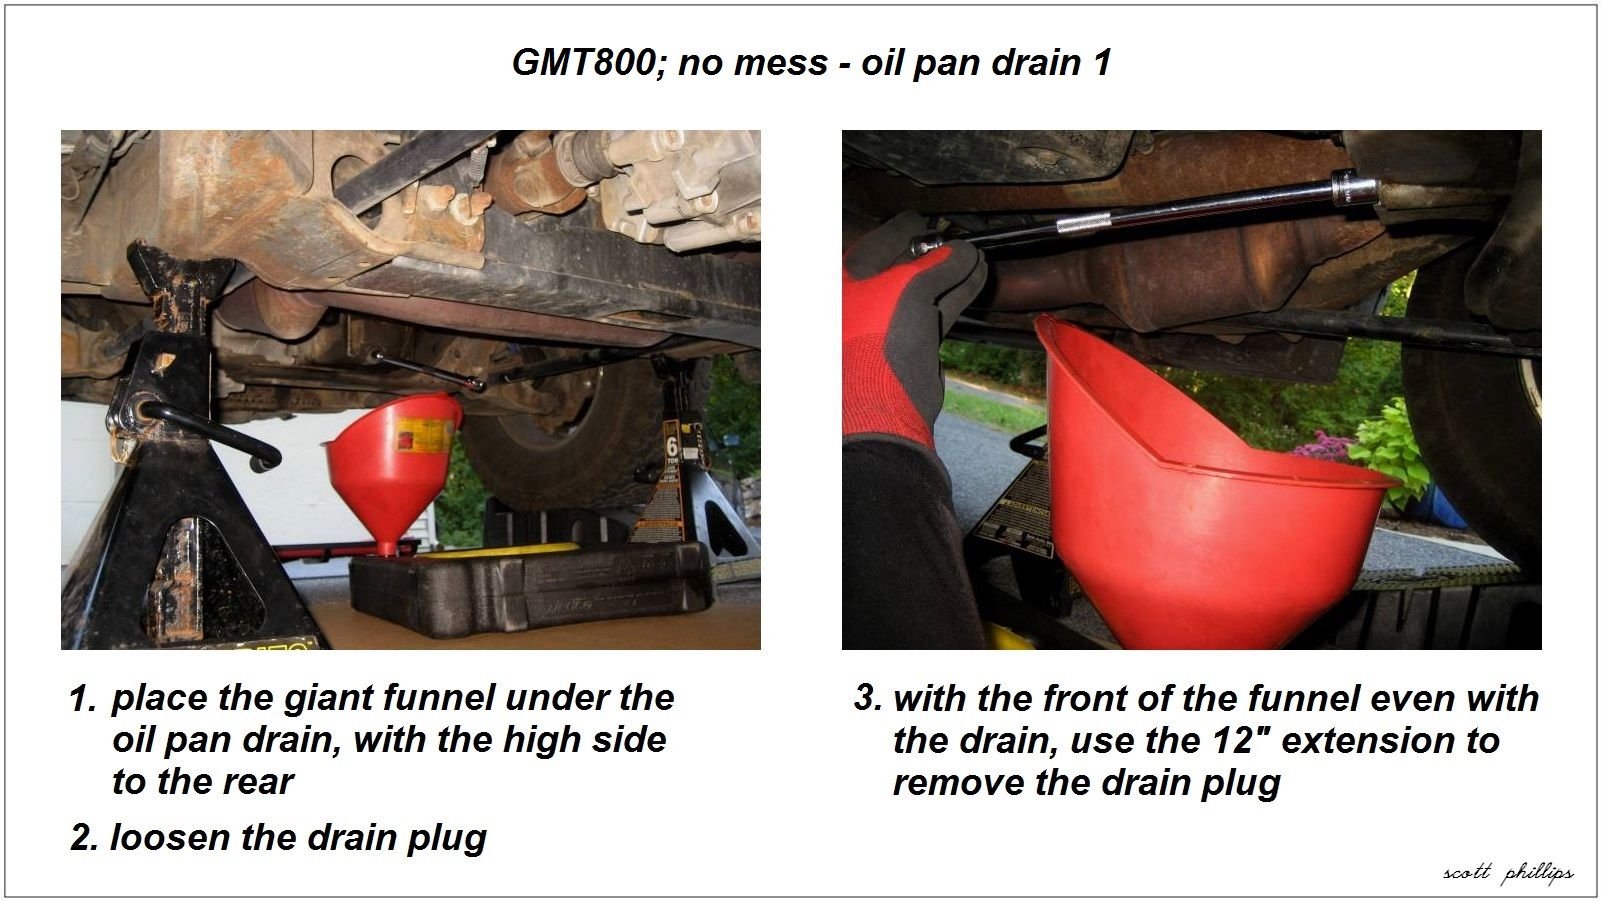
Step 6 – Drain oil pan with no mess
- Position the Giant Funnel with the low side front under the drain and the high side to the rear.
- To prevent splashing from the funnel, loosen the pouring spout cap on the drain pan.
- Use the 15 mm wrench just to break the torque on the oil drain plug. Leave it hand snug.
- Using the 12" extension to reach over the Giant Funnel, unscrew the drain plug.
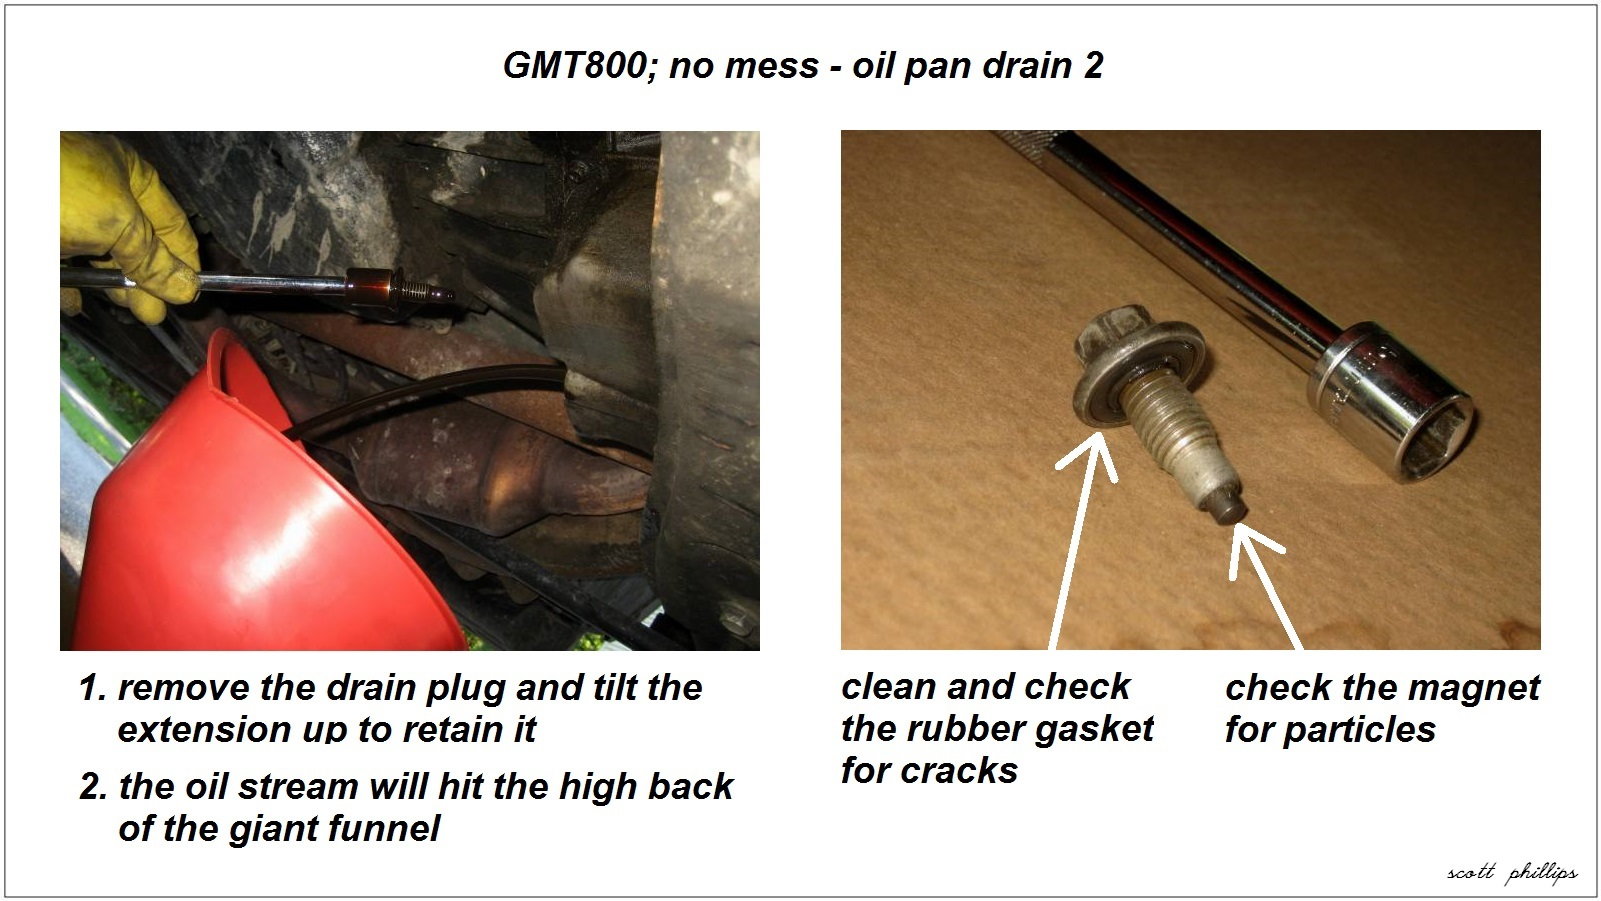
- As the drain plug comes off, tilt the extension up to retain the drain plug and prevent it from falling off the socket.
- The oil stream will hit the high side of the Giant Funnel. As the stream slows, you can tighten the pouring spout cap on the drain pan; you may need to use the cardboard to slide the drain pan assembly slightly to adjust the funnel position.
- Check the drain plug magnet for metal particles and wipe the plug clean. The GM drain plug uses an integrated rubber gasket, which is superior to the common crush washer and reusable many times. Ensure that the gasket is not torn or cracked and, if needed, replace it with a genuine GM plug.
Step 7 – Install the filter and drain plug
- Remove the aluminum foil drip shield.
- Wipe the sealing surfaces and the oil pan clean and dry. This will ensure that you can tell the difference between a new leak and an old leak or spill.
- Install and tighten the drain plug to contact plus 1/4 to 1/2 turn to compress the rubber gasket. Remember that the drain plug is steel and the oil pan is aluminum; do not over-tighten.
- Use the standard funnel to fill the oil filter with about 8 to 10 ounces of oil. Go slow and let the oil settle through the filter media.
- Lightly lubricate the filter gasket with clean oil.
- Install and tighten the filter to contact plus one turn, which ensures proper gasket compression. Use the strap wrench if needed, but don't over tighten, as an over compressed gasket can leak.

Pro Tip
Engine oil in the filter provides immediate lubrication to the valve train on start-up. Always fill the oil filter before installing it.
Step 8 – Fill the engine oil with no mess
- Use the standard funnel to pour about 5.5 quarts into the engine. Pour from the high side of the bottle, as shown in Figure 9. The offset spout is designed to prevent glugging and splashing.
- Install the oil cap.
- Run and leak check your work. Tighten up the drain plug and filter if needed and wipe clean.
- Take the Silverado off the ramps/jack stands and park it on level ground.
- Top up the oil to the full mark on the dipstick. The difference between the two dipstick holes is about 1/2 quart. Topping up the last half-quart carefully will prevent over-filling.
- The Vortec 4.8, 5.3 and 6.0 liter engines should all hold about 6 quarts total.
Step 9 – Reset the oil life monitor
Using the steering wheel controls:
- Turn the key to IG2 with the engine off.
- Use Fuel button (lower left) to scroll to the "Engine Oil Life" display.
- Press and hold the Select button (lower right) for 10 seconds, to reset the display to 100%.

Without using the steering wheel controls:
- Turn the key to IG2 with the engine off.
- Pump the accelerator pedal fully down and up three times within five seconds.
- The "Oil Life Reset" message will flash for 10 seconds.
- Turn the key to LOCK.
Related Discussions
- Oil Capacity 5.3L Silverado - Chevroletforum.com
- Best Oil for Chevy Truck? - Chevroletforum.com
- Oil Change every 5K Miles? - Chevroletforum.com