Chevrolet Silverado 2007-2013: How to Change Oil
As advanced as Silverado truck engines have become, DIY fans can still save money and feel the satisfaction of changing their own oil. Here's how!
This article applies to the Chevrolet Silverado 5.3L and 5.7L Vortec engines (2007-2013).
One of the first things you learned about cars when you were young drivers was how and when to change the oil. As advanced as modern engines have become, it's comforting to know that you can still change your oil in your Silverado pickup. In fact, it seems GM has actually made it easier for you—thanks to improved access points to the drain plug and filters. Be sure to check your owner's manual for the proper oil weight and double check the cross-reference numbers when purchasing aftermarket oil filters.
Note: GM is now recommending oil changes every 5,000 miles (versus 3,000). The new engines run much cleaner, so every 5K–instead of 3K–will save you money.

Materials Needed
- Hydraulic floor jack and jack stands
- Oil filter wrench
- 15mm wrench or 15mm socket with extension and ratchet
- Cardboard or drop cloth
- 6 quarts of 5W-30 weight oil (traditional or synthetic)
- Oil filter
- Waste oil pan
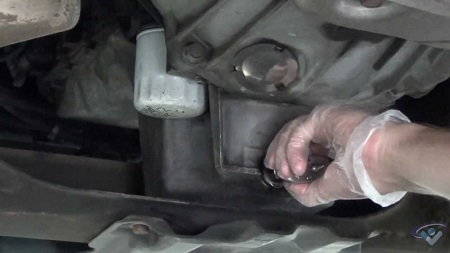
Step 1 – Jack up car and remove oil pan plug
Some feel comfortable crawling under a truck without jacking it up. While this is great for 4WD trucks, the idea is to give you some elbow room because oil drain plugs and oil filters sometimes require some elbow grease. After jacking up your car, remove the oil pan plug. Be sure to position your waste oil pan underneath the truck before loosening the plug.
Pro Tips
- Be certain to chock your rear tires! Never trust the locked transmission to secure your vehicle in place.
- Use a cardboard sheet or a drop cloth to catch any additional drips around the pan.
(Related Article: How to Jack Up Your Truck - ChevroletForum.com)
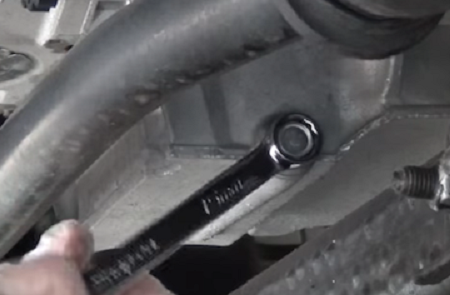
Step 2 – Drain the old oil
Once the oil has drained, allow a minute or two to let the final drops of used oil to drain out. Then, re-install the oil drain plug.
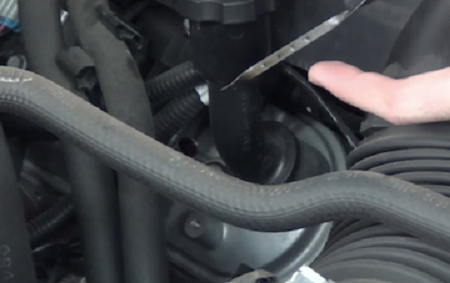
Step 3 – Loosen and remove oil filter
Using an oil filter wrench that fits your filter size, turn the oil filter counterclockwise and remove it by hand. Be careful if the oil is still hot!

Pro Tip
If your oil filter wrench doesn't fit or if you don't have one, some people slide an old leather belt around the filter. Then, loop it through the buckle and tighten it around the filter cylinder. Removing it is easy!
Step 4 – Replace oil filter
Screw in the new filter. The rule of thumb is "hand-tight," but an extra quarter turn beyond hand-tight (only) ensures you have it tight enough.
Pro Tip
Always, always, always apply a light coat of oil around the rubber ring gasket before installing a new oil filter. This will help it seal better, and will make removal of the filter easier next time you change your oil.
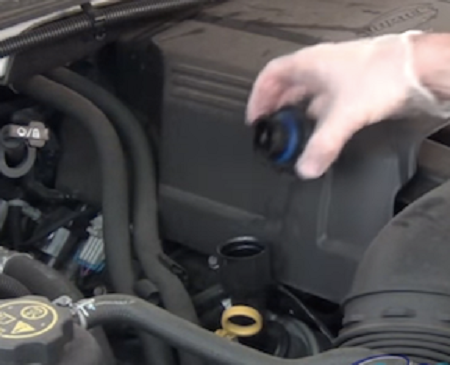
Step 5 – Add 5 quarts of oil
Remove the filler cap, and pour five quarts of oil into the upper oil filler tube.
Step 6 – Run the engine
Run the engine for one minute, then check the oil level. This is an important step. Once you start the engine and allow oil to circulate, your oil pump will fill the empty oil filter. Shut-off the engine and recheck oil level. Add an additional (6th) quart (slowly) until you've added enough to read "Full" on your dipstick. A little bit over never hurt an engine, but keep it as close as possible.
Step 7 – Reset oil change warning light
- Turn your ignition key to the "Run" position with the engine off.
- Press and release the gas pedal three times within five seconds.
- The system is resetting if you observe the "Oil Life Reset" message display for 10 seconds.
- Turn off the ignition key to the lock position.
- If the "CHANGE ENGINE OIL" light returns when you start your truck, the oil life reset has not taken, so repeat the steps.
- If it still fails to reset, check with your dealer or repair shop for service.
If everything checks out, lower your truck down and tidy up the garage. You're done!
Pro Tips
- Be sure to record your mileage and the date you changed your oil.
- Pour used oil into the empty containers, and return it to the store you purchased your new oil from, or bring it to a recycling center. Don't pollute!
Related Discussions
- Best Oil for My Truck - ChevroletForum.com
- Oil Change Tips - ChevroletForum.com
- 5000 Mile Oil Change Interval - ChevroletForum.com
- Oil Capacity of V8 Engine - ChevroletForum.com
- Resetting Oil Service Light - ChevroletForum.com