Chevrolet Silverado 2004-Present: How to Remove Spare Tire
Changing a spare tire is easy; here's how to access the spare tire in your Chevrolet Silverado 1500.
This article applies to the Chevrolet Silverado 1500 (2014-present).
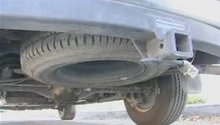
Before you can return to the road after a flat tire, you'll need to release the spare tire that is attached to the underside of your Chevrolet Silverado 1500. Because your spare tire is mounted to your vehicle via a well-supported underbody hoist system, releasing it is as easy as releasing the secondary latch, which has been put in place to stop your spare from dropping to the ground while you're driving. The removal process is straightforward and your tire will lower to the ground without the need for force. Once your spare tire is free, there are a few more steps you'll need to follow before you're back on the road again. Let's get started!

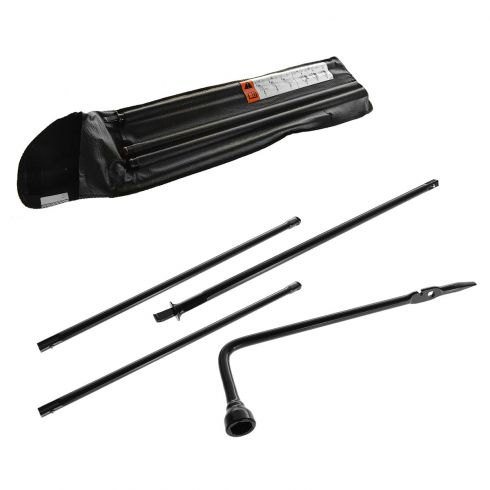
Materials Needed
- Jack stand set
- Wheel wrench
Step 1 – Find the connecting cable
Bend down and take a good look at the underside of your vehicle. There should be a well visible cable, which you'll need to tighten in just a moment. If you don't see the cable, proceed to Step 2. If you do, complete the following:
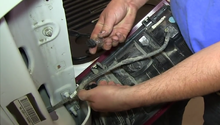
- Tighten the cable by turning your wheel wrench clockwise. Don't worry about over tightening the cable; simply turn your wheel wrench until you hear two clicks.
- You might feel it skip twice, which is an indication you are performing this task correctly.
- Repeat this procedure until the spare tire lowers to the ground, which might take at least two more rounds.
- If the spare tire does not lower to the ground, consult your owner's manual. The information should fall under the heading, "Removing the Spare Tire and Tools," which is located on page 566.
- Turn the wrench counterclockwise to free 6 inches (15 cm) of cable.
Step 2 – Get the wheel blocks into position
- Position the wheel blocks upright and facing each other on their shortest ends.
- Properly balance the jack by placing the bottom edge of the jack (A) on the wheel blocks (B).
- Attach the jack handle, extension, and wheel wrench to the jack.
- Move to the front of the rear bumper and place the jack and wheel blocks underneath your vehicle.
- Get the center lift point of the jack into position under the center of the spare tire.
- Raise the jack by cranking the wheel wrench in a clockwise direction.
- Continue cranking the wheel wrench until the spare tire has no where else to go and is held firmly in place. At this point, the secondary latch is released and the spare tire is balancing securely and safely on the jack.
- Crank the wheel wrench in a counter-clockwise direction to lower the jack. Continue to do so until the spare tire either slides off the jack or hangs from the cable for easy removal.
Step 3 – Disconnect the jack
- Detach the jack handle from the jack and release the jack from your vehicle.
- Apply pressure to the spare, while simultaneously pulling the jack out from under the spare tire. If you are uncomfortable performing this task on your own, have an assistant step in to help you.
- Check if the spare tire is suspended from the cable. If it is, insert the hoist handle, extension, and wheel wrench into the hoist shaft hole in the bumper. Using some force, turn the wheel wrench counter-clockwise until the spare tire lowers completely.
- Position the retainer at the end of the cable as needed and then guide it through the wheel opening.
- You are now ready to ease the tire out from under your vehicle by hand.
- If the cable is suspended under your vehicle, turn the wheel wrench clockwise. This will raise the cable back up and into correct positioning.
Step 4 – Have your vehicle inspected
Visit your local mechanic to have your hoist assembly replaced and a new spare tire installed.

Related Discussion
- Releasing a Spare Tire - ChevroletForum.com