Chevrolet Silverado 1999-2006: How to Replace Power Steering Pump
If your Silverado's power steering pump has gone out, don't get frustrated and overworked. Replace it sooner rather than later using the steps below.
This article applies to the Chevrolet Silverado GMT800 (1999-2006).
The power steering pump in your truck runs off the engine, and serves as a hydraulic assist for the steering rack. Although power steering pumps are prone to wear and may eventually fail, they are not very complex components and moderately easy to replace. In trucks, however, heavier loads can put added pressure on the pump, and failure is usually quickened by the fluid as well as pump overheating. Signs that your power steering pump is failing are if the steering wheel is shaking heavily, the wheel is difficult to turn, and you hear a squealing or whining noise. If you notice these signs in your Silverado, follow the steps below to replace your power steering pump.

Materials Needed
- Pulley removal/installation tool
- 8, 10, and 15mm sockets
- Ratchet and extension
- Adjustable wrench
- Pliers
- Flat head screwdriver
- Strap wrench (if necessary)
Step 1 – Remove the air intake duct
Always disconnect the battery when dealing with components under the hood of your truck. Use an 8mm socket and ratchet to unbolt the negative (black) battery lead. Then, disconnect it from the battery.
There are two hose clamps that hold the air intake duct in place. One hose clamp is secured to the MAF by the air filter housing, and the other hose clamp is secured to the throttle body. Use a flat head screwdriver to loosen each hose clamp, and then lift out the air intake duct.
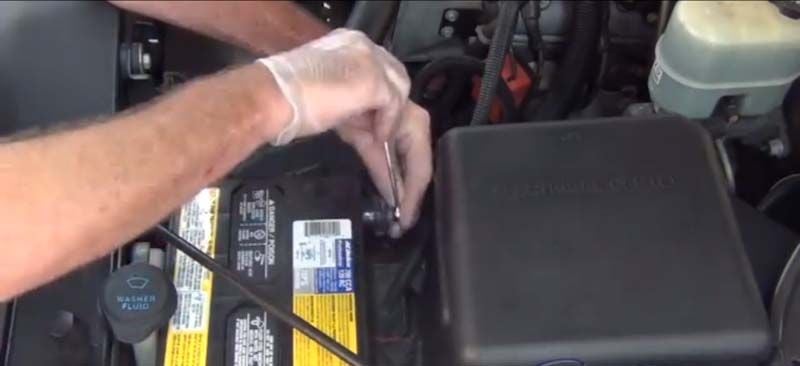
Figure 1. Disconnect the negative (black) battery terminal. 
Figure 2. Loosen the MAF hose clamp. 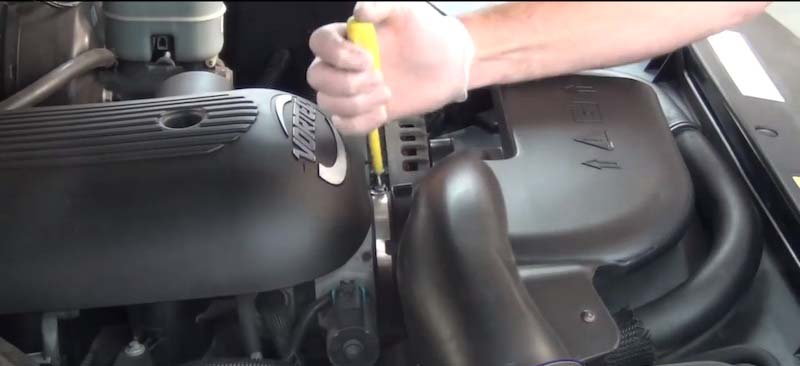
Figure 3. Loosen the throttle body hose clamp.
Step 2 – Remove the radiator fan
The radiator fan is attached to the water pump pulley, and channels air flow from the radiator to directly cool down the engine. First, remove two 10mm on the fan shroud to gain access to the radiator fan. Then, attach an adjustable wrench to the nut on the back of the fan. Rotate the wrench counterclockwise to loosen the nut, and then rotate the blades of the fan counterclockwise to remove it.
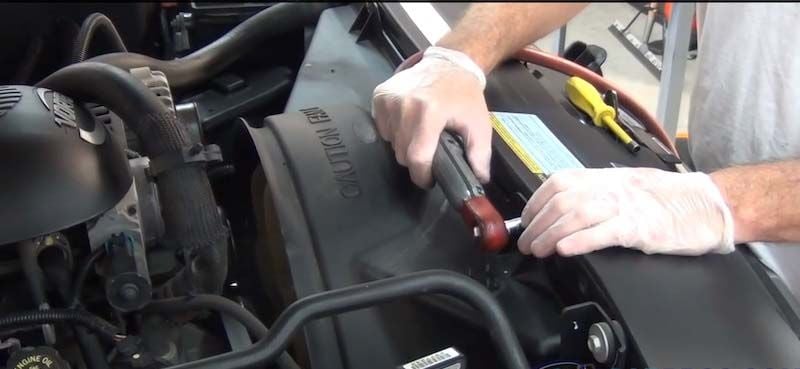
Figure 4. Remove bolts from the fan shroud. 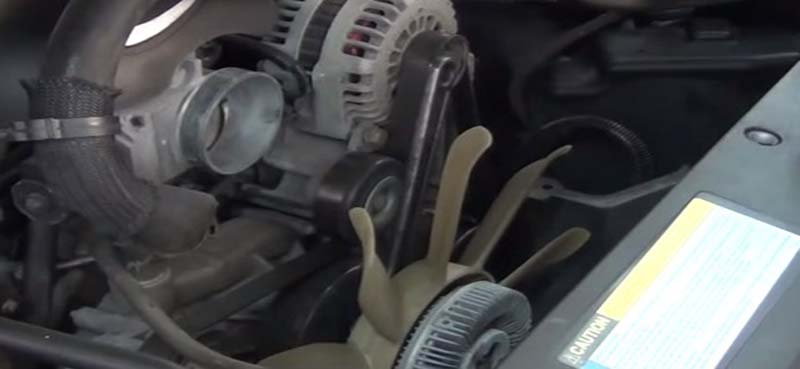
Figure 5. Use adjustable wrench to loosen the radiator fan nut.
Pro Tip
The drive belt should keep the fan from spinning as you loosen the nut. If the fan does happen to spin, you will have to remove the drive belt and hold the pulley with a strap wrench.
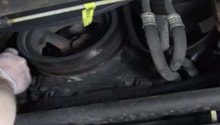
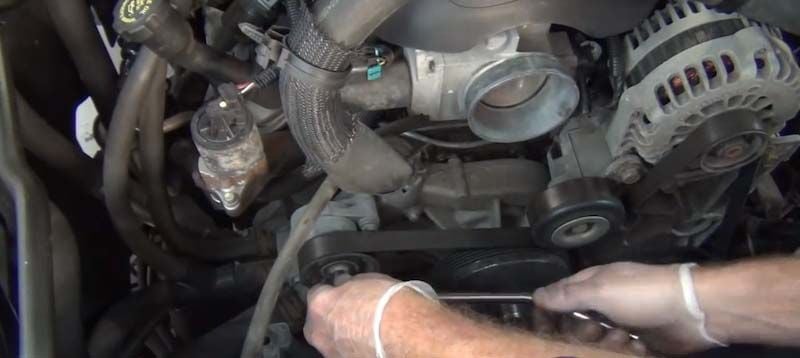
Step 3 – Remove the drive belt
To remove the drive belt (serpentine belt), the tension from the tensioner pulley must be released. Attach a 15mm socket with ratchet and extension to the center bolt of the tensioner pulley. Rotate the bolt clockwise until enough tension on the drive belt is relieved. Then, remove the drive belt from all of the pulleys.
Pro Tip
When re-installing the drive belt, refer to the routing diagram on the radiator shroud for the correct placement.
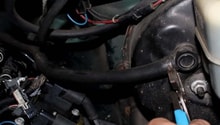
Step 4 – Disconnect the power steering lines
There are two hydraulic power steering lines connected to the pump: a supply line and soft return line. Place an oil catch pan directly underneath the power steering pump. Use an adjustable wrench to loosen the nut on the supply line, and remove the line to let the fluid drain into the pan. Use pliers to squeeze the tabs of the hose spring clamps on the soft return line, and let the fluid drain into the catch pan.

Figure 7. Detach and drain the hard line. 
Figure 8. Loosen the hose spring clamp.
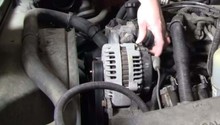
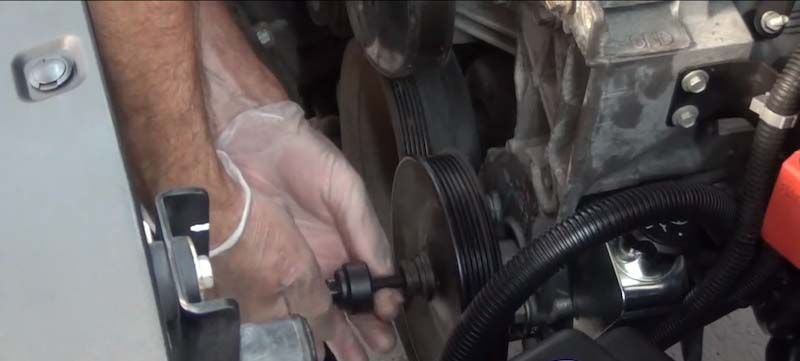
Step 5 – Remove the power steering pump pulley
Place a pulley removal/installation tool onto the center bolt of the power steering pump pulley. Then attach a 10mm socket with ratchet to the end of the pulley removal tool, and attach a 10mm wrench to the nut of the pulley tool. Hold the ratchet in place as you rotate the wrench counterclockwise. Continue until the pulley is removed.
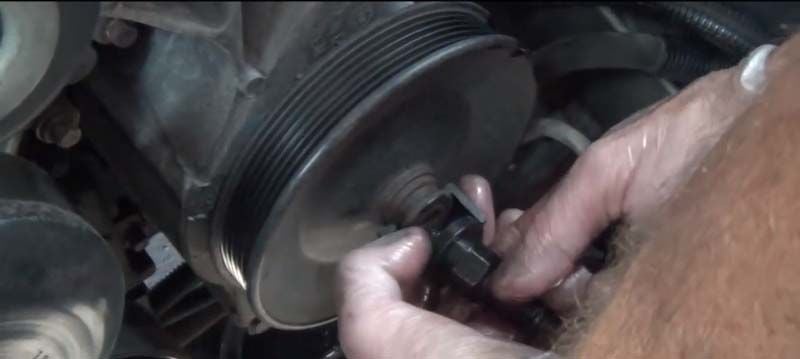
Figure 9. Remove the power steering pump pulley. 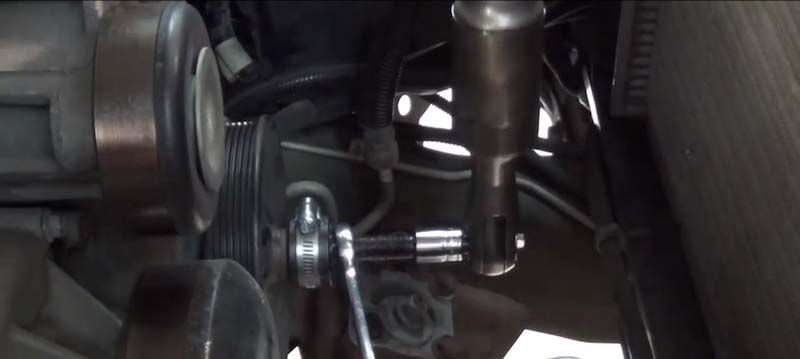
Figure 10. Rotate the ratchet and wrench in opposite directions.
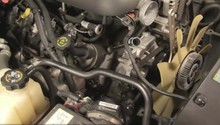
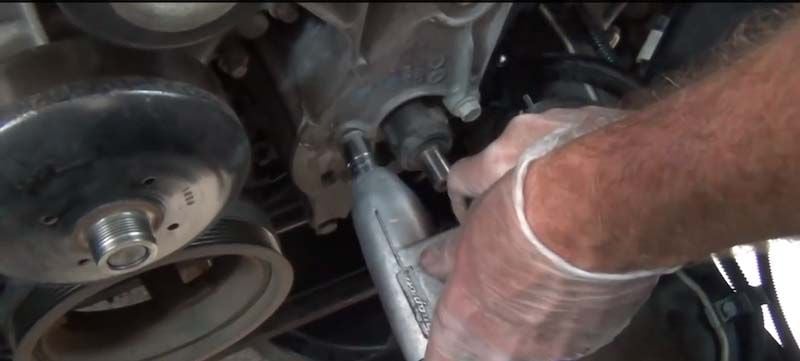
Step 6 – Loosen the mounting bolts
The power steering pump on V8 Silverado engines is retained by four 15mm bolts. Three bolts secure the pump to the bracket and one bolt secures the bracket to the engine. While supporting the pump, use a socket and ratchet to remove the three bracket bolts. Then, slide the pump out.
On V6 Silverado engines, the power steering pump is retained by two bracket 15mm bolts on the rear side of the pump. While supporting the pump, use a socket and ratchet to remove the two rear bracket bolts. Then, slide the pump out.
Pro Tip
Sometimes it's necessary to loosen the bolts securing the bracket to the engine, as the bracket also serves as the mounting point for the alternator. Loosening these bolts will make it easier to remove the power steering pump.
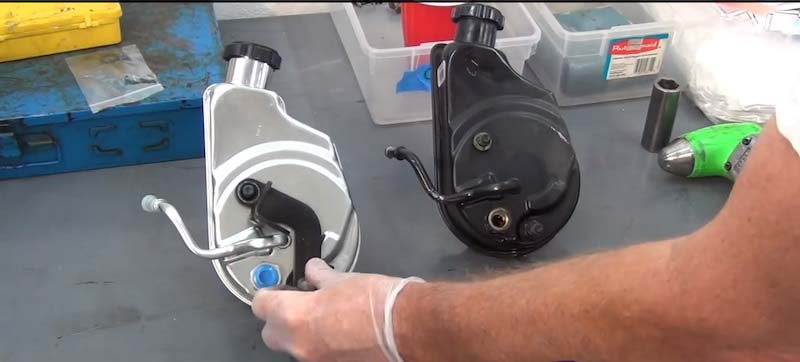
Step 7 – Transfer the mounting bracket
There is a black bracket secured to the old power steering pump by two 8mm nuts. Use a socket as well as ratchet to remove the nuts, and then transfer the bracket over to the new power steering pump.
Step 8 – Install the new power steering pump
Slide in the new power steering pump, and secure it with the same mounting bolts. Push the pulley onto the new pump and attach the pulley removal/installation tool to the center bolt. Attach the 10mm socket with the ratchet and 10mm wrench to the pulley tool. Then, rotate the wrench clockwise while holding the ratchet in place. Tighten the pulley to a snug fit.
Step 9 – Re-install the removed components
- Attach the hydraulic power steering supply and return lines.
- Install and correctly route the drive belt.
- Attach the radiator fan and fan shroud.
- Install the air duct.
- Reconnect the negative (black) battery terminal.
Step 10 – Add fluid to the power steering pump
Use a funnel to direct the power steering fluid into the pump, and pour until the fluid reaches the fill line. To make sure the power steering fluid is circulating throughout the entire system, turn on the engine and rotate the steering wheel left as well as right multiple times. Lastly, check the fluid level again and top off as needed.

Figure 14. Pour in new power steering fluid. 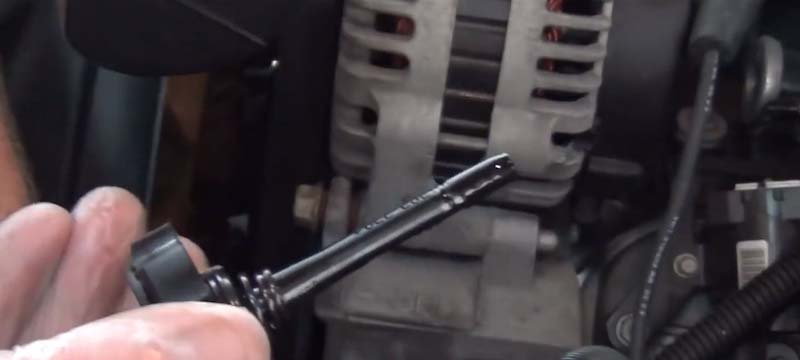
Figure 15. Add power steering fluid to the fill line.
Featured Video: Power Steering Pump Replacement
Related Discussion
- Easy to Replace Power Steering Pump - ChevroletForum.com