Chevrolet Silverado 1999-2006: How to Replace Wheel Bearings
Bad wheels bearings can cause your tires to wear irregularly. Prevent this by replacing the bearings; learn how to here.
This article applies to the Chevrolet Silverado 1500 (1996-2006).
It's very important to replace wheel bearings when they begin to fail as they can cause a few different problems that can be both costly and dangerous. Wheel bearings allow your wheel to rotate with minimum friction as well as support the weight of the vehicle on that corner, which means even the slightest bit of damage can lead to problems. The first problem you'll begin to notice is that the alignment will feel like it's out. In addition, the front tires will begin to wear unevenly. Excessive driving on failed bearings can cause two major problems: the friction can cause the bearing to weld itself in place which can lead to it shearing off the hub and you can potentially lose a wheel going down the highway.

Materials Needed
- Floor jack
- Jack stands
- Tire iron
- Wheel chocks
- Socket set
- 33mm socket
- Flat head screwdriver
- Hammer
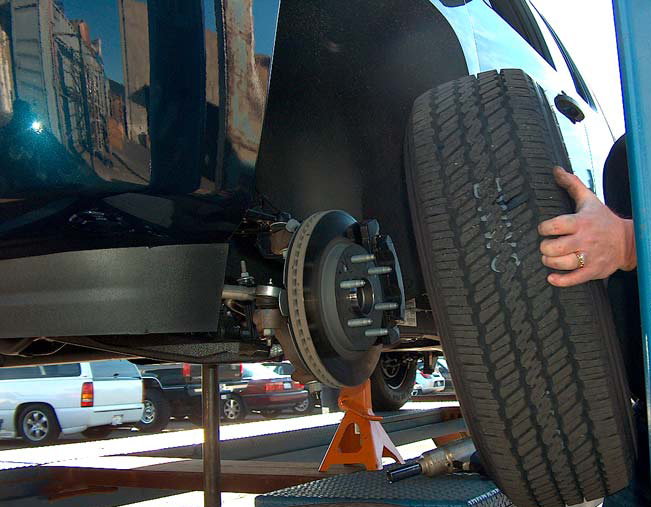
Step 1 – Jack up the truck and remove the wheel
- Park on flat, level ground.
- Chock the wheels on the opposite end of the truck that you are removing the wheel from.
- Using the tire iron, loosen the lug nuts on the wheel.
- Raise the vehicle using the floor jack high enough to get the wheel off.
- Position the jack stand under the lower control arm.
- Finish removing the lug nuts and then remove the wheel.
- Lower the truck onto the jack stand.
(Related Article: How to Jack Up Your Truck - ChevroletForum.com)
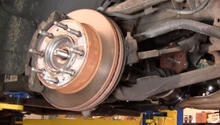
Step 2 – Remove brake assembly
You can either remove the brake caliper, then brake pads, then brake caliper bracket (in that order), or you can just remove the entire assembly at once by removing the caliper bracket. It's recommended going that route as it's only two bolts to remove and it keeps you from having to re-seat the brake pads. Once you have the caliper bracket removed, set it on top of the upper control arm to prevent any stress to the brake line that is attached to it. With the caliper assembly out of the way, you'll be able to slide the rotor off easily.

Step 3 – Remove hub assembly
- Remove the clips that hold the ABS harness in place.
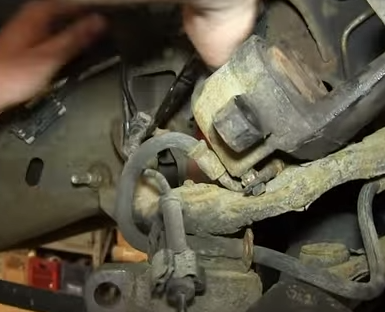
Figure 3. ABS harness clips. - With the holding clips undone, you can unplug the harness.
- Using a hammer and a flat head screwdriver, remove the hub dust cover.
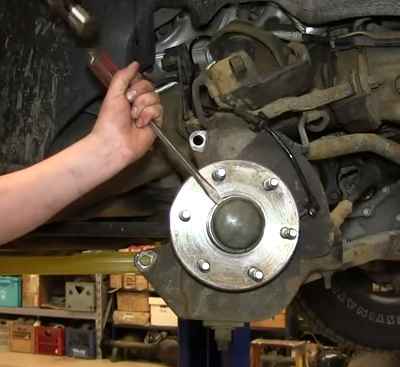
Figure 4. Remove dust cover. - Remove the 33mm bolt in the center of the hub assembly, if you don't have an impact wrench, you'll need to use a breaker bar.
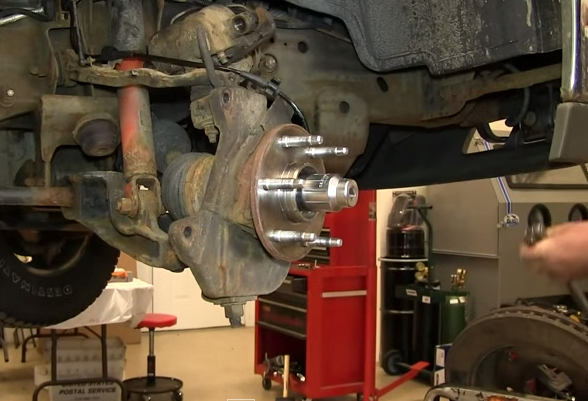
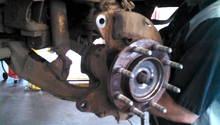
Figure 5. Remove 33mm bolt. - Remove the three 15mm bolts on the backside of the hub assembly. They're located in a triangle pattern with the top being the center.

Figure 6. Remove the 15mm bolts. - Re-install the 33mm nut about a 1/4 way on to keep the hub assembly from falling off during the next step.
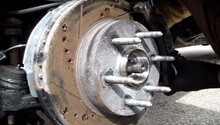
- Using a hammer, or a small sledge, hit the back of the hub assembly to break it free.
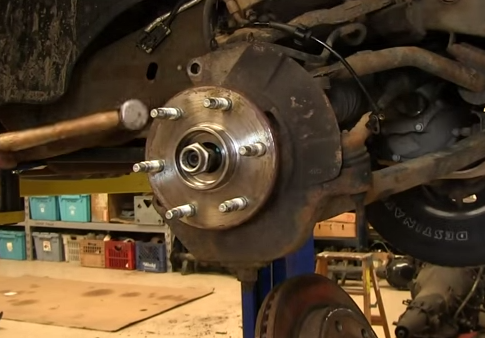
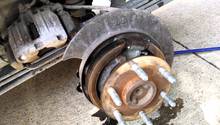
Figure 7. Hammer the back of the assembly. - Remove the 33mm nut again and then pull the hub assembly off.
- Remove the triangle shaped backing plate from the back of the assembly; you'll be reusing this.
Step 4 – Install hub assembly
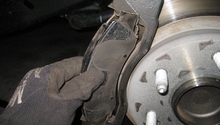
- Install the backing plate onto the new hub assembly; it just slides on. It should be oriented so that the piece that extends out will be behind the brake caliper.

Figure 8. Backing plate on hub assembly. - Push the new hub assembly onto the center stud.
- Re-install the three 15mm bolts on the back of the assembly to attach it to the knuckle. Be sure to tighten evenly. If you have a torque wrench, you'll need to torque these to 75 ft-lbs.
- Re-install the ABS harness back into the clips you removed the old one from. Then plug it in.
- Re-install the 33mm hub nut, make sure you have the washer in between the nut and the hub.
- Push the rotor back onto the assembly.
- Next you'll need to re-install the caliper assembly; you may find it easier to install a lug nut back on to help keep the rotor flush while bolting on the caliper assembly.
- To get the caliper assembly back on, you may need to use a c-clamp to compress the brake pads to allow it to slide on easily. Once the assembly is on, re-install the two bolts that hold it on to the knuckle.
- Now you can re-install the wheel and lower the truck back down. Be sure to tighten the lug nuts in a crisscross pattern.
Pro Tip
Because wheel bearings play a part in your alignment, it's a good idea to get a fresh alignment as soon as possible.