Chevrolet Silverado 1999-2006: How to Replace Throttle Position Sensor (TPS)
Rough idle, low fuel economy, knocks or misfires? If your Silverado is experiencing these symptoms, the TPS is a likely culprit. Find out how to replace the faulty TPS in you Silverado with the help of this article.
This article applies to the Chevrolet Silverado GMT800 (1999-2006).
Simply put, when you step on the gas pedal, its position is sent to the ECM and then to the throttle position sensor (TPS). The TPS controls the the position of the throttle plate and the amount of fuel injected into the cylinders, regulating the air-to-fuel ratio for proper combustion. Without a proper air and fuel mixture, your Silverado won't reach its optimal engine performance and fuel economy. In effect, you should notice a rough idle, stalling, engine knock or misfires, and a hesitation on acceleration, all of which can be caused by a faulty TPS.
To make sure that it's your truck's TPS causing these problems, use an OBD scan tool to pull up the trouble codes. If you're unable to retrieve a code, you can also use a voltmeter to determine if the problem is connected to the TPS itself or within the power signal transmitted to the ECM. Continue reading to replace the faulty TPS in your Silverado.

Materials Needed
- Flat head screwdriver
- Torx T20 driver
- 15mm socket and ratchet with extension
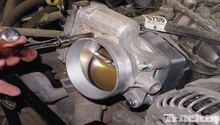
Step 1 – Remove the air intake hose
- Open the hood and use a flat head screwdriver to loosen the hose clamp on each end of the air intake hose. One hose clamp is located by the MAF sensor, and the other is located by the throttle body.
- Once the hose clamps are loose, slide the air intake hose out and set it aside.
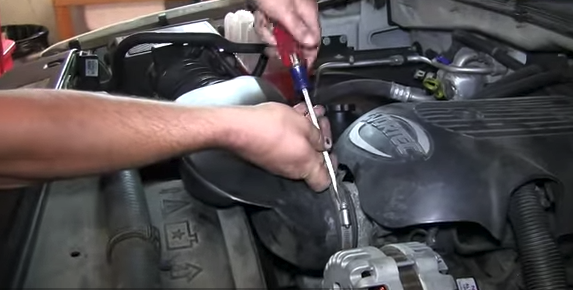
Figure 1. Loosen hose clamp near the throttle body. 
Figure 2. Pull the air intake hose off.
Step 2 – Gain access to the TPS
- Attach a 15mm socket with ratchet and extension to the center bolt of the tensioner pulley.
- Turn the bolt clockwise to loosen the tension of the drive belt enough to pull if off of the alternator pulley only.
- Release the tensioner pulley.
- Use the 15mm socket with ratchet to remove three bolts securing the alternator to a bracket.
- Push the alternator off to the side (away from the engine). You do not have to remove the alternator completely.
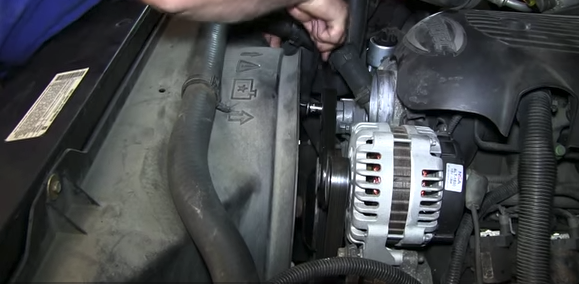
Figure 3. Loosen tensioner pulley to slide out the drive belt. 
Figure 4. Pull alternator away from the TPS.
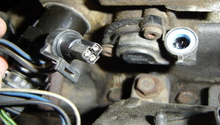
Step 3 – Remove the TPS
- The throttle position sensor is located on the right side of the throttle body. You will see (connected to the TPS) a black wire harness connector.
- Pull back the metal clip of the connector and then pull the connector out.
- Use a Torx T20 driver to remove the two bolts securing the TPS to its bracket.
- Remove the TPS and set it aside.
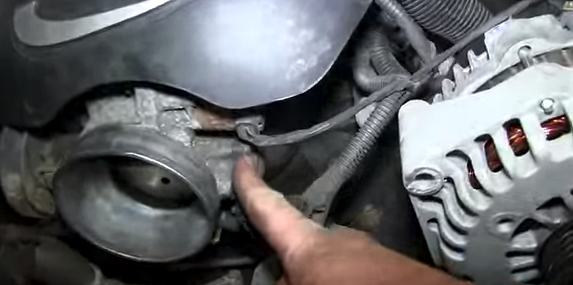
Figure 5. Remove Torx bolts from the TPS. 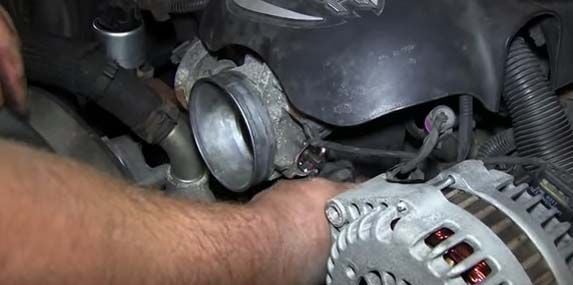
Figure 6. Pull the TPS off of the throttle body.
Step 4 – Install the new TPS
Install the throttle position in reverse order to the removal process.
- Place the new TPS on the throttle body and secure it using the T20 Torx bolts.
- Line up the alternator and bolt it back to the bracket.
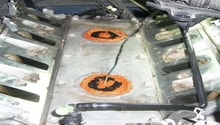
- Loosen the tensioner pulley and slide the drive belt back onto the alternator pulley. Refer to the drive belt routing diagram on the radiator shroud.
- Release the tensioner pulley and make sure the drive belt is properly seated on each pulley.
- Re-install the air intake hose and tighten the hose clamps.
Featured Video: How to Replace Throttle Position Sensor
Related Discussion
- Silverado Has Throttle Problems - ChevroletForum.com