Chevrolet Silverado: How to Wash, Wax, and Detail Your Truck
Find out the best detailing tips, so you can wash and wax your vehicle to a showroom finish.
This article applies to the Chevrolet Silverado, GMT800, GMT900, and K2XX (1999-Present).
To detail your truck to a showroom finish, you'll need the right tools. Other automotive car care guides might say that you can cut corners when it comes to your basic cleaning products, as long as you finish the job with a high performance polish or wax. However, by choosing premium quality products from start to finish, you can be sure your paint is prepped, cleaned, and polished to a showroom finish in less time than the lesser quality products usually require. Here are the best DIY detailing tips, strategies, and advice around, so you won't have to look elsewhere for follow-up instructions.

Materials Needed
- Mothers Back to Black
- Mothers Back to Black heavy duty trim cleaner
- Mothers Back to Black trim and plastic restorer
- Microfiber cloth or car sponge
- Black Magic Foaming All Wheel Cleaner
- Clay bar and lubricant or water
- Meguiar's High-Tech Yellow Wax liquid
- Meguiar's Gold Class Carnauba Plus Paste Wax (optional)
- Forever Black Truck Bed Liner Gel
- Bags and electrical tape
- Degreaser or foam cleanser
Step 1 – Remove your battery
Turn off your engine, pop the hood of your truck, and then remove your battery by detaching the cables from the battery terminals one by one. This must be done before starting the detailing process. Take this time to bag or use electrical tape on any loose and exposed wiring.

Pro Tip
You should also cover your alternator for good measure.
Step 2 – Washing
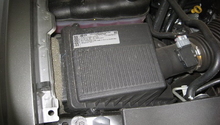
With the hood popped, spray down the engine bay with a degreaser or foaming cleanser. While that is working the grime off your engine, wet the exterior of the vehicle to begin washing. Using your wash bucket full of your preferred cleaning solution and water, saturate your sponge or wash mitt with the cleaning solution. Then, begin cleaning the panels. Remember, the panel needs to be lubricated (wet) to avoid scratches. When passing the mitt over the paint work, resist the urge to work in circular motions. Instead, use low pressure and straight passes across the panel. Work one panel at the time to keep things cohesive, working from top to bottom and front to back.
With the body cleaned, use an agitating brush to scrub the engine bay to loosen additional grime. With this all done, spray the car down to remove excess grime, soap suds, etc. The engine bay will dry itself with the heat from the running engine. Using your microfiber towels, pat the painted surfaces on your truck. Again, do not use excessive pressure, but rather light pats.

Pro Tips
- Use a microfiber cloth or car sponge on your paint and exterior trim panels.
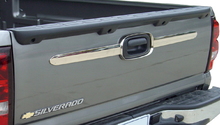
- Hose down the truck bed to loosen any large dirt particles. You may also want to switch to a more concentrated cleaner for this area of your truck. It is also recommended using Forever Black Truck Bed Liner Gel. This professional quality restorer is formulated to clean and restore shine for up to six months. Apply using the applicator sponge.
Step 3 – Clean your wheels
Spray a tire and wheel cleaner onto each wheel. Then, clean using a bristled brush. It is recommended using Black Magic Foaming All Wheel Cleaner.
- Hose off any lose dirt before applying.
- Spray the foam cleaner onto your wheels.
- Wait 3-5 minutes for the product's cleaning agents to take effect.
- Wipe away dirt using a microfiber cloth, sponge, or bristled brush.
- Hose off wheels using cool water.
- Then, let it dry.
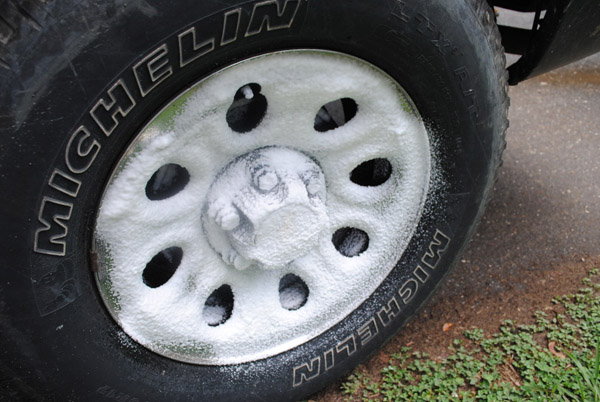
Pro Tip
Any cleaning materials—be it a cloth, sponge, or cleaning brush—that you use should be soft.
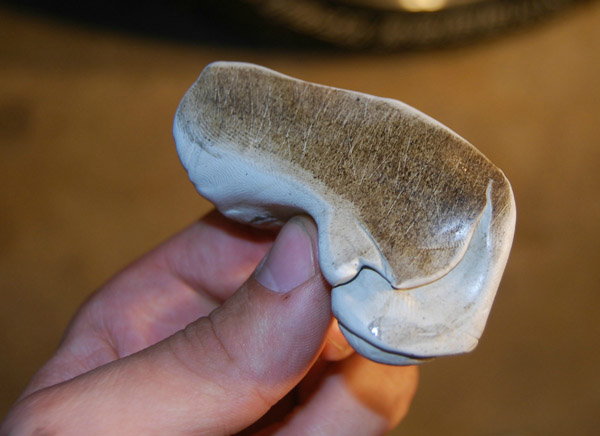
Step 4 – Clay bar your truck using a lubricant
Run the backside of your hand over the painted surfaces of your truck. Is the paint work smooth as glass, sticky, or rough feeling? If it's latter, time to get friendly with the clay bar. Clay bar is exactly what it sounds like. Clay bars run over the whetted surface of the paint work, and it draws up those contaminants hidden in the paint to remove them.
Using a small section of clay bar and progressing slowly section by section across your truck, glide the clay bar over the surface of your paint. Use a back-and-forth motion to remove contaminants and achieve a smooth, even finish in preparing for polishing. You will need to apply the lubricant to each section of the paint to achieve this "gliding" effect. Periodically check the clay bar as it pulls up contaminants because clay bars are one-time-use. Once it has picked up those contaminants, the bar itself is now contaminated and rubbing used clay bar against the paint is no bueno! Due to clay bar's one-time-use, you are going to want to divide your small block of clay into many usable pieces. A typical full, fresh clay bar should be more than enough to cover your entire vehicle, even if you have an F350 or larger.
Pro Tip
If you drop the clay bar on the ground, throw it away because it's done. See the image below. That piece of clay is done!
Step 4 – Polish and wax your truck
Apply a high performance polish. Rub the product into the paint with a clean microfiber cloth until it completely disappears. Wipe away any excess residue and or swirls. Follow with a high quality wax, applying the same application technique. Some of the favorite wax products include Meguiar's High-Tech Yellow Wax liquid, Meguiar's Gold Class Carnuba Plus Paste Wax, and Turtle Wax's Ice Paste Wax.
Step 5 – Clean your interior
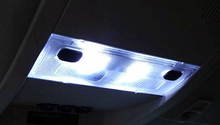
Remove dirt and other items by hand before running a vacuum across your seats, floors, and mats. Wipe down interior panels using an interior car care product. A 303 Aerospace Protectant is highly recommended for your interior plastics and dash. It will give a clean, semi-gloss appearance and better protect from sun fading. Clean your windshield and windows with a glass cleaner.
Related Discussions
- Engine Bay Cleaning - ChevroletForum.com
- Best Cleaner for Exterior Plastics - ChevroletForum.com
- Wax and Polish - ChevroletForum.com
- Detailing Questions - ChevroletForum.com