Chevrolet Silverado 2014-Present: How to Replace the Thermostat
Allowing your Silverado's engine to overheat can cause major problems. The simplest way to resolve this "hot" issue is to replace the thermostat.
This article applies to the Chevrolet Silverado 1500 K2XX (2014-Present).
The thermostat in your truck controls the coolant flow throughout your engine, keeping the engine running at ideal temperatures. Unfortunately, thermostats might warp over time and are prone to failure after hundreds of heat cycles, which will prevent coolant from sufficiently flowing throughout the engine.
Diagnosing a bad thermostat is fairly simple. If your truck is running hot, pull over and carefully touch the upper and lower radiator hoses. If one of them is not hot, then your thermostat is causing the problem. Continue reading for the steps on how to replace your Silverado's thermostat.

Materials Needed
- Flat head screwdriver
- Pliers
- 10mm socket
- 1" and 1/4" drive extension and ratchet
- RTV Gasket Maker or new thermostat housing gasket
- Coolant catch container
- Shop rags
- New thermostat
- Engine coolant
- Sandpaper or gasket scraper
- 50/50 Dex-Cool and distilled water mix
Note
- Make sure your engine is cold before replacing the thermostat.
- The following procedure may slightly vary based on your Silverado's engine and trim.
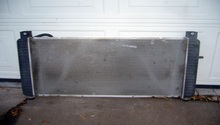
Step 1 – Drain coolant from the system
- Jacking up your truck is optional for this step, but you may do so for more work space.
- Remove the cap from your coolant overflow tank.
- Use a flat head screwdriver to open the drain cock located on the bottom corner of the radiator.
- Allow the coolant to drain, and then re-install the drain cock.
(Related Article: How to Jack Up Your Truck - ChevroletForum.com)
Step 2 – Disconnect the radiator hose
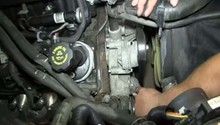
- Follow your lower radiator hose towards the engine. The hose leads to the thermostat, which is located on the passenger's side of the truck.
- Remove the hose clamp on the radiator hose with a pair of pliers.
- Pull the radiator hose off of the thermostat housing and allow more coolant to drain.
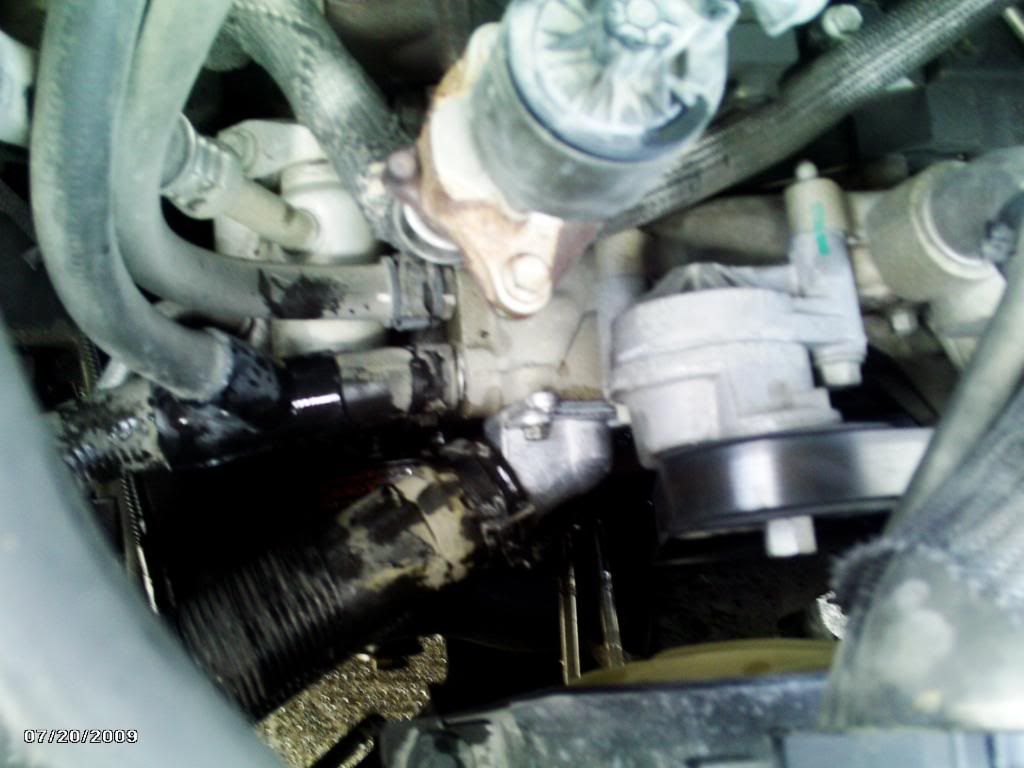
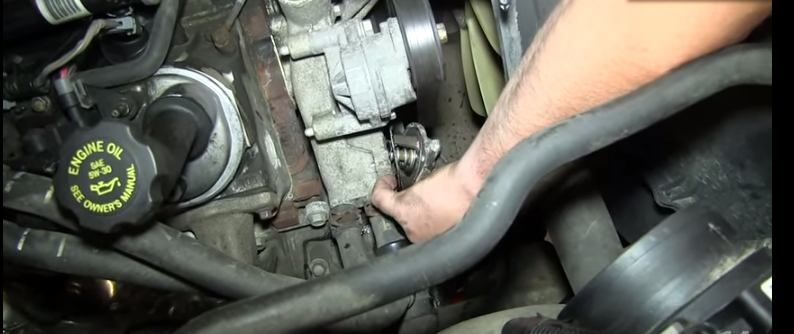
Step 3 – Remove the thermostat
- Use a 10mm wrench to remove the two thermostat housing bolts.
- Carefully pull the thermostat housing off of the block.
- Once you remove the thermostat, more coolant may drain from the block.
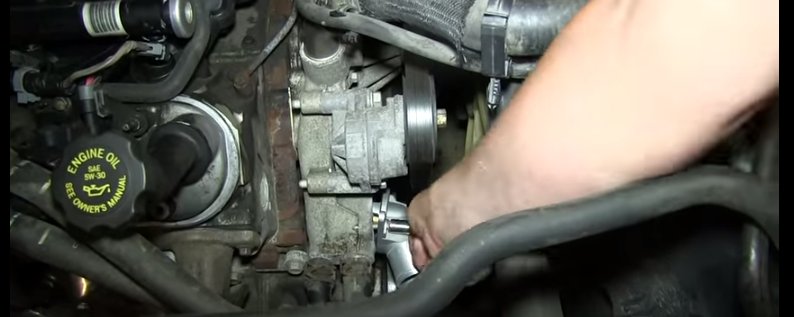
Step 4 – Install the new thermostat
- Use sandpaper or gasket scraper to smooth out the surface of the block and remove any contaminants.
- Place a new gasket on the thermostat housing, or apply a bead of RTV Gasket Maker to the block to ensure a good seal.
- Install the thermostat housing and new thermostat onto the block. Torque to 15 ft-lbs.
Step 5 – Re-install lower radiator hose
- Slide the lower radiator hose onto the thermostat housing.
- Then secure the hose by tightening the hose clamp.
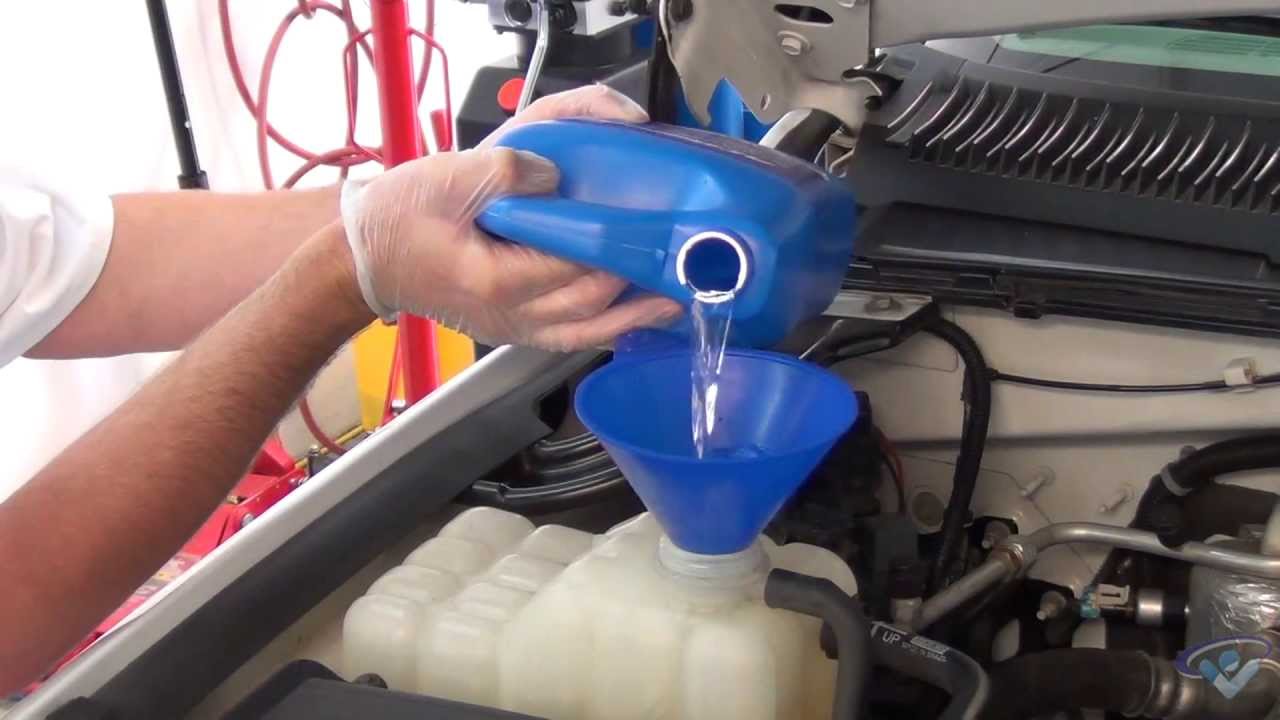
Step 6 – Refill the engine coolant
- Make sure the drain cock on the bottom of the radiator is tightly closed.
- Place the funnel into the coolant overflow tank and pour about 15 quarts of 50/50 Dex-Cool and distilled water mix. Refer to the owner's manual for the exact specs.
- Keep the tank's cap open. Then start the engine, and allow it to run to appropriate operating temperatures.
- Add more coolant if necessary and re-cap the overflow tank.
Pro Tip
Only use GM Dex-Cool coolant and distilled water as the quality of other coolant brands may not be as good.
Featured Video: How to Replace Thermostat and Housing
Related Discussions, Video, and Site
- Silverado Heating Problems - ChevroletForum.com
- Truck Overheating - ChevroletForum.com
- How to Change a Thermostat in a Chevy Silverado - eHow.com
- How to Service/Change Coolant - YouTube.com