Chevrolet Silverado 2007-2013: How to Change Transfer Case Fluid
Take care of your 4WD system, and it will take care of you. Fail to do so, and you may get locked out of 4WD when you need it the most.
This article applies to the Chevrolet Silverado 1500 (2007-2013).
The transfer case controls whether you are in four-wheel drive or in two-wheel drive, so it's important to make sure it's maintained properly. The transfer case functions by taking the output from the transmission and splitting that power into two driveshafts. The driveshaft going towards the rear of the truck powers the rear axle, and the driveshaft going to the front powers the front axle. Just like your transmission, the transfer case requires fluid for both lubrication and cooling. If the fluid goes bad or gets low, it can't do its job as well which can lead to damaging the gears inside the transfer case.
Materials Needed
- 18mm socket
- New drain plug or white Loctite
- Car ramps (optional)
- Fluid hand pump
- Drain pan
Step 1 – Get the fluid
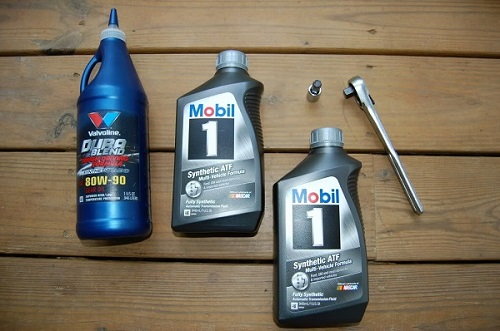
There's a couple different recommended transfer case fluids depending on your transmission and transfer case combo. To determine what kind and how much you need, you can either refer to your owner's manual, call your local dealership, or visit your local auto parts store as they can normally look it up as well.
Step 2 – Drain fluid
Before getting too far into it, you need to figure out whether or not you can fit under your truck. Depending on your size, you may be able to slide under the truck fine; otherwise, you may need to put the truck on car ramps to give yourself a bit more room.- Let the truck cool off completely first; you don't want to burn yourself on hot fluid.
- It's recommended taking some shop rags and cleaning off any loose dirt around the fill plug; this helps to prevent any contaminants from entering the transfer case.
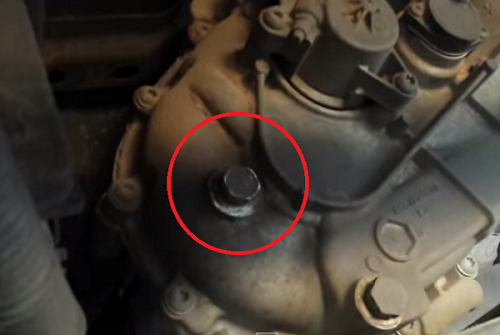
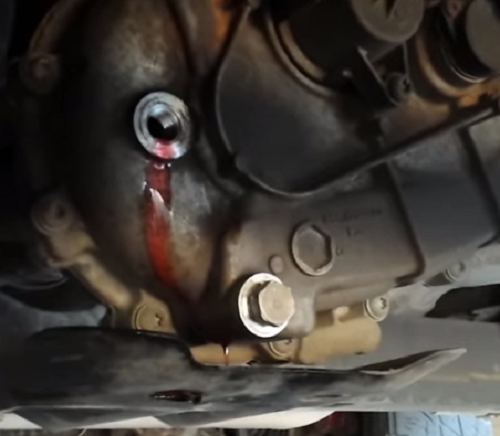
- Test loosening the fill plug first using the 18mm socket; sometimes these get stuck. If you can't get the fill plug out, then you don't want to proceed with draining the fluid; otherwise, you're stuck until you do get it out.
- You can now remove the drain plug using the 18mm socket. Be prepared as the fluid will rush out quickly.
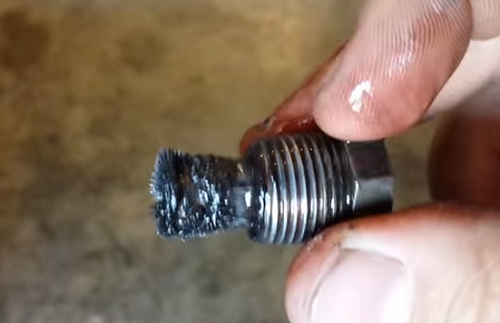
- If you didn't purchase a new drain plug, use the time while the fluid is draining to clean any metal shavings off the old one. If you see any large chunks of metal, that is a sign you have internal damage somewhere in the transfer case and you'll need to rebuild it.
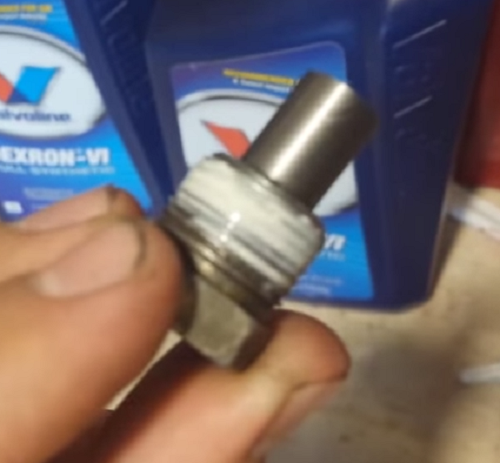
- You can also go ahead and apply the white Loctite to the old drain plug as well if you are reusing it and then allow the Loctite to dry.
- Once the fluid stops dripping out, you can re-install the drain plug. If you have a torque wrench you can torque it to 15 ft-lbs.. If you don't, this is right around hand tight. Think of it being the same as how much you would tighten the engine oil drain plug.

Step 3 – Refill the fluid
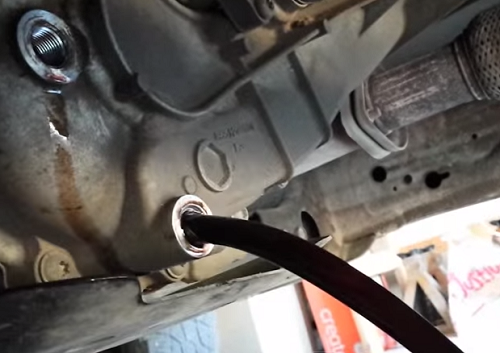
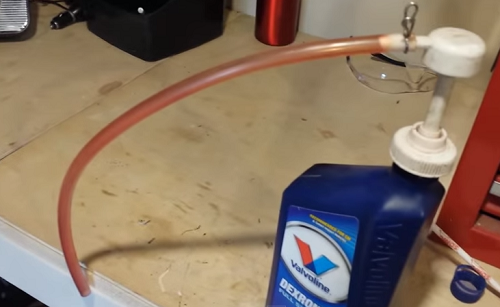
- Get your hand pump and fluid ready to go back under the truck. The more you can do on the outside the more comfortable you'll be while doing it.
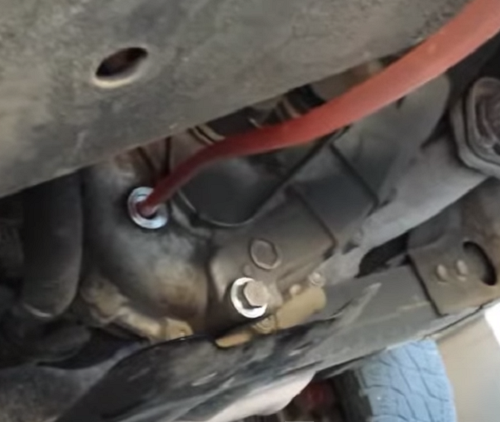
- Run the fill pump tube into the fill hole.
- Pump slowly until fluid starts to come out of the fill hole. It should take right around 1.5-2 quarts to fill it back up. Once fluid starts coming out, give it one more slow pump.
- Apply the white Loctite to the fill plug. Once it's dry, you can re-install it using the 18mm socket. Like the drain plug, this only needs to be hand-tightened.
Featured Video: How to Change Transfer Case Fluid
Related Discussions
- Transfer Case Fluid Flush - ChevroletForum.com
- Transfer Case Fluid Type - ChevroletForum.com