Chevrolet Silverado 2007-2013: How to Drain Radiator Coolant
Old coolant, especially GM's "Dexcool," needs to be changed every 100K miles. Some mechanics claim that Dexcool needs to be changed more often to reduce the chances of gasket failure. Here's how to flush and replace your coolant.
This article applies to the Chevrolet Silverado GMT900 (2007-2013).
You want to take good care of your truck. Part of that includes flushing your cooling system and changing your coolant at 100,000 miles, but changing your coolant is an idea not without controversy.
GM's OE solution to coolant is called Dexcool, and if you happen to Google it, you'll see plenty of debate concerning this anti-freeze. Some say it works fine and you can even wait to change your coolant until 150K miles. Others say it is a poison to your engine's cooling ability, and even causes rapid degeneration of gaskets as well as seals. The general consensus seems to be that Dexcool reacts with plastic surfaces and turns into sludge.
Your best bet is to drain your coolant, inspect the color as well as smell–and heck, why not check the thickness of the liquid–to determine for yourself if you feel safe with Dexcool. Maybe you'll choose to change it out to an alternative cooling fluid. You will, after all, be flushing everything out and starting fresh.
Google carefully!

Materials Needed
- Pliers
- Channel locks
- 1 gallon anti-freeze/coolant
- 1 gallon water
- Drain pan
- Garden hose
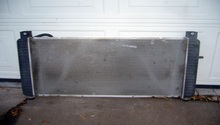
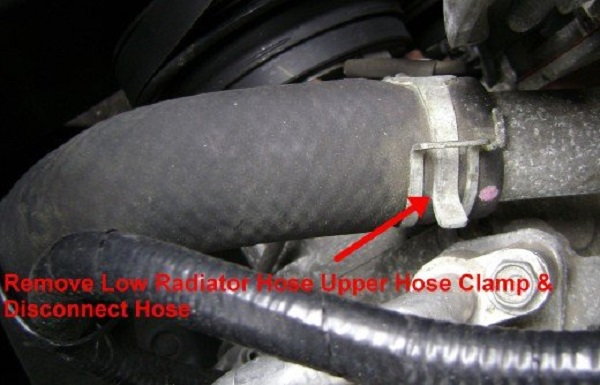
Step 1 – Drain the radiator
In the old days, you'd loosen the petcock and drain the radiator. But now, the only way to remove the coolant from your Silverado is to disconnect the lower radiator hose and allow it to drain into your drain pan. Fortunately, being a truck, your Silverado's ride height means that jacking the truck up isn't even required. Just undo the belly pan, and access the lower radiator hose. Radiator hoses are annoying to work with because of the very secure clamps. You will need to use pliers or channel locks to loosen the clamp and remove the hose.
Pro Tip
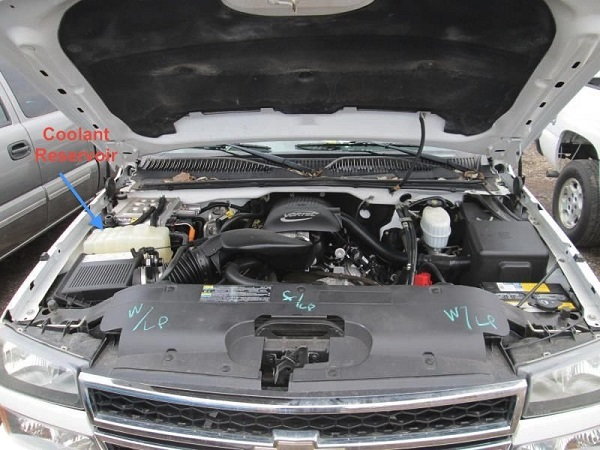
Removing the cap from your coolant reservoir will allow air in, which helps smooth the flow of coolant from the radiator and hose.
Step 2 – Reattach lower hose and remove upper hose
After reattaching the lower hose, remove the upper hose and start the truck. While in the cab, turn on your heater to hot. Run water from the garden hose into the coolant reservoir tank, and run the engine until clear water begins to run from the top hose. Turn the truck off.
Pro Tip
Be sure to line up your drain pan below the area where the upper hose is detached.
Step 3 – Reattach upper radiator hose
Secure the upper hose to the radiator.
Pro Tip
If you need to replace the hose clamps, most mechanics recommend using the OE spring ring clamps. They offer consistent clamping pressure in the coldest or hottest environment where the worm-drive style clamps may expand or contract with temperature changes.
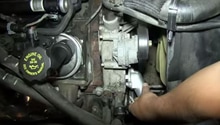
Step 4 – Remove the lower hose (again) and drain
This step is important because you'll be removing all of the impurities and sludge from your cooling system. With any residual old coolant or contamination removed, refit the radiator hose.
Pro Tip
Before you reattach the hose, be sure to inspect it for cracks or dry rot!
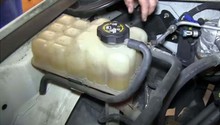
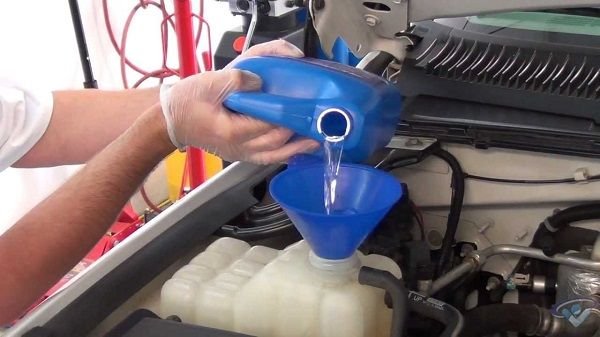
Step 5 – Add coolant to reservoir
Add a 50/50 mix of coolant and distilled water to the reservoir tank. Start the truck. (Be sure your heater is still on!)
Pro Tip
Once the 50/50 mix has been sucked into the radiator, pour another full reservoir and wait for it to drain in as well.
Step 6 – Start the truck and add straight coolant
As the coolant drains from the reservoir, pour the remaining full-strength coolant into the reservoir and allow it to drain into the radiator before adding more 50/50 mixture. A higher content of anti-freeze in the system than intended is not a benefit! Often times, this can reduce the efficiency of the cooling system to dispel heat.
Pro Tip
No matter how long you drain it, there is still some water remaining in your engine block. Some mechanics and DIY'ers fill the reservoir to the fill line with straight coolant in order to boost the engine's overall coolant mixture to the desired 50/50. In colder climates, some recommend a 60/40 (coolant-to-water) mixture, with the opposite being true for warmer climates.
Featured Video: How to Drain Silverado Radiator Coolant
Related Discussions
- Coolant Drain - ChevroletForum.com
- Coolant Flush Questions - ChevroletForum.com
- DexCool Antifreeze - ChevroletForum.com
- Where to Fill Coolant - ChevroletForum.com