Chevrolet Silverado 1999-2006: How to Replace Water Pump
A seeping water pump is often the cause of coolant odor, and an expansion tank that often needs topping off. Although it may not blow out like a hose, the water pump will get worse. Keep reading and learn how to replace the water pump in your Chevy Silverado right in your driveway with basic tools.
This article applies to the Chevrolet Silverado GMT800 (1996-2006).
GM Dexcool coolant carries combustion heat away from the cylinders. It flows out through the upper radiator hose, cooled while descending through the radiator, and returns to the engine via the lower radiator hose as the thermostat opens at about 180 degrees. The water pump is driven by the accessory drive belt, and provides the motive flow for the Dexcool circuit. At times, the water pump can leak at the rotating shaft seal or the block gaskets, but the service life varies widely.
If the water pump in your Silverado needs replacing, it would be prudent to also replace the thermostat. Some GM thermostat fittings have a diameter of 51mm, while others have been revised to 48mm. Ensure that the water pump, thermostat, and thermostat elbow fitting are all compatible for this DIY job, particularly if you order aftermarket parts. If your truck is approaching 100,000 miles, this would be a good time to change the coolant as well.

Materials Needed
- New water pump and thermostat
- Water pump gasket sealant
- 2 gallons of GM Dexcool pre-mixed coolant
- 8mm wrench
- 10 and 15mm socket
- Torque wrench
- Ratchet and extension
- Flat head screwdriver
- Channel lock pliers
- Radiator hose pick
- Razor scraper
- 5-gallon coolant drain pan
- Electrical tape
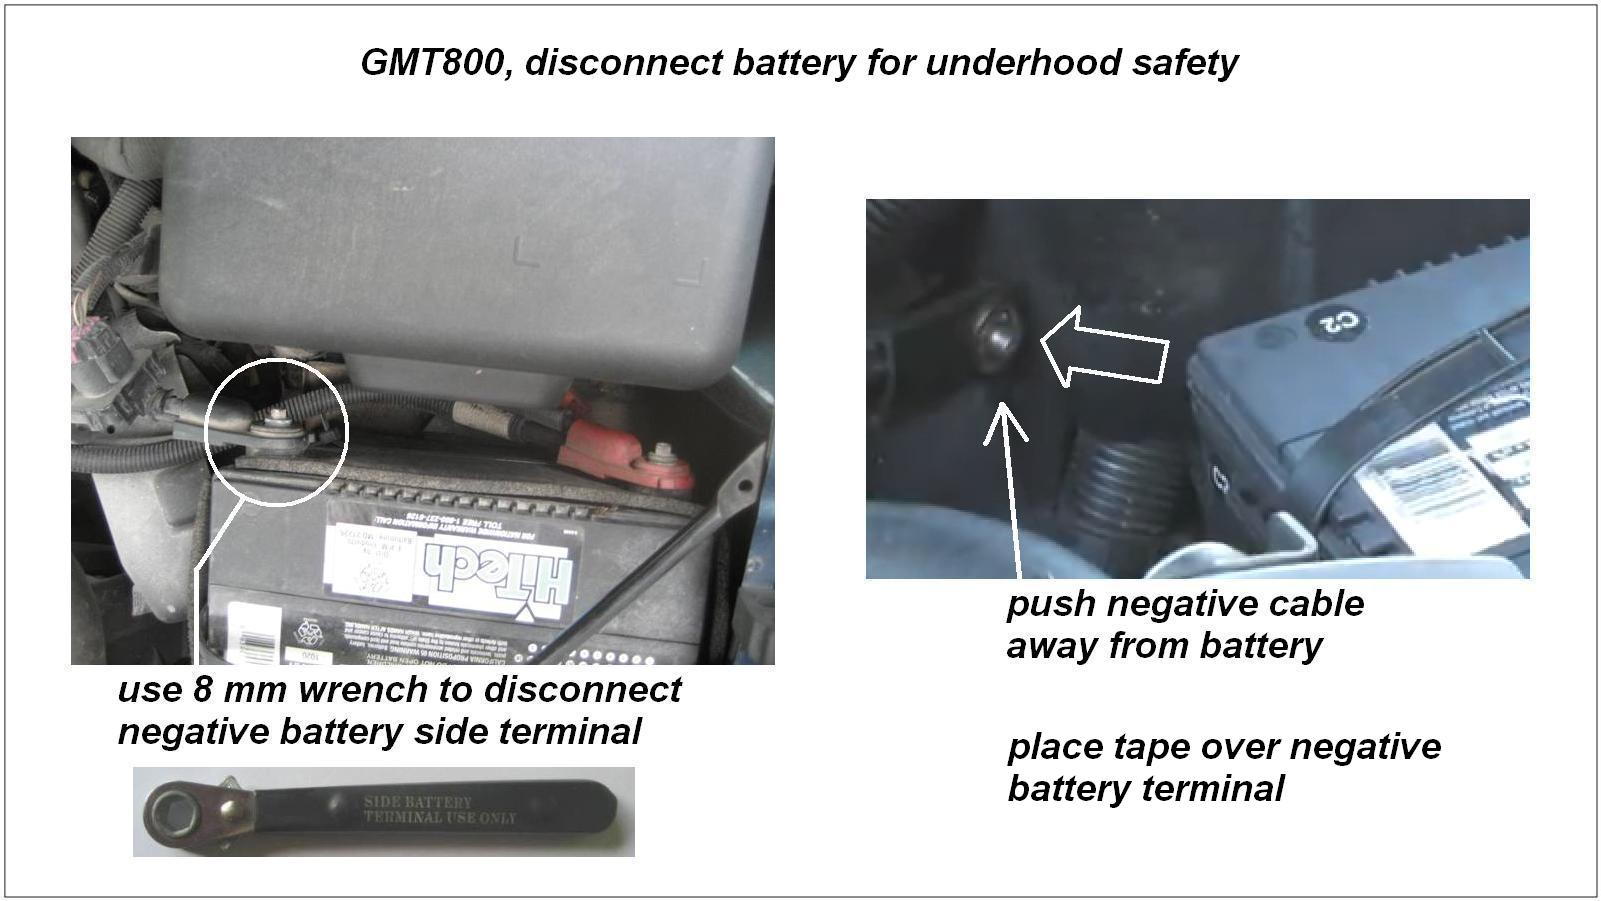
Step 1 – Disconnect the battery
When performing substantial work under the hood, always disconnect the negative (black) battery terminal for safety. Make sure the engine is COLD before starting.
Use an 8mm wrench or a ratcheting to disconnect the negative lead from the battery terminal. To prevent inadvertent contact, push the negative cable away from the battery and place electrical tape over the negative battery terminal.
Pro Tip
Make sure you have saved any audio and navigation security codes before disconnecting the battery.
Step 2 – Remove the intake duct
- Use a flat head screwdriver to loosen the intake duct clamps at the MAF sensor fitting and intake manifold fitting.
- Slide the intake duct off the fittings.
- Lift the duct slightly, and use a flat head screwdriver to pry the intake duct bracket off the clip attached to the upper radiator hose.
- Then, lift the duct out and set it aside.

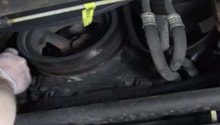
Step 3 – Remove the drive belt
The GM drive belt auto-tensioner maintains spring pressure on the drive belt to automatically adjust for optimum tension as the belt wears.
- Place a 15mm socket, ratchet, and extension on the center bolt head of the tensioner. The ratchet extension is used for extra leverage.
- Rotate the center bolt clockwise, and hold the tensioner against the spring as you slip the drive belt off either the idler pulley or the tensioner pulley.
- Release the tensioner slowly as it will return to the spring stop.

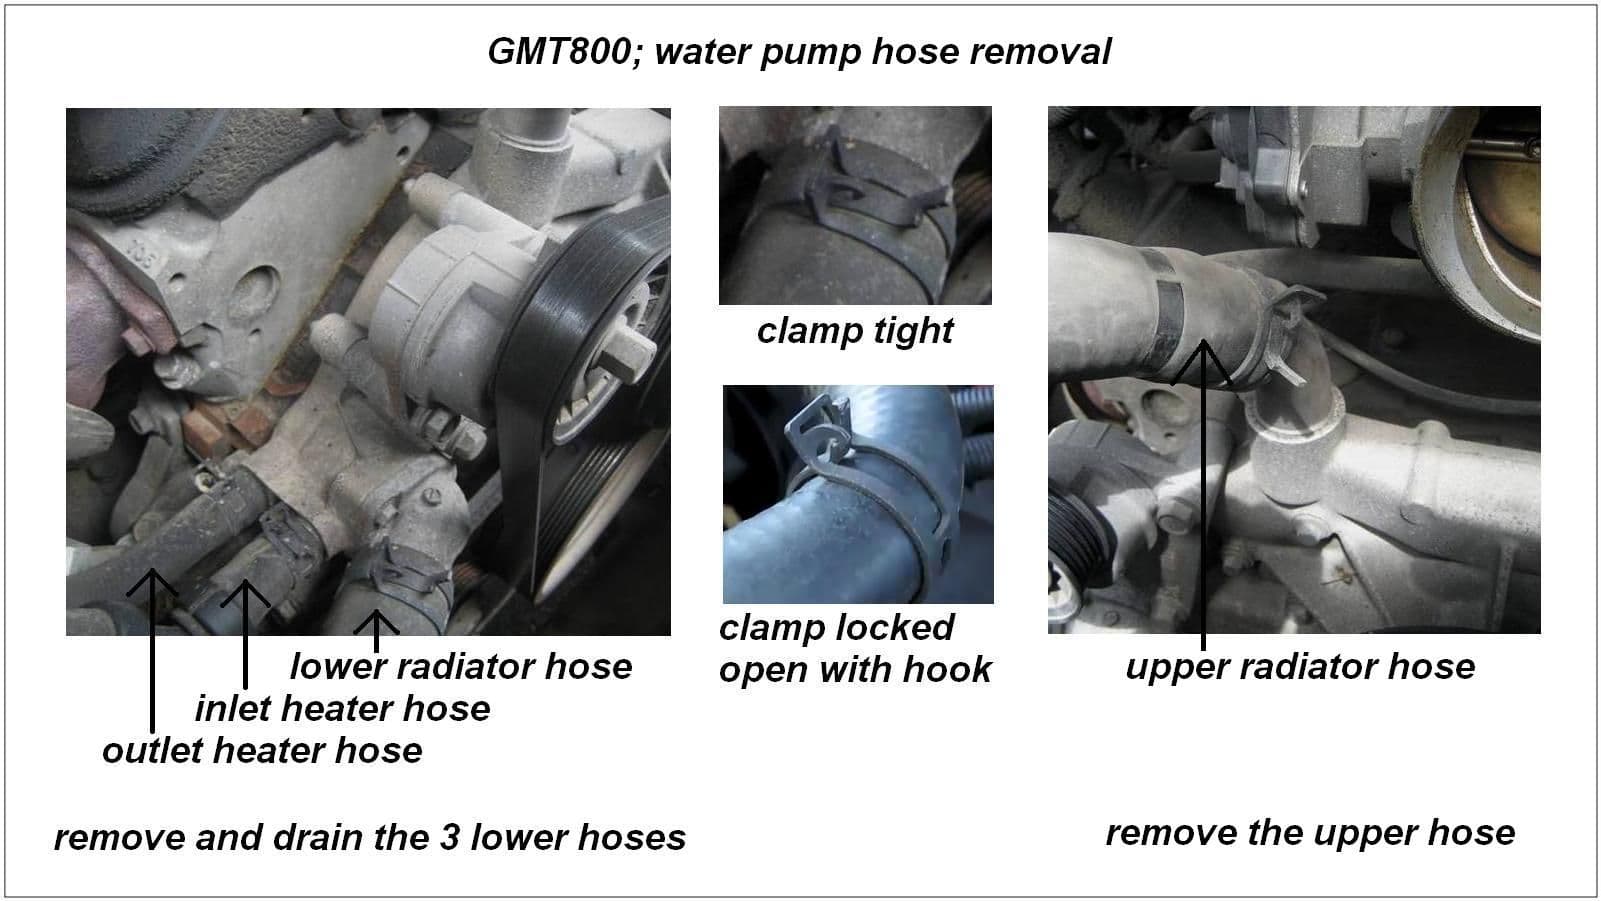
Step 4 – Remove radiator, remove heater hoses, and drain the coolant
GM provides convenient spring clamps that lock open (see Figure 4).
- Loosen the coolant expansion tank cap.
- Using channel lock pliers, squeeze the tabs on the lower radiator hose spring clamp until the hook locks it open.
- Then, slide the loose clamp down the hose a few inches.
- Using a hose pick, carefully work the hose off the water pump nozzle and direct the hose into the drain pan.
- Remove and drain the inlet heater hose as well as the outlet heater hose.
- Remove and drain the upper radiator hose.
- Measure the amount of drained coolant, so you have an approximate amount to add after installation.
Pro Tip
Be careful not to cut the hoses or gouge the metal nozzles with incorrect tools.
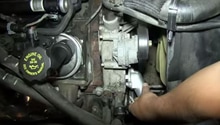
Step 5 – Remove the belt tensioner and thermostat elbow
Both the tensioner and thermostat are mounted to the water pump. It is easier to remove them when the water pump is held securely to the engine.
- Use the 15mm socket wrench to remove the three bolts that secure the tensioner. Support the tensioner as you remove the last bolt.
- Use the 10mm socket wrench to remove the two bolts that secure the thermostat elbow. Some coolant may spill once you loosen the elbow.

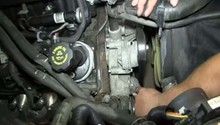
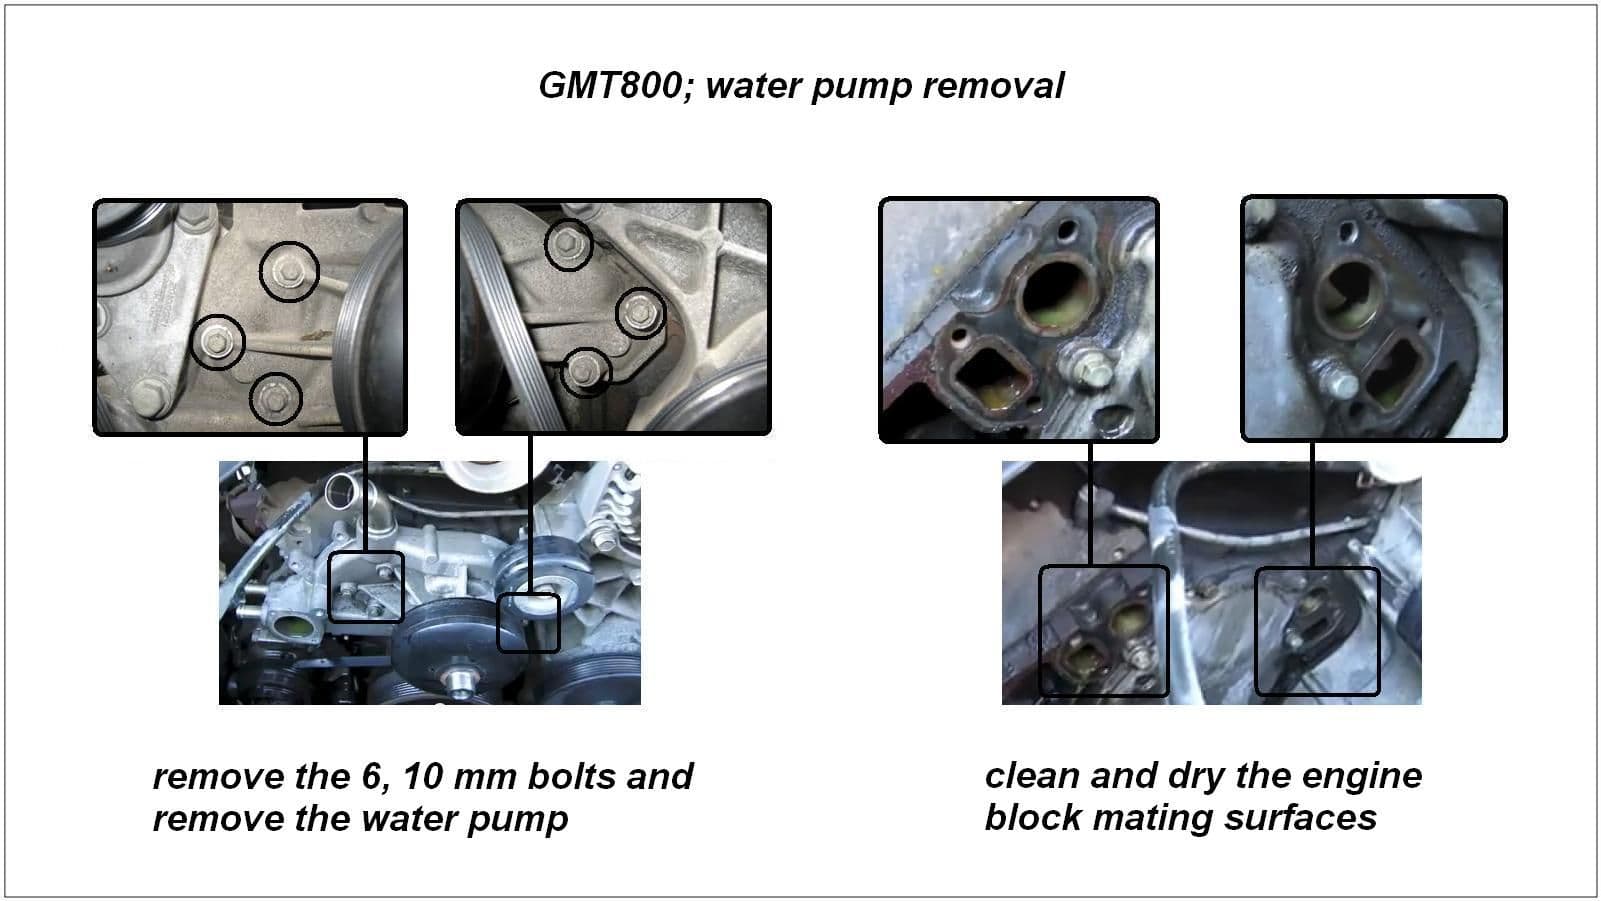
Step 6 – Remove the water pump
- Use the 10mm socket wrench to remove the six bolts that secure the water pump. Support the water pump as you pull the last bolt. Some coolant may spill once you work it loose.
- Use a razor scraper to remove any residual adhesive from the engine block mating surfaces.
- Clean and dry the mating surfaces. Then, make sure they are free of oily residue for the gasket dressing to tightly adhere.
Step 7 – Seal and install the water pump
- Apply gasket dressing to the water pump and thermostat elbow flanges.
- Position the gasket onto the flange, and install the thermostat as well as elbow.
- Tighten the thermostat bolts to 132 inch-lbs.
- Apply gasket dressing to the rear flanges on the water pump, and position the gaskets.
- Then, apply gasket dressing to the gaskets.
- Install the water pump. Tighten the six bolts in a crisscross pattern to 132 inch-lbs, and then again to 22 ft-lbs.
- Re-install the belt tensioner, and tighten the bolts to 37 ft-lbs.

Pro Tip
Be careful when using a torque wrench on the water pump bolts. Since a 10mm wrench is only four inches long, a much longer torque wrench can accidentally snap off the bolt heads.
An alternative to the torque wrench on small bolts is the turn-of-nut method: tighten the bolt to a snug fit, and then tighten further by rotating an additional 1/4 to 1/3 turn. Compressing the gasket may take up to 3/4 turn. If you are using a ratcheting socket wrench, choke up on it to limit your force.
Step 8 – Install the coolant hoses
- Fit the hoses onto the nozzles and position the hose clamps.
- Use a flat head screwdriver to release the locking hook on the hose clamps.
Pro Tip
The GM spring-tension hose clamps are far better than the parts store's worm-gear clamps because they adapt tension during heating/expansion and cooling/contraction cycles without cutting into the hose.
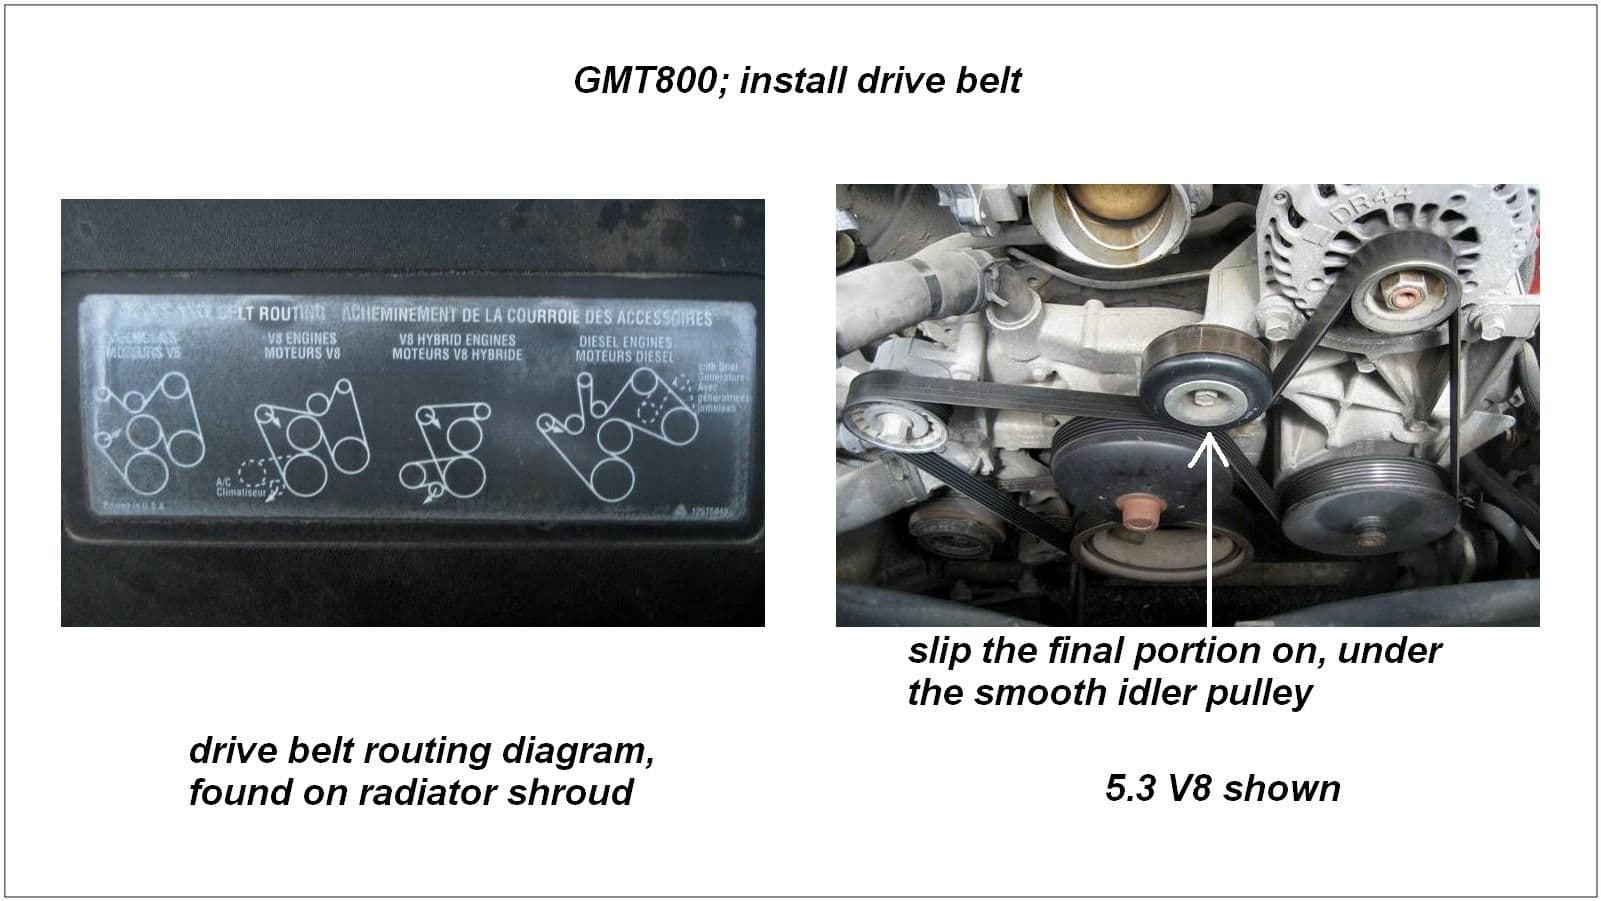
Step 9 – Install the drive belt
(Refer to the drive belt routing diagram on the radiator shroud for routing guidance.)
Install the belt around the pulleys, and rotate the auto-tensioner with enough slack to finish. It may be easier to route the last portion under the smooth idler pulley.
Step 10 – Install the intake duct
- Connect the intake duct to the clip attached to the upper radiator hose.
- Slip the duct over the MAF and intake manifold fittings. Then, tighten the clamps.
Step 11 – Connect the battery
Remove the electrical tape from the negative lead, and connect it to the battery terminal. Enter the audio and navigation security codes as needed.
Pro Tip
Do not over-tighten battery side mount terminals because the side mount seals can break and cause a leak.
Step 12 – Refill and bleed the coolant
- Fill the coolant expansion tank with GM Dexcool, and allow some time for the coolant to flow through the system. Try to add an approximate amount, and fill until the coolant reaches the FULL COLD line on the expansion tank. Leave the cap off.
- Start the engine and let it idle with the climate system on the max heat setting.
- As the engine draws the coolant level down, add Dexcool back up to the FULL COLD line as needed.
- When the coolant level has stabilized, replace the expansion tank cap and let the engine idle until the upper radiator hose becomes hot.
- You may have to repeat this process several times until all air is bled from the system.
Featured Video: How to Install a Water Pump
Related Discussions and Video
- What is the Average Water Pump Life? - ChevroletForum.com
- Silverado Water Pump Gasket Replacement - ChevroletForum.com
- How to Install/Replace Water Pump Chevy Silverado by 1A Auto - YouTube.com