Chevrolet Silverado: How to Install Navigation System
Tired of getting lost on your way to the auto parts store? It's time to install that OEM GPS system your Chevy Silverado has been missing!
This article applies to the Chevrolet Silverado GMT800, GMT900, and K2XX (1999-Present).
It's no real shock that you might have skipped out on purchasing the navigation system directly from the dealer; the price markup is insane (since they figure you'll glaze over it if it's rolled into monthly payments). Sure, it's nice to have the ability to map yourself using your cellular phone or a huge visual obstacle on the windshield in the form of a TomTom. But wouldn't you rather have the clean lines and total synchronicity that an OEM navigation system allows? Sure you would!

Materials Needed
- Ratchet and 7mm socket
- Trim removal tool
- Pliers
- One wire tap (commonly called T-taps)
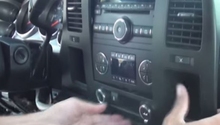
Step 1 – Remove the radio bezel
- Using a trim removal tool, pry out the plastic bezel around the radio.
- Remove the eight 7mm bolts holding the radio in place. There are four on each side.
- Slide out the bottom two units under the radio, and unplug their wire harness connectors.
- Then slide out the double DIN OEM radio, but do not yank it out. You should hear the clip on the rear of the radio unsnap.
- Unplug the radio's rear connector and radio antenna.
- Remove the factory radio and set it aside.
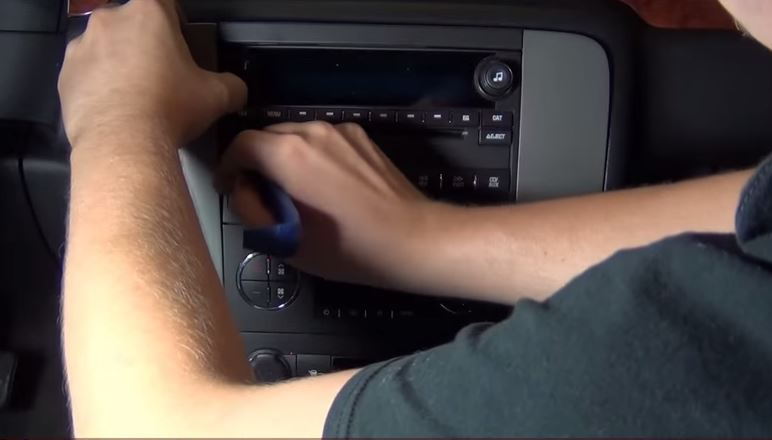
Figure 1. Remove the radio bezel. 
Figure 2. Remove bolts that secure the factory radio. 
Figure 3. Radio clip on back side of the radio.
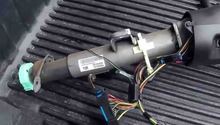
Step 2 – Route the wires
- Unravel as well as route the green wire (from the OEM navigation unit) down the driver's side foot well and to the wiring distribution block. You will find the block behind the brake pedal.
- Remove the cover on the distribution block.
- Undo the clips on the side of the distribution block, and then pull it out.
- Turn the distribution block around, and un-clip the bottom two wire harnesses (green and orange).
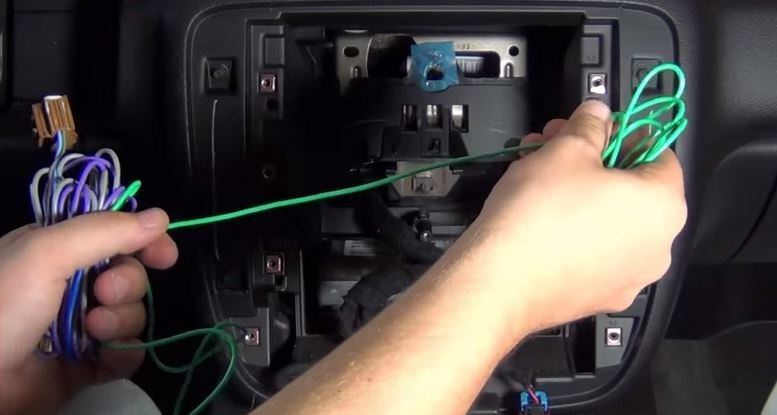
Figure 4. Route the green navigation system wire. 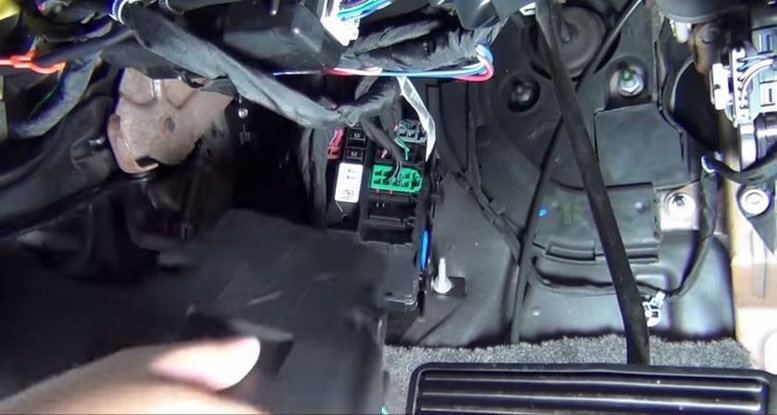
Figure 5. Location of wiring distribution block.
Step 3 – Tap the wires
- Place the T-tap connector over the green and white speed sensor wire. This wire is connected to the black wire harness connector at the bottom of the distribution block.
- Tap the green wire that you routed from the unit to the speed sensor wire.

Figure 6. Location of speed sensor wire. 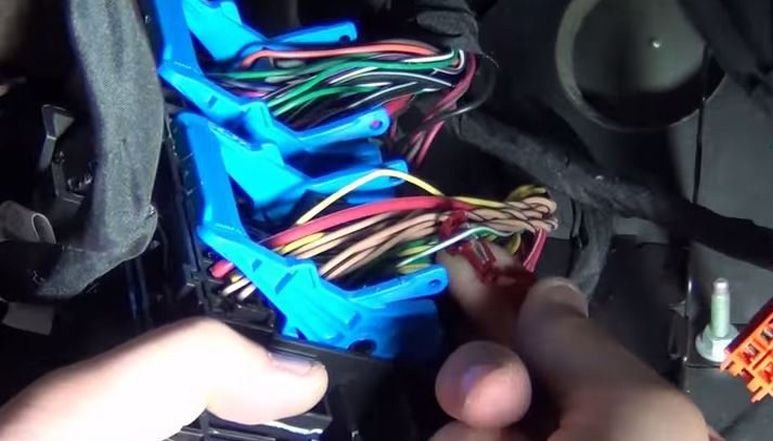
Figure 7. Tap the speed sensor wire.
Step 4 – Route the antenna wire
- Use the trim removal tool to pop off the dashboard's top access panel. In some Silverado models you will also need to remove the A-pillar to run the antenna wire.
- Place the GPS antenna plate underneath the access panel.
- Route the antenna (from the GPS antenna plate) through the lower hole and into the double DIN radio compartment.

Figure 8. Mount the GPS antenna plate. 
Figure 9. Route the antenna wire.
Step 5 – Install the navigation system
- Plug in the wire harness connector (from the green wire) to the back of the new navigation system unit.
- Plug in the antenna wire to the back of the unit.
- Slide in the new unit and secure it with the eight bolts.
- Snap on the radio bezel.
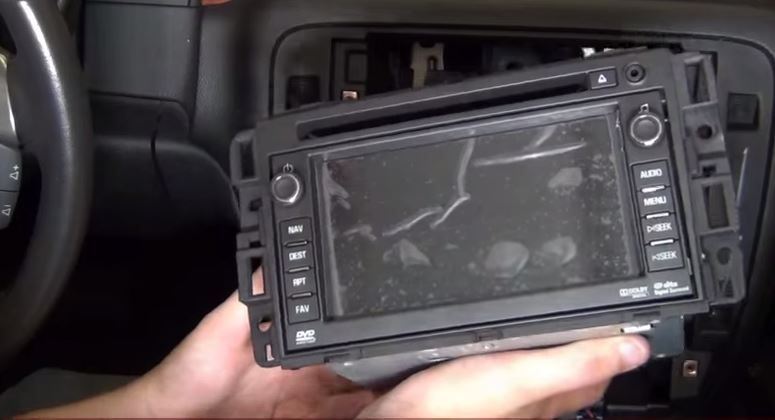
Figure 10. Install the new navigation system. 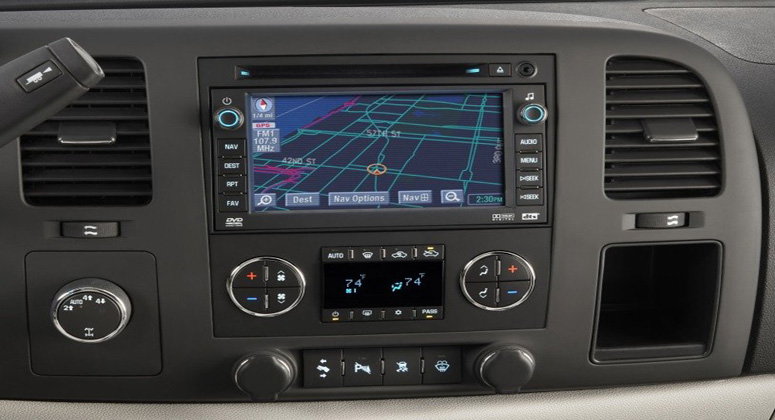
Figure 11. Navigation system installed.
Featured Video: Navigation System Installation
Related Discussion
-
Navigation Unit install My '08 Silverado - ChevroletForum.com