Chevrolet Silverado 2014-Present: How to Replace Brake Pads, Calipers, and Rotors
Dusty, ineffective brake pads and lame, aftermarket ceramic units reduce dust without reducing stopping power. While you're down there, check those rotors. If they're past the wear mark, they need to go too. Brake calipers are usually pretty robust, but they can fail, usually the piston sticks or locks in place, causing the brake pads to drag. You can rebuild them, or replace them; either way, here's how to remove them.
This article applies to the Chevrolet Silverado 1500 (2014-present).
Properly functioning brakes are key to both your safety and the safety of others around you. While the braking system may seem complex, it can actually be explained pretty easily. When you press the brake pedal, fluid is moved through the brake lines into the calipers. The fluid pressure in the calipers pushes pistons out that are holding the brake pads so that they are pressed against the rotors. By pressing the pads against the rotors, the friction built up will slow you down.

Materials Needed
- Wheel chocks
- Floor jack
- Jack stands
- Tire iron
- Brake bleeding equipment (either a power bleeder or clear rubber tubing and a drain bucket)
- Socket set
- C-clamp
- Torx bits
- Flat head screwdriver
- Brake cleaner
- White lithium grease
Step 1 – Preparation
- Park on flat, level ground.
- Chock the rear wheels.
- Set the parking brake.
- Open the hood and remove the brake fluid reservoir cap.
- Loosen the lug nuts with the tire iron.
- Raise the truck high enough for the wheel to be able to come off.
- Position the jack stand under the lower control arm.
- Remove the lug nuts.
- Remove the wheel.
- Lower the truck onto the jack stand.
(Related Article: How to Jack Up Your Silverado 1500 - ChevroletForum.com)
Step 2 – Remove caliper
If you aren't replacing the calipers, then you can skip the first four steps.
- Place your drain bucket below the caliper.
- It's recommended to line old shop towels around the brake line fitting to catch any leaks, but this isn't completely necessary.
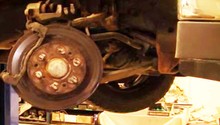
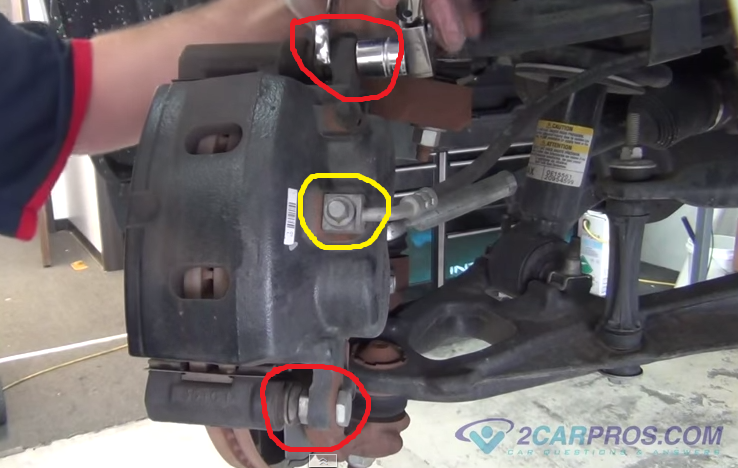
- Using the proper sized socket, disconnect the brake line circled in yellow in Figure 1.
- You can now either position the brake line so any fluid coming out will drip into the drain bucket or you can orient it upwards to retain the fluid inside.
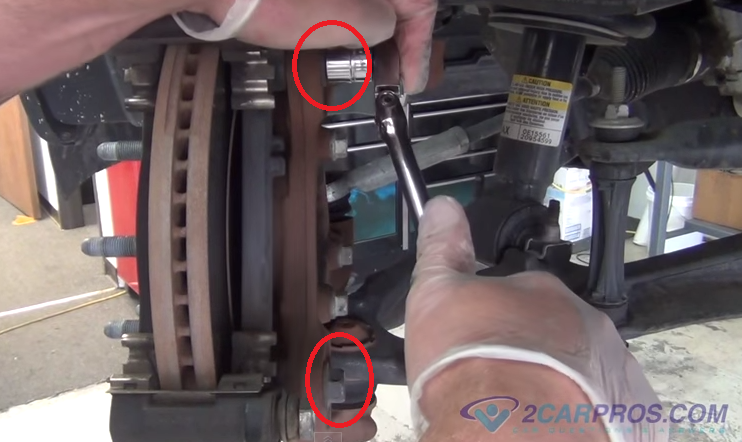
- Remove the two caliper slide bolts located at the top and the bottom; they're circled in red in Figure 1.
- Gently, wiggle the caliper free. If the brake line is still attached, you'll need to find a place to rest it so the line doesn't get stretched or pinched. If it's disconnected, be prepared for the remaining fluid to come out.
Step 3 – Remove brake pads
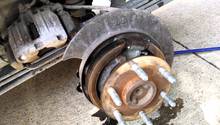
To remove the brake pad, simply pry them off the rotor with a flat head screwdriver. If you aren't replacing the rotors, take care not to gouge them with the screwdriver.

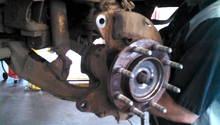
Step 4 – Remove caliper mounting bracket
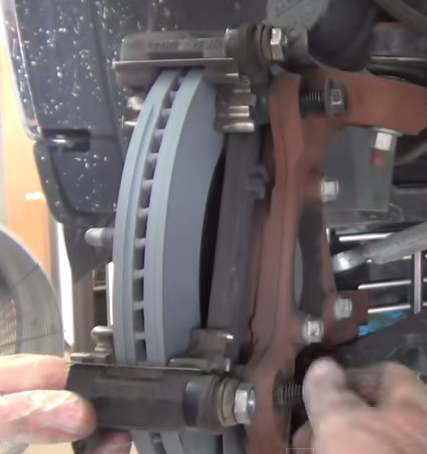
To remove the caliper mounting bracket, remove the two bolts circled in red in Figure 3. With the bolts out, you'll be able to easily pull off the bracket.
Step 5 – Remove rotor
- Remove the Torx bolt on the face of the rotor guard.

Figure 4. Remove Torx bolt (circled). - Using the appropriately sized bolts (normally included with new rotors) thread them in by hand into the two holes on the rotor guard.

Figure 5. Bolts threaded into rotor guard. - Evenly tighten the two bolts you just threaded in to push the rotor off of the hub assembly. Once it's loose, you should be able to slide it off the studs easily by hand.

Figure 6. Bolts tightened to loosen rotor.
Step 6 – Install new rotor
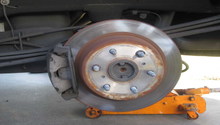
- Using brake cleaner, clean off the new rotor before install. This helps remove any potential contaminants that could hinder braking performance.
- Slide the new rotor onto the hub assembly, taking care to line up the Torx bolt hole.
- Tighten the Torx bolt until snug. You may need to hold onto a stud while tightening to keep the rotor from spinning.
Figure 7. Tighten Torx bolt.
Step 7 – Install caliper mounting bracket
Re-install the caliper mounting bracket using the two bolts you removed previously in Step 4.
Step 8 – Install brake pads
- Using a flat head screwdriver, pry out the old brake pad slides located at the top and the bottom of the caliper mounting bracket.
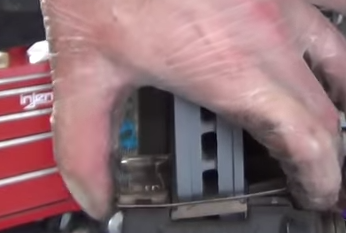
Figure 9. Pry out brake pad slides. - Install the new brake pad slides onto the caliper; they'll pop into place with a little pressure.
- This step is optional; however, some people recommend to put white lithium grease on the back of the brake pad to help prevent squealing sounds.
- To install the new pads, make sure you have them oriented correctly and then slide them onto the brake pad slides so they're snug against the rotor. They should be oriented so that the brake pad side (the rough side like sandpaper) is facing the rotor and so that the curve along the bottom of the brake pad follows the curve of the rotor.
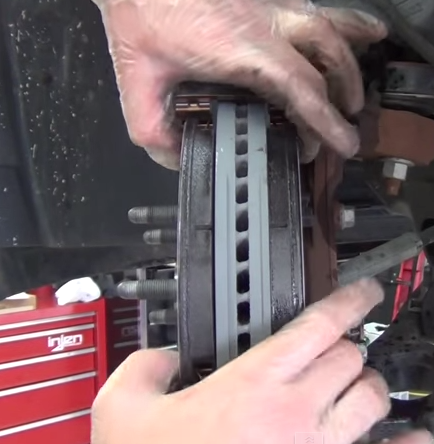
Figure 10. Brake pads installed.
Step 9 – Install calipers
- Using the c-clamp or something similar, you'll need to compress the pistons on the calipers to allow them to slide on easily. If you removed the brake line, be prepared for fluid to come out. If the brake line is still attached, make sure the cap is off of the brake fluid reservoir. Place an old brake pad against the pistons to allow you to compress easily.
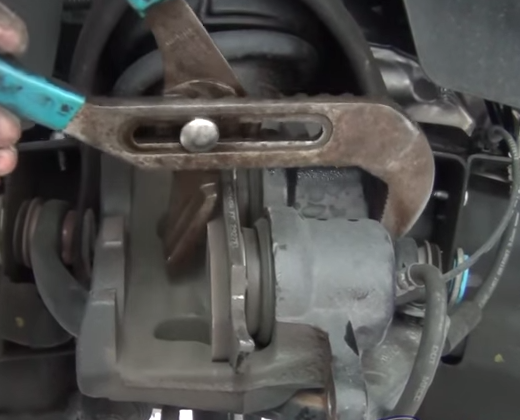
Figure 11. Compress brake calipers. - With the pistons compressed, you should easily be able to slide the caliper back into place.
- Once the caliper is re-installed, re-install the two caliper slide bolts you removed in Step 2.
- If you removed the brake line, you can go ahead and re-install that now as well.
Featured Video: Brake Pad, Caliper & Rotor Replacement
Step 10 – Finishing up
- If you removed the brake lines, you'll need to bleed the brakes now in the following order: passenger rear, driver rear, passenger front, driver front.
- Reinstall wheels and fasten lug nuts.
- Lower truck.
- Take test drive, ensuring that brake pedal is firm and stopping power present. It is not uncommon for brand new pads/rotors to not stop very well for the first few miles, so drive carefully.
(Related Article: How to Bleed Brakes - ChevroletForum.com)
Related Discussions
- Ceramic Brake Pads vs. Standard Pads - ChevroletForum.com
- Review of EBC Pads and Rotors - ChevroletForum.com
- Warping Rotors - ChevroletForum.com