Chevrolet Silverado 1999-2006: Why Doesn't My Blower Motor Work?
If you notice your blower motor is not functioning on certain speed settings, has a burning plastic smell, or the blower continues to run with the ignition in the off position, it may be time to replace your blower motor. Here are some steps you can take to confirm whether or not this replacement is necessary.
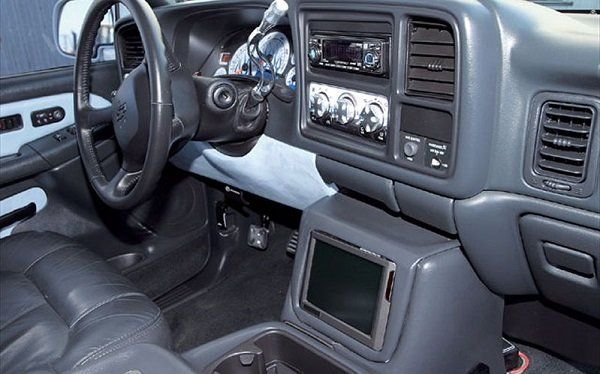
This article applies to the Chevrolet Silverado GMT800 (1999-2006).
There are several signs that you can look for to tell if your blower motor might be on its way out—for instance, if your HVAC blower does not operate at different speed settings or doesn't work at all, that could be a sign the motor is on its way out. Also, if you smell burning plastic or smoke begins to enter the cabin when the blower is going, that is also a sign you have a faulty blower motor. Finally, if you hear that the blower motor is still running even when the Silverado ignition is in the “off” position, chances are, your blower motor needs replacing.
To confirm whether or not this is definitely the case, here are a few things you can look for before going to the auto parts store in search of a new blower motor.

Materials Needed
- Multimeter
- Jumper cables (resistor)
Step 1 – Check to see if power is getting to the fan
Power may not be making its way through to the fan.
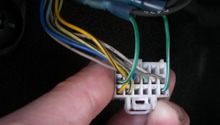
The blower motor resistor harness connector has four wires, which supply it with the signals necessary for the blower to operate in the setting you wish it to. Here’s a quick breakdown.
Pin Letter, Wire Color, Description:
- A, Yellow, Low Input from AC-Heater Panel
- B, Blue, Output to Blower Relay
- C, Tan, M1 Input from AC-Heater Panel
- D, Light Blue, M2 Input from AC-Heater Panel
So when the blower speed dial is set to low, there should be voltage in terminal A of the blower resistor connector, and so on.
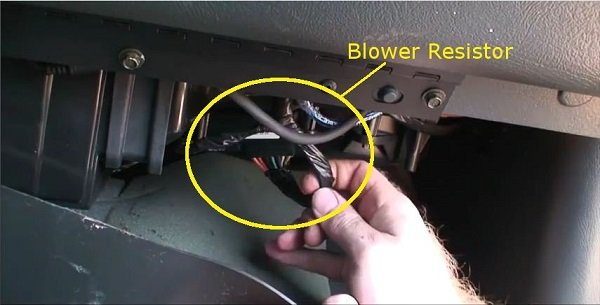
To test the voltages, disconnect the blower resistor from the harness connector and set your multimeter to volts DC mode. Next, turn the key ignition to the "on" position, set the blower speed knob to low, and verify that terminal A of the blower resistor's connector has 12 volts DC with your multimeter.
With the key in the "on" position, set the blower speed knob to M1 and verify that terminal C of the blower resistor's connector has 12 volts DC with your multimeter.
Now set the blower speed knob to M2, and verify that terminal D of the blower resistor's connector has 12 volts DC with your multimeter.
If you are missing voltage during any of these tests, make sure to repeat the test. If there is still no voltage, then you have found the source of the problem. All you need to do is replace the appropriate connector in the control panel with a new one to solve the problem.
If all three terminals have 12 volts where indicated, this is good and it means the blower fan switch is, as a whole, in working order. Proceed to Step 2.
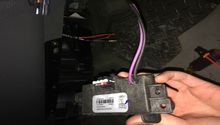
Step 2 – Test the blower resistor
It may be burned out.
You can do this by bypassing the resistor with a jumper wire. It’s pretty easy to do; although, it should be noted that you’ll want to use a wire with a small enough diameter, so that the resistor’s female metal connector terminals aren’t damaged. If the wire is too thick, you could permanently open these terminals and create an “open” problem.
Assuming you have the right wire, disconnect the blower resistor from its harness connector and turn the key to the "on" position (no need to start the engine).
Hook jumper terminals A and B together (this is the circuit that controls blower speed low). The correct test result is for the blower motor to run on high speed (it won't run LO because you're bypassing the resistor).
Now, hook jumper terminals C and B together (this is the circuit that controls blower speed M1).
Lastly, hook jumper terminals D and B together (this is the circuit that controls blower speed M2).
If the blower motor runs when all of the terminals were jumped together, it means the circuit between the resistor connector and blower motor is fine as well as the blower's motor relay, but the blower resistor is bad and needs to be replaced.
If, on the other hand, the blower motor doesn’t run when the terminals are jumped together, then it means the circuit between one, two, or all of the circuits is bad, but the blower resistor is OK. Specifically, the problem resides in the wiring between the resistor connector and the blower motor, which could also lead to the aforementioned burning plastic smell or smoke.

Figure 3. Damaged wiring on the right side. 
Figure 4. Molten, damaged wiring and connectors.
Related Discussions
- Blower Motor Bad Not Resistor - ChevroletForum.com
- Blower Motor Issues - ChevroletForum.com
- Blower Motor Problem - ChevroletForum.com
- Heater Control Problems - ChevroletForum.com