Chevrolet Silverado 1999-2006: The Ultimate Shocks Guide
Are you shocked? Do you want to be shocked? Yes? No? Okay, this makes no sense. Let's just knock off the jokes and replace the shocks on your Silverado.
This article applies to the Chevrolet Silverado GMT800 (1999-2006).
Your truck's suspension is a complicated bit of engineering. In the front, it uses what's known as a "double wishbone" design, with a solid axle and leaf spring setup in the rear. The front suspension is sprung using what is called a "torsion bar." This is good news, because it makes life a little easier when replacing shocks than if there were a spring or coilover setup.
So, let's replace those shocks and enjoy the ride.
Step 1 – Safely jack up the front of the truck and remove wheels
To replace the front shocks, we're going to need some room to work, so the wheels need to come off. Don't forget that loosening the wheel nuts before putting the front of the truck in the air is a good idea, and can save you a bit of headache later. On level ground, get the truck up in the air and situated on stands. Once the truck is seated on stands, give it the good old shake test. You're going to be working under your truck, so you'll want to make sure it's safely on those stands and not likely to slip off.
Go ahead and spray some of your penetrating lube on the bolts as well as the top and bottom of the shocks. You might as well go on and spray some on the rear while you're at it, so it has time to do its magic.
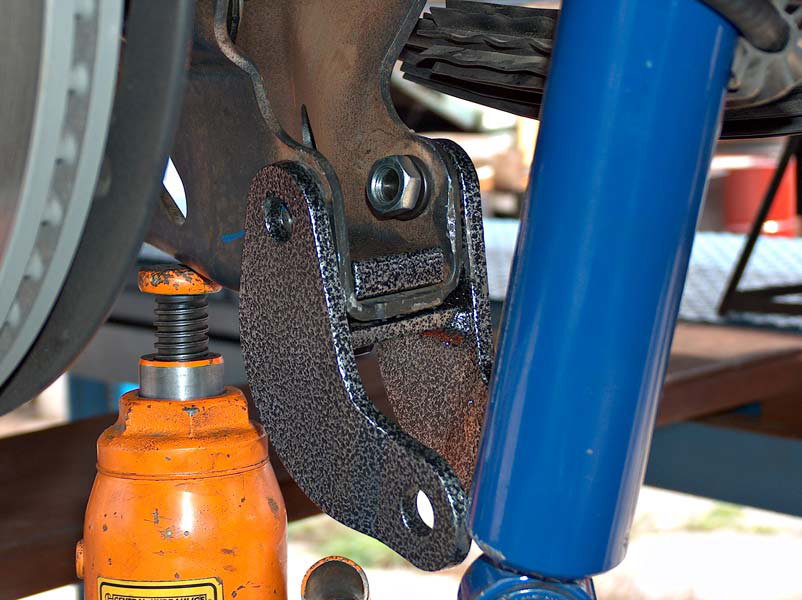
Step 2 – Compress the control arms with your jack
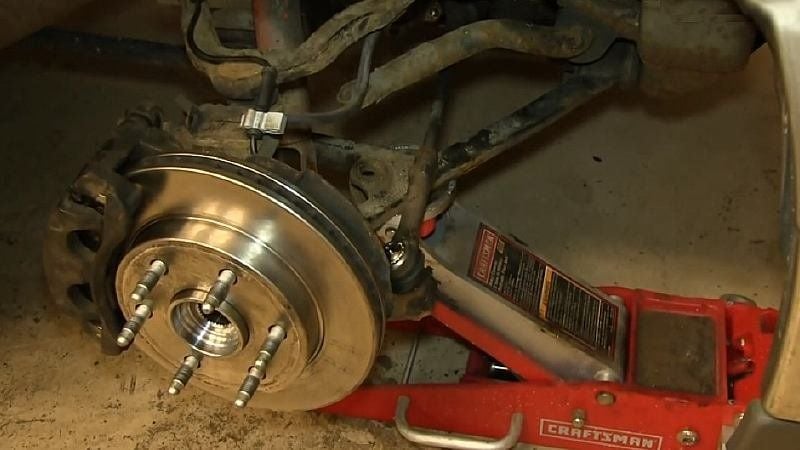
Yes, we just put the front of your truck in the air, but now we need to compress the suspension so the load is taken off the shock and torsion bar. It might seem a little counter productive but it's really not. Remember when finding a jacking point under the lower control arm that you're going to need access to the bolt and nut at the bottom of the shock tube, so don't block those. The photo below isn't just like your truck, but you (hopefully) get the idea.
Figure 2. Jack up the control arm.
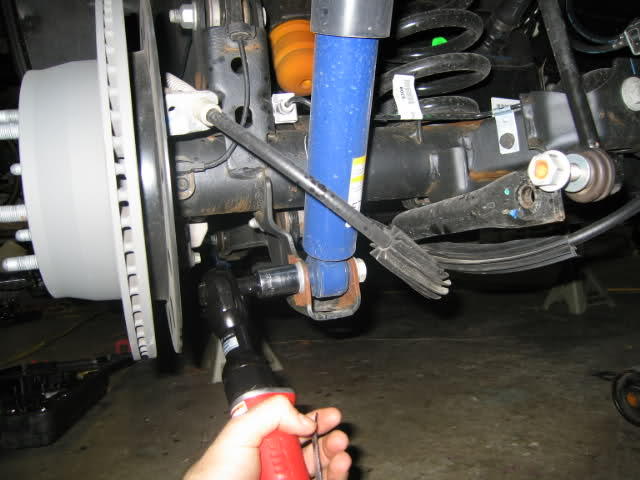
Step 3 – Loosen top of shock
The top of your front shock has threaded rod coming out of it. Threaded onto that is a 15mm nut that needs to be loosened and removed so you can back the shock out of the shock perch in the frame. But it's not quite that easy, because when you turn the nut, the innards of the shock are going to want to turn inside it rather than the nut moving off the threaded rod.
So, you're going to need some way to hold the shock still while you take that pesky nut off. There are a couple of ways of doing this. Which method you choose depends on how much you care about the shock you're removing. If you don't care at all, you can grab the top of the threaded rod with a super tight pair of locking pliers and use those to stabilize it while you remove the nut. This will not be kind to the threads there, though, so you might end up having to cut the top of the rod off later.
Another way would be to find two nuts the exact same size as the threaded rod, and thread them on at the top so that they press against one another, then use two wrenches to apply opposite direction of force. Or, you can use a grinder to cut a slot into the top of the threaded rod so you can jam a screwdriver in it.
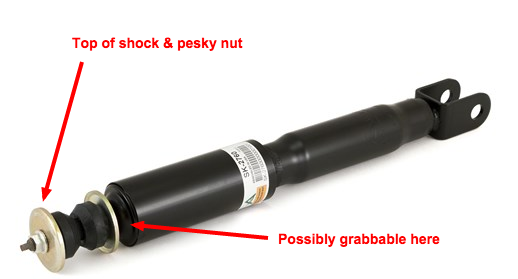
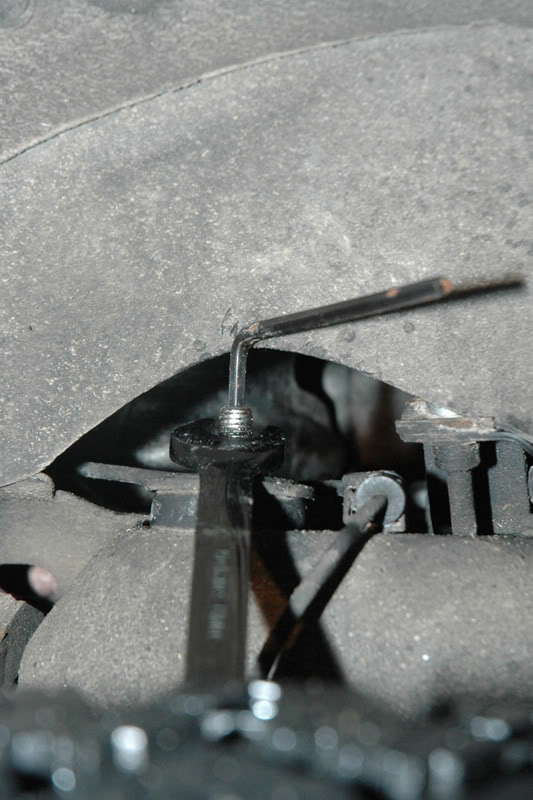
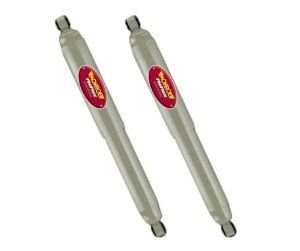
Some shocks make this easy on you by providing a place to use a wrench at the top of the shock, as shown here. Hopefully, the shocks on your truck currently are these kind.
Figure 3. Example shock with working points highlighted.
Step 4 – Remove bottom nut and bolt
Once the top is loose, all you have to do is remove the bottom. We'll have a similar problem here, in that turning the nut on the bottom bolt will usually just cause the bolt to turn, but in this case it's a little easier to solve since you have a hex head on both sides. Use a breaker bar or box-end wrench to brace one side while you use the socket to remove the other side.
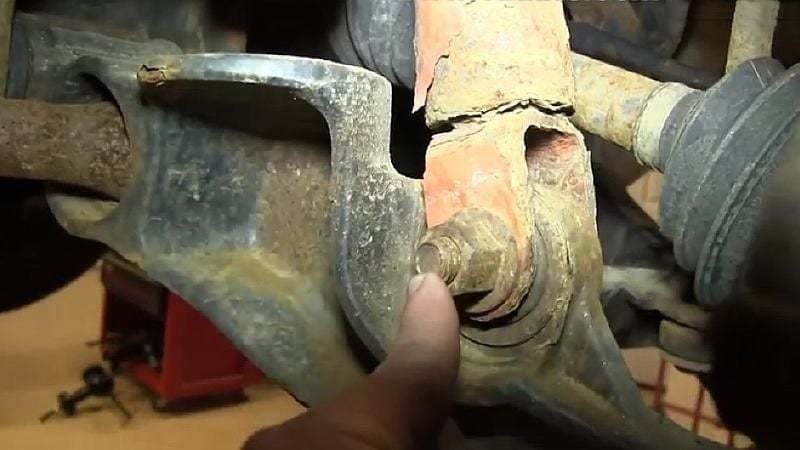
Hopefully your truck doesn't look quite this bad.
Figure 4. Rusted out shock bolts.
Step 5 – Install new front shock
Now all you have to do is put your new shock into the truck and you're done with this corner. You may find that a little extra lift with the jack helps get it into place, or possibly less. Make sure you get the rubber bits and any washers included installed correctly.
Just do the other side, replace the wheels, and you'll be ready to move on to the rear.
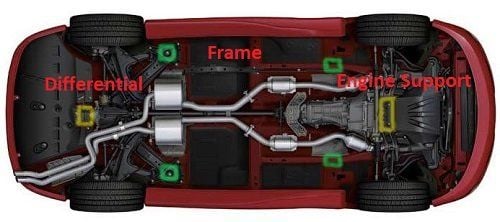
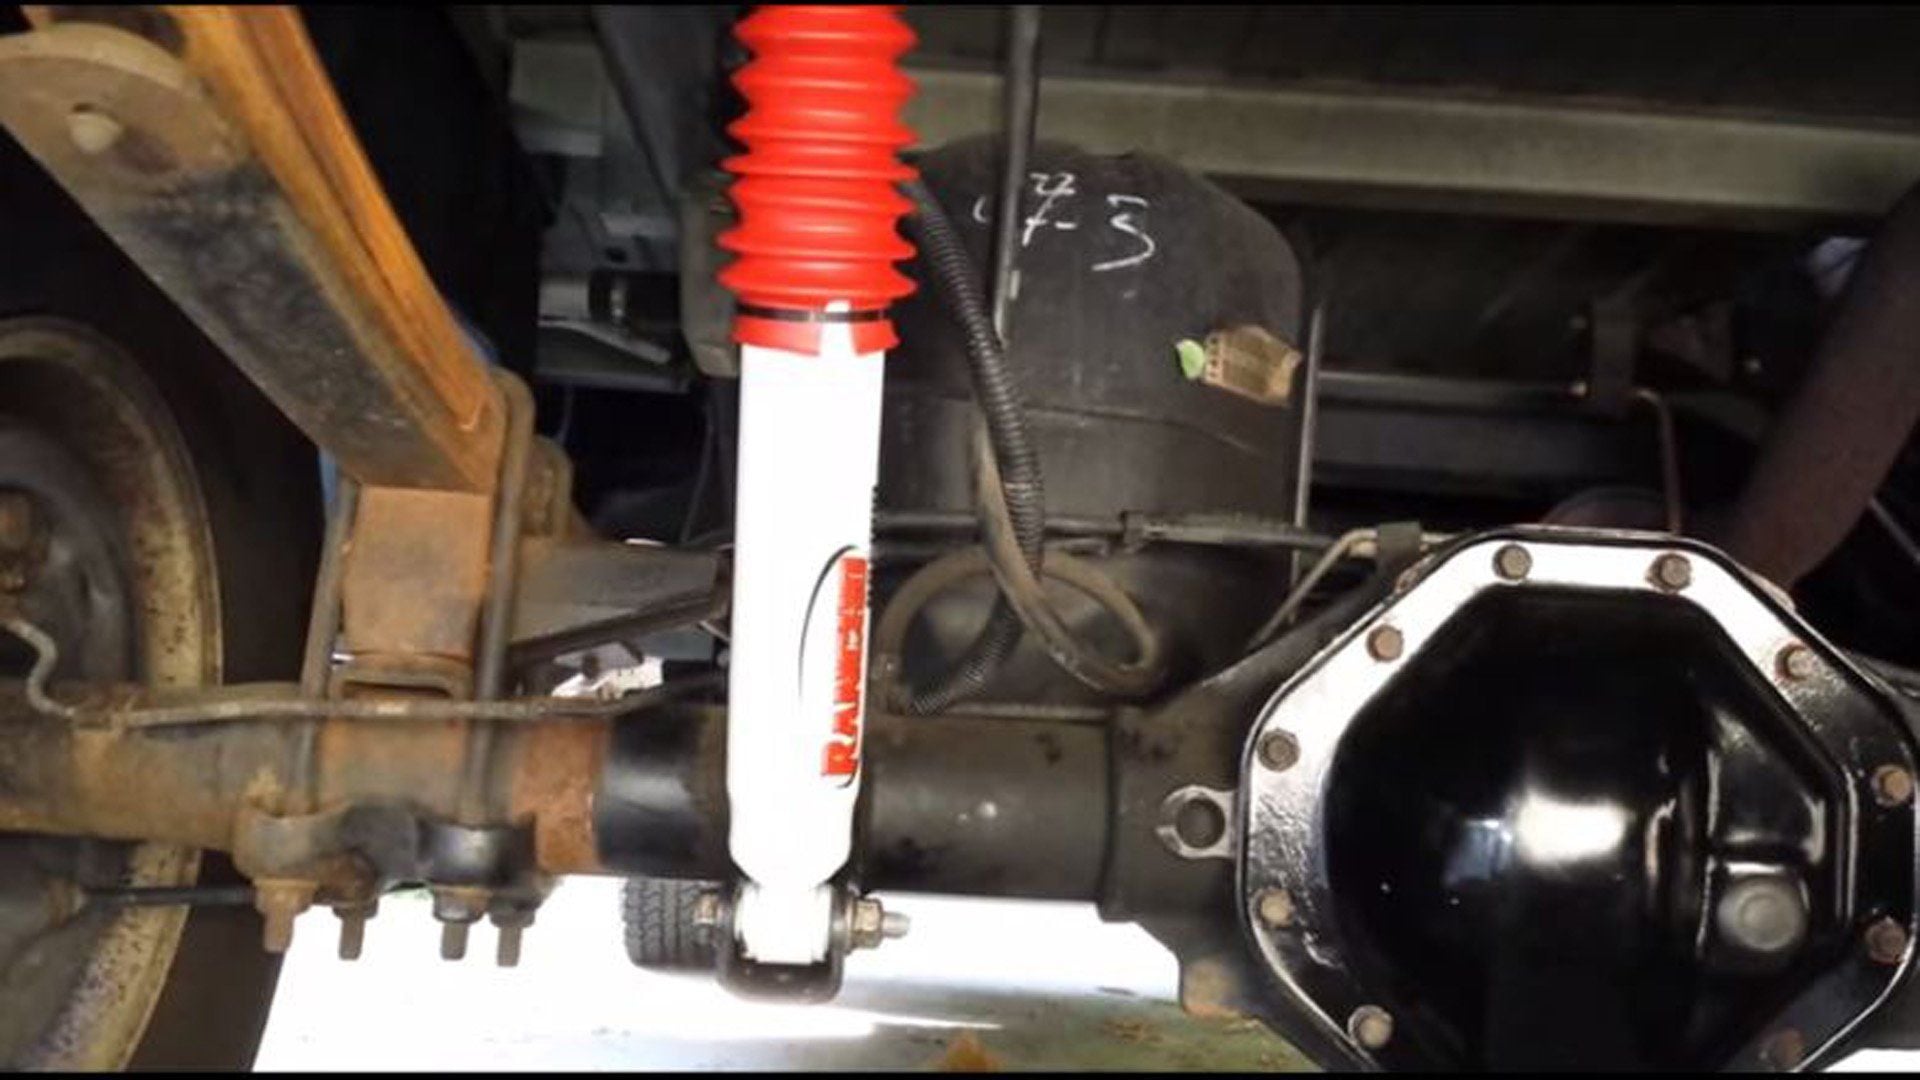
Figure 5. Rear shocks on your truck.
Step 6 – Loosen bottom of rear shock (but don't remove the bolt)
This is another good place to use your penetrating oil if you haven't already as mentioned in Step 1. With the rear, it's not necessary to jack up the truck. You can just crawl underneath, as long as you're careful to secure the truck with wheel chocks or another method of keeping it from rolling over you.
Loosen the nuts on the bottom of the two rear shocks using a breaker bar, 21mm sockets, and a big ratchet and/or cheater pipe. If you have air tools, this would be a good time to bust 'em out if you haven't already.
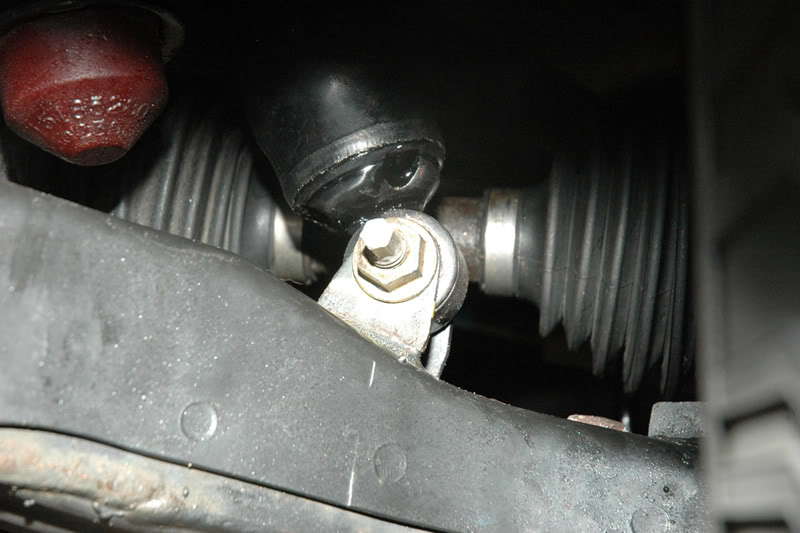
Figure 6. Using a socket and wrench to loosen the bolt, but do not remove it.
Step 7 – Loosen top of rear shock (but don't remove the bolt)
Same idea here as on the top bolts. We want to get the nuts off using our dual breaker bar setup, but leave the bolts in for the moment.
Figure 7. Loosen but do not remove the bolt yet.
Step 8 – Use a jack to lift rear axle just a touch (if needed)
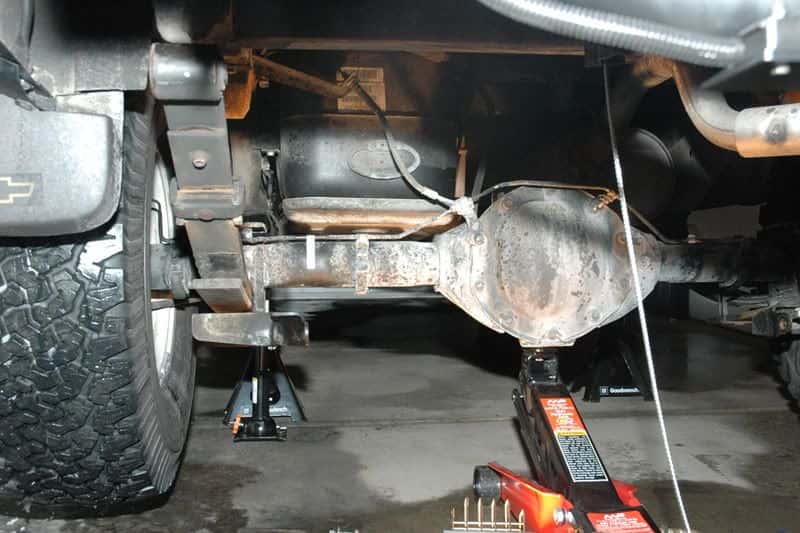
You shouldn't need to lift the whole rear of the truck here, just enough pressure on the differential to move the rear axle upward to relieve pressure on the rear shock bolts. You might not even need this step if your truck is sitting on the ground. Remember, put the jack under the differential housing, not just the cover.
Figure 8. Lift the rear to lessen the force on the differential.
Step 9 – Remove shocks
Take out the bottom bolt of one shock, and then the top. Be careful when doing this, especially if you're lying under the truck. This is a great time to get a piece of dirt or rust in your eyeball, and you do not want that at all.
The shock should now be free to remove from the truck. Some wiggling may be required to get the bushing to squeeze out of its mount. Again, be careful. Some protective goggles would be a good idea.
Figure 9. With the bolts out, the shock should drop right out.
Step 10 – Install new shocks
Using what you've learned so far, putting the new rear shocks in should be no problem. Once you've got them all nice and bolted up, you can remove your jack and be on your way.
Figure 10. Insert those new shocks and enjoy.
Featured Video: How to Replace Shocks in Chevy Silverado
Shocks Review
Now we know how to replace our shocks, but which ones should we put in? Here's a breakdown of some popular models that you may find helpful.
Please note that price (*) listed is for one shock. You will need four of them for your truck. Some manufacturer prices differ based on how much lift you have/want on your truck. We've included the range of prices here to reflect that.
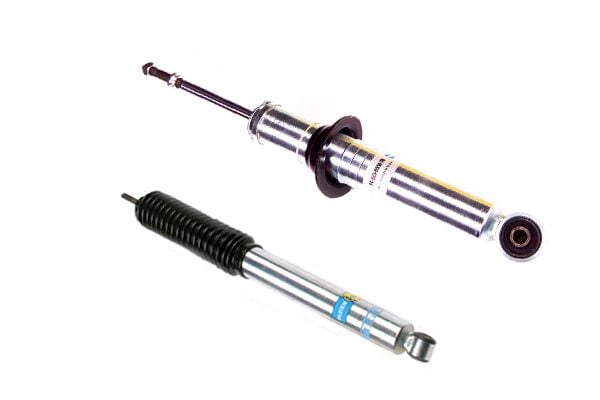
Bilstein 5100
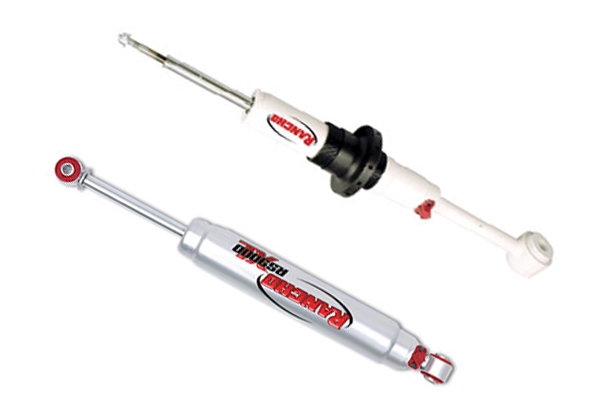
Rancho RS9000XL
Monroe Reflex
Price*
$88.99-$209.99
$110.99
$47.97
Damping Adjustable?
Yes
9-Way
No
Warranty
Limited Lifetime
Limited Lifetime
Limited Lifetime
Best Quality: Bilstein
Best Value: Monroe
Bilstein 5100
Price – $88.99-$209.99
Damping Adjustable –Yes
Warranty –Limited lifetime
If you have a look around the ChevroletForums.com forums, probably the most often recommended shock will be the Bilstein 5100. They have a loyal following and lots of happy customers. That's why we're giving the Bilsteins the nod over the Ranchos, even though the Rancho has some added features.
Manufacturer Description: BILSTEIN 5100 series shock absorbers are designed specifically to help your lifted truck, Jeep, or SUV reach its pinnacle in ride performance while supplying the correct tuning and length for your specific lift. Recommended for those who value the confidence that comes with buying a recognized product.
Rancho RS9000XL
Price – $110.99
Damping Adjustable –9-way
Warranty –Limited ifetime
The Rancho option brings 9-way adjustability into the mix, allowing you to dial in the exact level of damping you want from your shocks. These are your best bet if getting under your truck and fiddling with a knob until your ride is perfect as your cup of tea.
Manufacturer Description: Rancho® RS9000™XL 9-position adjustable shocks deliver an exclusive nine levels of performance to stock or lifted off-road trucks, SUVs,and Jeeps. Globally recognized as the first 9-position manually adjustable shocks series in the off-road market, this advanced line of shocks is ideal for off-road use, towing, hauling and more. The RS9000XL 9-position shocks allow the driver to control how soft or firm the ride quality is through the shock’s manual dampening and provide up to 400-percent change in vehicle control and response from setting one to nine. Plus, the RS9000XL series shocks come housed in an extra-large shock body, allowing for cooler and more consistent performance under even the most demanding conditions. These shocks come covered by a limited lifetime warranty and 90-Day free-ride offer. Recommended for those who desire flexibility to change ride quality depending on the conditions.
Monroe Reflex
Price – $47.97
Damping Adjustable –No
Warranty – Limited lifetime
The Monroe Reflex® truck shock absorber with the patented ASD Technology combines specially tuned valving with a Fluon banded piston. The ASD valve has the ability to sense acceleration to improve the handling, safety, and overall ride characteristics of sport-utility vehicles, mini-vans and light trucks. The ASD base valve will sense a bump in the road and automatically adjust the shock to absorb the impact, leaving the shock with greater control when it is needed. Recommended for those who are looking for a shock that will fit your truck and won't make your wallet catch on fire.
Pro Tip
Your truck's suspension system is complicated. Are you going to take it off road? How much lift do you want? Make sure you know what you plan to put your suspension through. Then you'll know which solution suits you and your truck best.
The Ultimate Leveling Modification Guide
Rough Country
Leveling kits for your Silverado truck are fairly inexpensive and hold their worth. Installing them, however, is another matter.
This article applies to the ...
The Ultimate Lowering Kit Guide
Drop your Silverado with these DIY instructions.
This article applies to the Chevrolet Silverado GMT800 (1996-2006).
Lowered trucks have been around for a long time, and the ...
Lowering Kit Reviews and How to Lower Your Truck
Some like it high and some like it low. Learn how to make your Chevy Silverado look like a bulldog.
This article applies to the Chevrolet Silverado 1500 ...
How to Install Front and Rear Shocks
If your Silverado suffers from a rough and bouncy ride, it's probably time to replace the shocks.
This article applies to the Chevrolet Silverado GMT900 (2007-2013).
Shocks use ...
How to Lower Your Truck
Find out if your are prepared to conquer a lowering kit installation in your Silverado.
This article applies to the Chevrolet Silverado GMT900 (2007-2013).
Lowering kits come in a wide ...
Lift Kit Reviews
Ready to lift your Chevrolet Silverado 1500? There are a lot of options out there. This article brings those options to one place for your viewing.
This article applies to the Chevrolet Silverado ...