Chevrolet Silverado 1999-2006: How to Replace 4WD Vehicle Speed Sensor (VSS)
The VSS in your Silverado provides crucial information for the ECM to properly balance and control several engine functions.
This article applies to the Chevrolet Silverado GMT800 (1999-2006).
A vehicle speed sensor (VSS) transmits the transfer case, transaxle, and/or wheel speeds to the truck's electronic control module (ECM). The on-board computer then uses this information to alter various engine and transmission functions, such as ignition timing, air-to-fuel mixture, and transmission shift points.
If your Silverado's brakes are stiffer than normal, the transmission is slow to engage, the overdrive light blinks on and off, the speedometer stops working or behaves erratically, or the check engine light turns on, then the vehicle speed sensor (VSS) may have stopped working.
You can make sure that the VSS is the root cause of these symptoms by pulling your truck's trouble codes. Auto shops offer to pull trouble codes for free, or if you have an OBD scan tool, then you can do it yourself. Once you've made sure the VSS needs a replacement, follow the steps below to do it yourself.

Materials Needed
- Replacement 4WD VSS
- 19mm wrench
Raising your truck is not necessary to complete this DIY job, but you can do so for extra work space. Follow the link below to learn how to properly jack up your Chevrolet Silverado.
(Related Article: How to Jack Up Your Truck - ChevroletForum.com)
Step 1 – Remove the old VSS
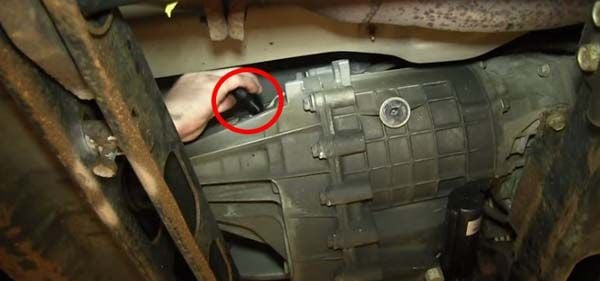
- The VSS is located on the front passenger's side of the transfer case.
- Pull back on the metal clip as well as the black wire harness connector, and then pull it straight out.
- Use a 19mm wrench to loosen the VSS.

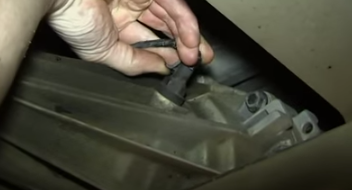
- Unscrew and remove the VSS by hand.
- Then, remove the old O-ring inside the VSS port.

Figure 4. Remove the VSS. 
Figure 5. Remove the O-ring.
Step 2 – Install the new VSS
- Thread in the new VSS by hand. A new O-ring should already be attached to the VSS.
- Use the 19mm wrench to tighten the VSS to a snug fit.
- Plug in the wire harness connector to the VSS, and make sure you hear the clip snap into place.

Featured Video: How to Install 4WD Speed Sensor
Related Discussion and Site
- How Serious is it When the VSS Wire is Cut? - ChevroletForum.com
-
How to Tell if You Have a Faulty Engine Speed Sensor - CarsDirect.com