Chevrolet Silverado 2007-2013: How to Replace Front Brake Pads, Rotors, and Rear Drum Brakes
Periodic visual inspections of your brakes are a good idea. If you wait until it's too late, you're going to find out the hard way that the brakes are gone, and then you have a much bigger issue at hand. With that said, now or never, let's change those brakes out.
This article applies to the Chevrolet Silverado GMT900 (2007-2013).
Brakes are essential for driving. Without them, you have no way to slow down. That's why it's important to replace the braking components as they get worn. For anyone who is mechanically inclined, this job is very straightforward and can be done in your garage for much cheaper than a dealership visit. The two main things you'll be replacing on a regular basis of around 50 to 75k miles is your front brake pads and front rotors. Don't forget about your rear brakes as well. You'll want to service or replace these around 100k miles. For those of you who do a lot of towing, it's always important to check your brakes before hauling a heavy load because towing will increase the wear rate on the braking system.

Materials Needed
- Wheel chocks
- Floor jack and jack stand
- Tire iron
- Shop towels
- Socket set
- Wrench set
- Flat head screwdriver
- C-Clamp or channel locks
- White lithium grease
- Pliers (or something similar)
- Wire brush
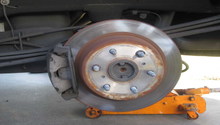
Step 1 – Preparation
- The first thing you'll want to do is remove the cap to the brake fluid reservoir. This will help with removing brake pads since it takes some of the tension off of the calipers.
- It is suggested lining around the brake fluid reservoir with shop towels. This is to catch any potential overflow when compressing the calipers later.
- Chock the wheels on the opposite end of the truck that you are removing the wheel from.
- Using the tire iron, loosen the lug nuts on the wheel.
- Raise the vehicle high enough to get the wheel off using the floor jack.
- Position the jack stand under the lower control arm.
- Remove the wheel.
-
Lower the truck onto the jack stand.
(Related Article: How to Jack Up Your Truck - ChevroletForum.com)
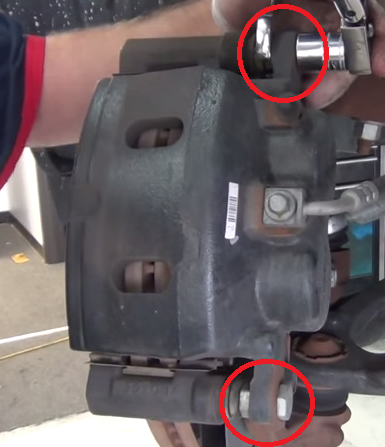
Step 2 – Front brake pad removal
-
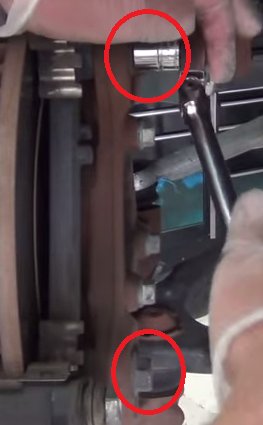
Remove the two caliper slide bolts circled in red (Figure 2). You will need an open-ended wrench to hold the bolt on the inside, and then a socket on the outside.
-
You can now gently wiggle the caliper free off the rotor. Because the brake line is still attached, you'll need to find a place to rest it (like on top of the upper control arm) to prevent the brake line from getting pinched.
-
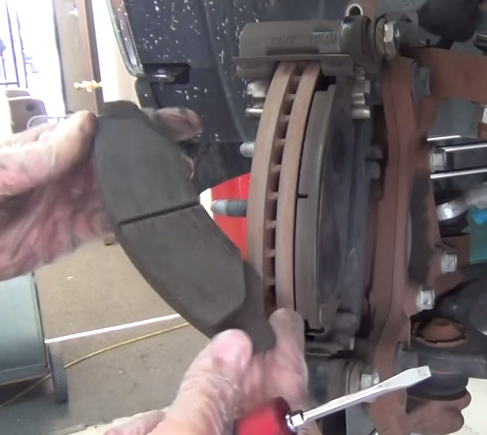
Using a flat head screwdriver, you can now pry out the old brake pads.
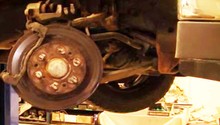
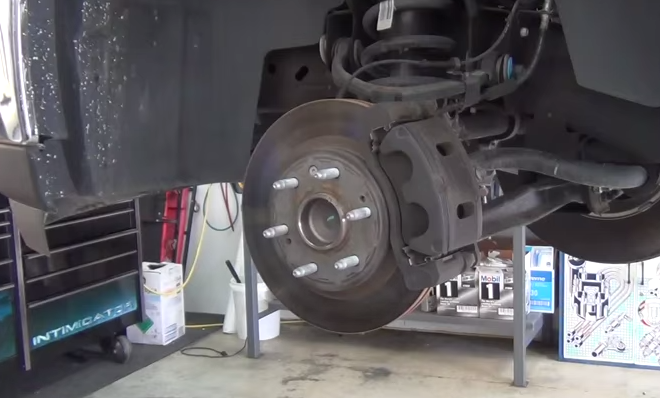
Step 3 – Front rotor removal
If you aren't replacing the rotors, then you can skip this step.
-
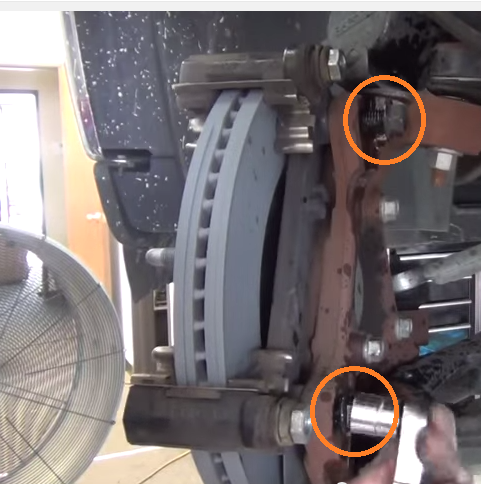
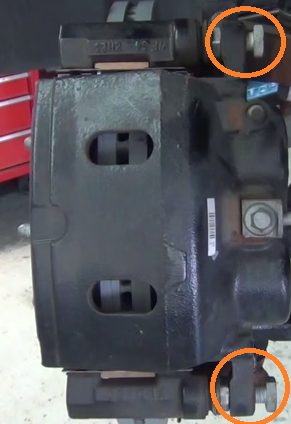
Using your socket wrench, remove the two caliper mounting bracket bolts circled in red (Figure 5).
-
You can now set the caliper mounting bracket to the side.
-
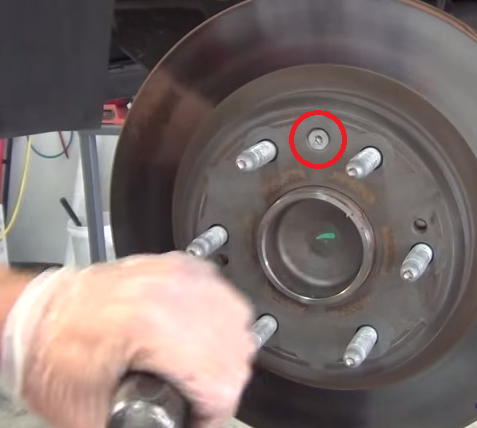
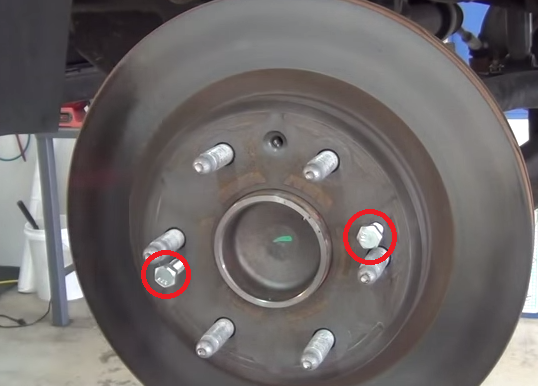
Using the correct sized Torx bit, remove the locking screw on the face of the rotor circled in red (Figure 7).
-
Using the proper sized bolts (normally included with new rotors), thread them into the two openings on the rotor face circled in red (Figure 8).
-
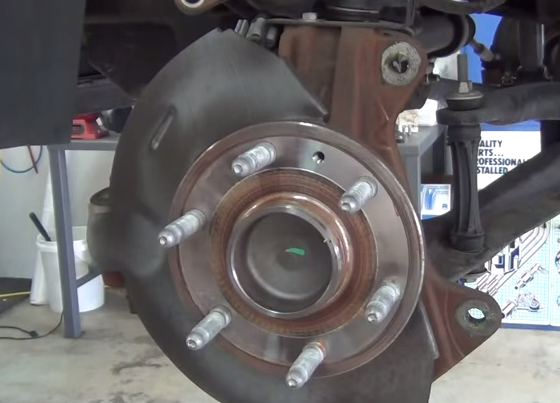
Tighten both screws you threaded into the rotor evenly. Eventually, they'll tighten enough to push the rotor free, at which point you can remove it by simply pulling it off.
Step 4 – Front rotor install
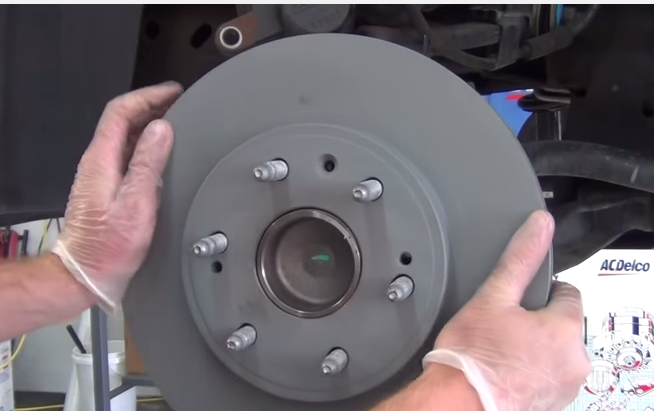
- Clean any dirt, grime, grease, etc. from the new rotor.
-
Line up the hole for the Torx screw on the new rotor with the hole on the rotor mounting surface.
- Install the Torx screw.
-
Re-install the caliper mounting bracket using the two bolts previously removed. Remember to tighten evenly.
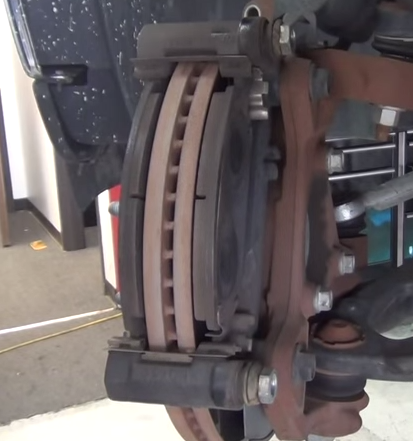
Step 5 – Front brake pad install
-
Using a flat head screwdriver, pry out the old brake pad slides. There's one located at the top and one at the bottom on the caliper mounting bracket.
- Install new brake pad slides onto the caliper mounting bracket. You just need to line them up, then press down, and they'll pop into place.
-
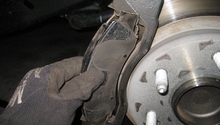
Slide the new brake pads into place, and be sure to remove any protective tape before placing them. Each pad has a specific shape, so you know where it goes. The pad with a curve on the bottom goes on the outside with the rough part facing the rotor. The pad that is flat on the bottom goes on the inside with the rough part facing the rotor.
-
Using a C-Clamp or something similar, you'll need to compress the pistons on the caliper to make install easier. Notice (in Figure 14) that the old brake pad has been placed there to help give even compression as well as to protect the pistons.
-
Wiggle the caliper back into place, and then re-install the two caliper slide bolts.
Featured Video: Front Brake Pads and Rotor Replacement
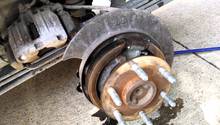
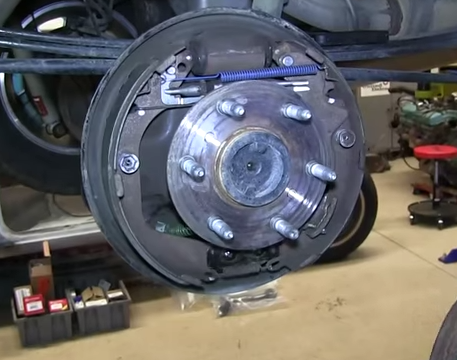
Step 6 – Rear drum brake removal
-
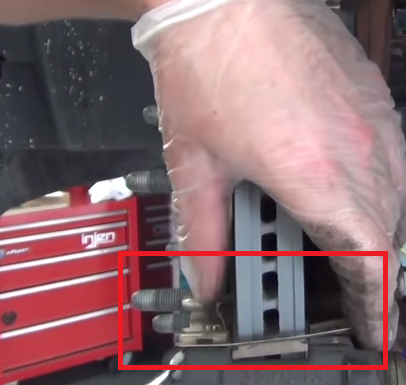
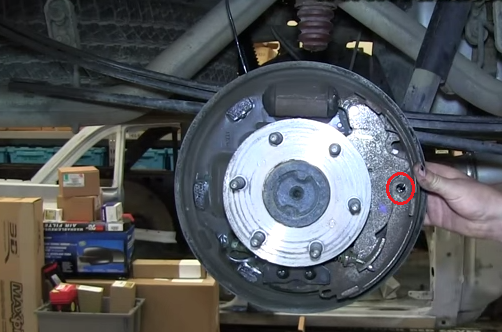
Remove the locking rings around the studs; there's usually one or two. You can try to pry them off all the way, or just use a flat head screwdriver and twist them until they break off (Figure 16).
-
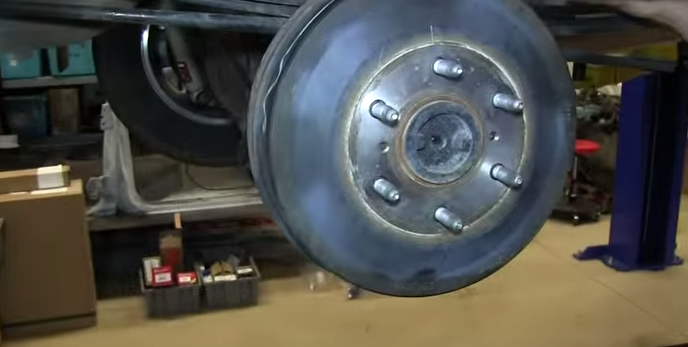
Using a M10 sized bolt, thread it into one of the screw holes on the face of the drum to push the drum free (Figure 17).
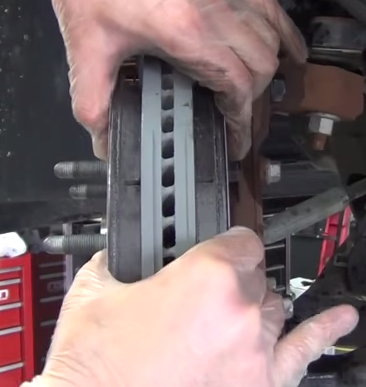
-
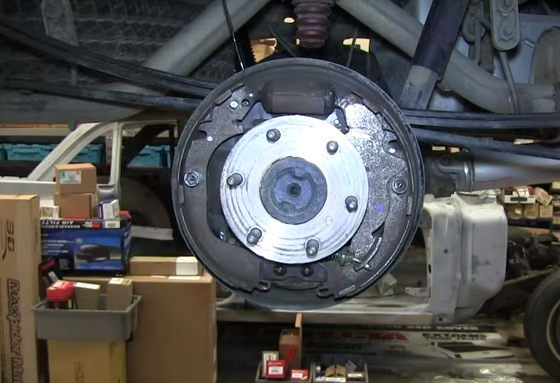
Once the drum is free, you can pull it off easily by hand.
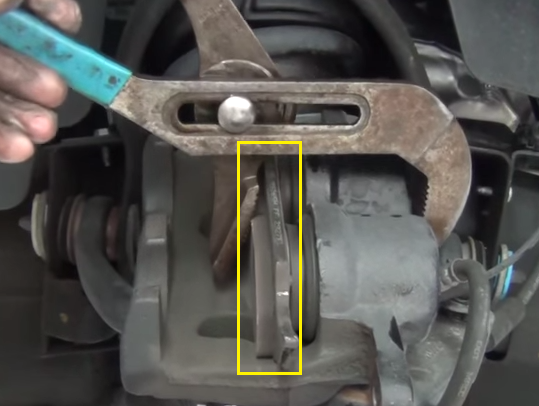
-
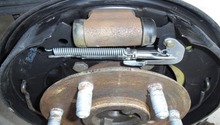
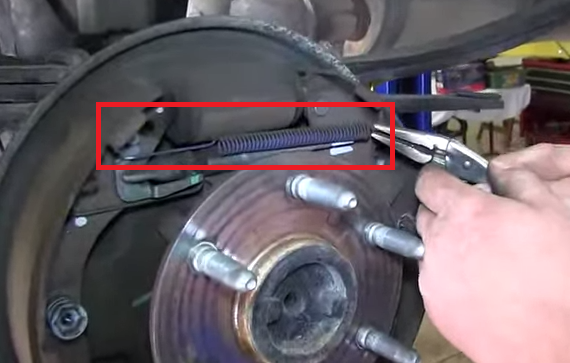
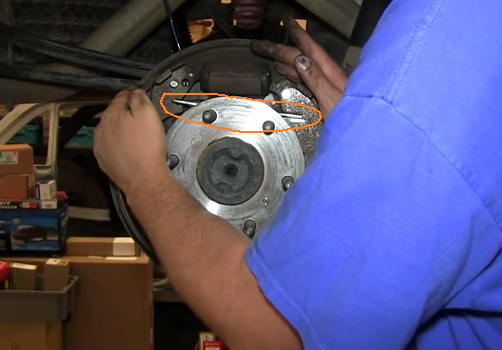
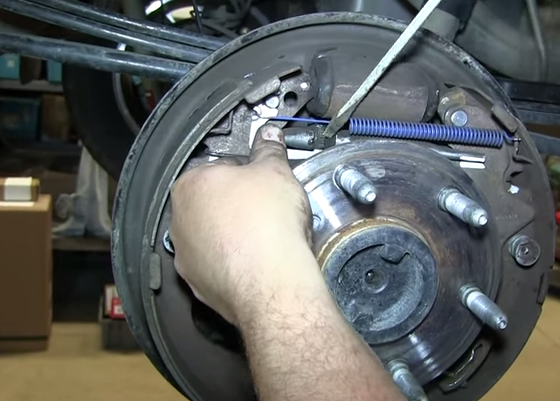
Remove the long spring circled in red (Figure 19) using a pair of pliers or something similar.
- With that spring removed, repeat the same process for the one behind it and then the one on the bottom of the brake assembly.
-
Using pliers or channel locks, rotate the spring retaining screw while holding the pin still on the rear of the brakes.
- With the pin out, you'll be able to move the brake shoe inward and unhook/remove the adjuster.
- Repeat the same process to remove the brake shoe towards the rear of the vehicle.
-
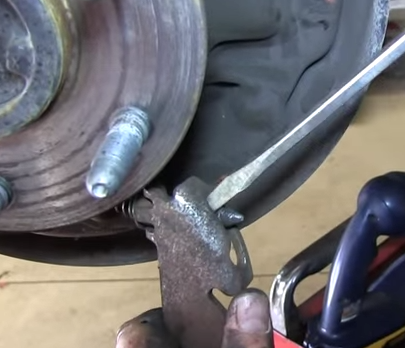
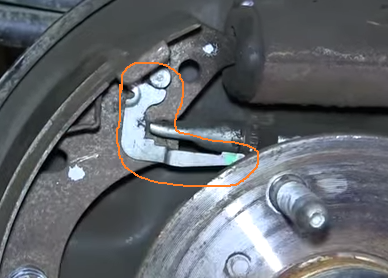
Using a flat head screwdriver, pry the e-brake free from its clip (Figure 21).
- You Should now be able to completely remove the front brake shoe.


Step 7 – Rear drum brake install
While not necessary, having a second set of helping hands makes this first step a lot easier.
- Pull the pin inside the e-brake cable forward, and then slide it into the slot on the new front brake shoe.
-
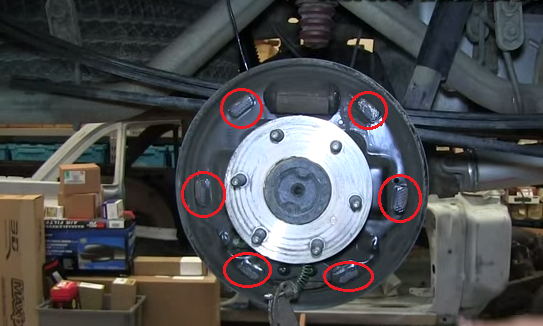
Using a wire brush, clean the friction points circled in red (Figure 22).
- Apply white lithium grease to the friction points.
-
Position the front brake shoe back into place, and then push the pin back in from the backside so it lines up with the hole circled in Figure 23.
- Twist the spring retaining screw counterclockwise back into place to lock the pin and front shoe in place.
-
Repeat the same process for the rear brake shoe.
-
Re-install the brake shoe adjuster. You'll need to push the brake shoes inward to help secure it until you install the springs later (Figure 25).
-
Re-install the brake shoe adjuster clip (Figure 26).
-
Re-install the three springs you removed earlier. You'll need a pair of pliers to help hold them while stretching them into place.
-
You can now do a test fit of the drum cover. If it doesn't fit back on, you can use a flat head screwdriver to turn the brake shoe adjuster screw to bring the brake shoes inward to provide more clearance. Likewise, if it slides on very easily, you want to bring the brake shoes out some. You want there to be a little resistance when pushing the drum cover on to ensure proper braking capability.
-
You can now re-install the drum cover.
- You can now re-install the rear wheel.
Step 8 – Afterwards
- Re-install the brake fluid reservoir cap, and make sure the reservoir is filled.
- Test the brakes. Without going anywhere, depress the brake pedal a couple times. If it feels soft or spongy, you'll need to bleed the brakes.
- Follow the break-in procedure specified for the types of brakes you bought.
(Related Article: How to Bleed Brakes- ChevroletForum.com)
Featured Video: How to Install a Rear Drum Brake
Related Discussions
- Need Advice on Brake Job - ChevroletForum.com
- Silverado Brake Pad Durability - ChevroletForum.com
- How Long Do Brake Pads Last - ChevroletForum.com
- EBC Brakes Review - ChevroletForum.com