Chevrolet Silverado 1999-2006: How to Replace Engine Air Filter
The engine air filter box is in plain sight at the front, right side of the engine compartment and readily accessible. This air filter box is common to many GM models. The filters are widely available and can be handily replaced in your driveway with just a few tools.
This article applies to the Chevrolet Silverado 1500 (1999-2006).
Your Silverado Vortec engine is an efficient and powerful air pump. It draws air from inside the front-right fender, mixes that air with gasoline and compresses and burns the volatile mixture. The vigorous combustion force drives the wheels, and the hot air/gas mixture is cleaned of contaminants and pumped out the exhaust. To protect the engine, the outside air is filtered, and when the filter begins to clog, it chokes off some of the incoming air. The combustion force is reduced and the truck loses power.
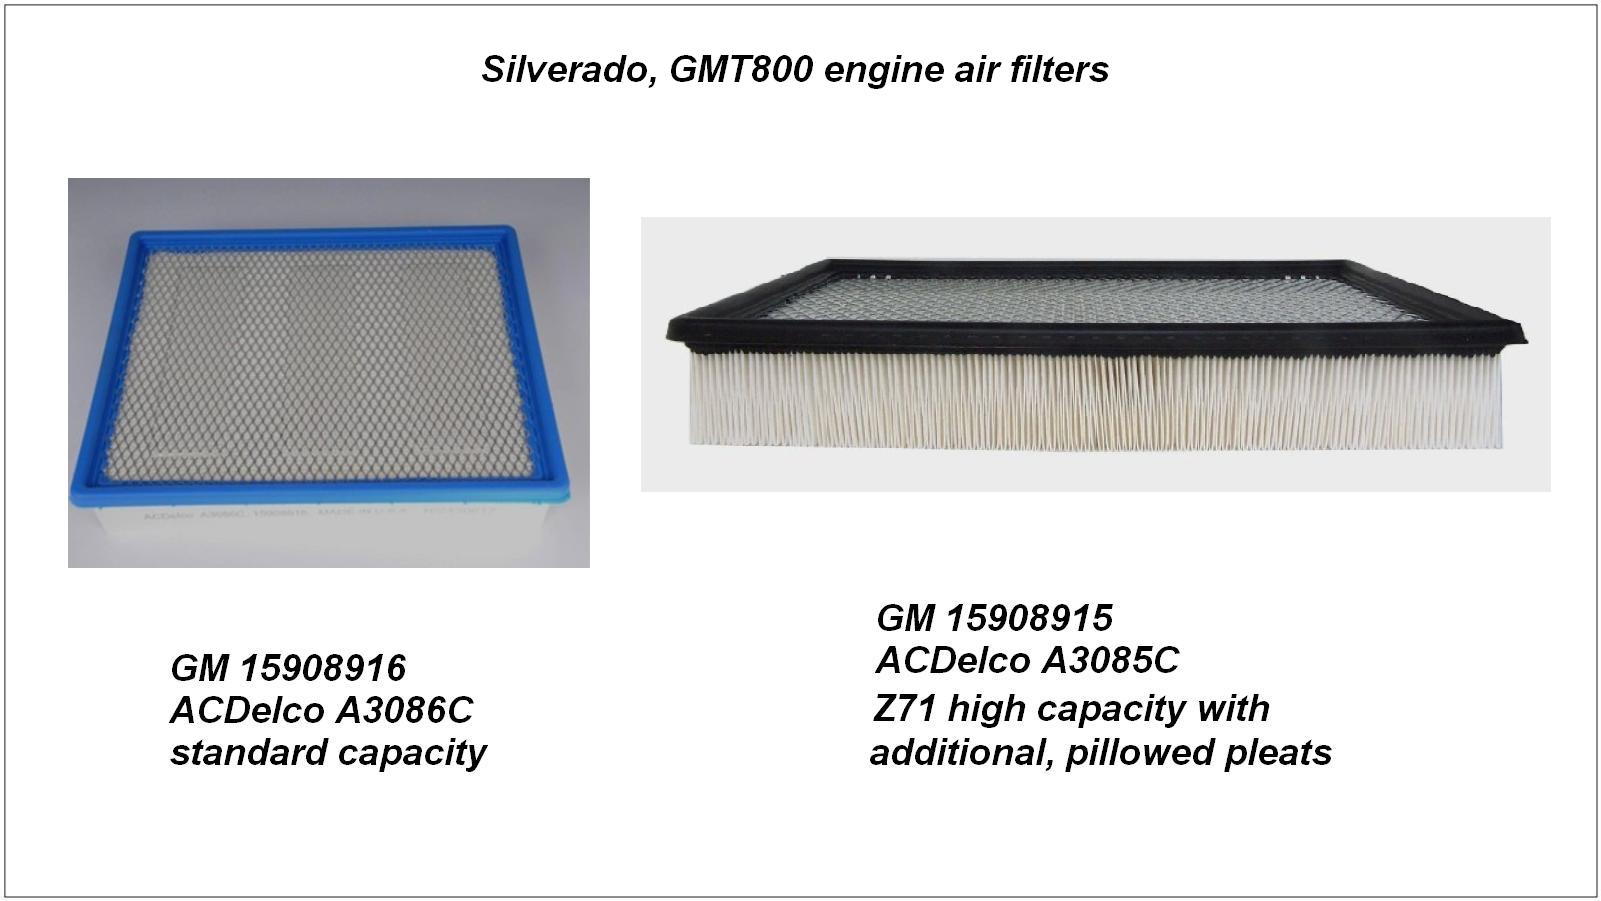
The GM Maintenance Manual recommends changing the filter every 50,000 miles. The OEM filter has been revised several times, and filters are available in standard and high capacity:
- Standard capacity GM part 15908916, ACDelco A3086C with a blue rubber bead. About $20.
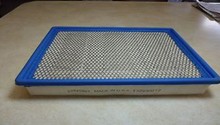
- High capacity GM part 15908915, ACDelco A3085C with a black rubber bead. Listed for the Z71 package, but can be used in other models. High capacity does NOT mean greater airflow – it refers to a greater capacity for holding dirt. It's constructed with corrugated pillows integrated into the pleats, which prevent the pleats from sandwiching together and maintain greater surface area, using additional pleats. About $35.
- Older GM filter part numbers are still available and can also be used. Many aftermarket air filters are available at auto parts stores.
Note
Always verify the correct engine air filter part number for your truck model.
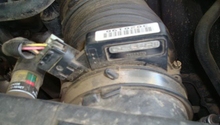
Some GM trucks have the optional Filter Restriction Indicator mounted on the inboard corner of the air box. It responds to the high vacuum made by a clogged filter – and the inner scale shows the percentage of filter life remaining, as it moves from the green band (filter ok) to the red band (replace filter). The restriction indicator is reset by depressing the rubber end button.
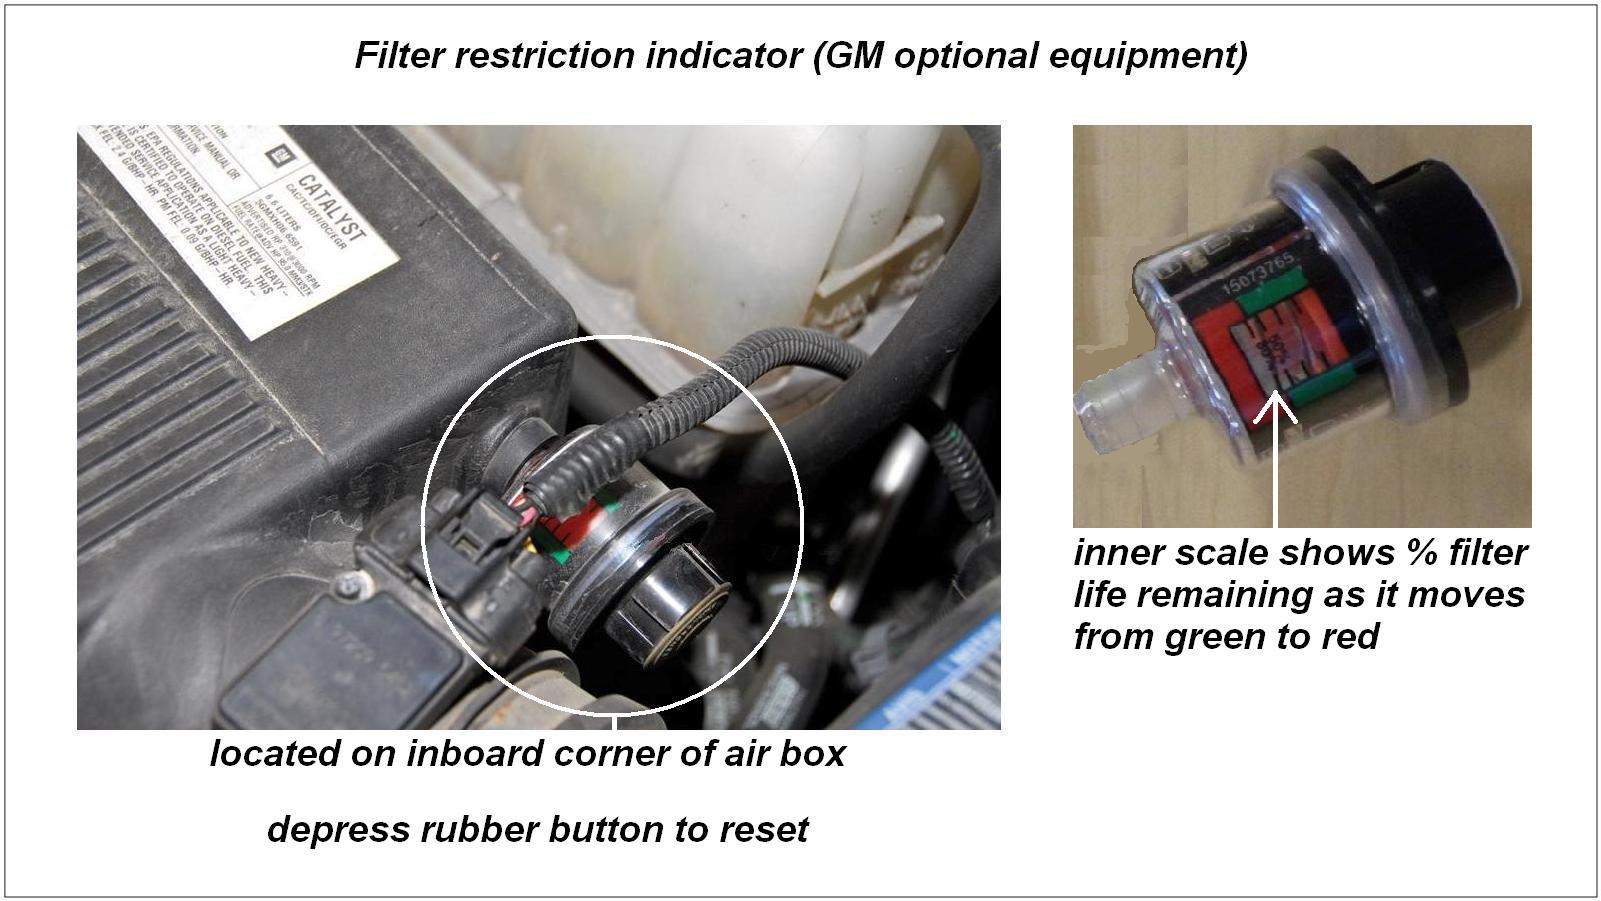
Figure 2. Engine air filter restriction indicator.

Materials Needed
- One engine air filter as verified for your truck
- Torx T-25 driver, magnetized
- 8 mm socket driver or flat-tip screwdriver
- Mechanic's gloves
- Bright LED flashlight (optional)
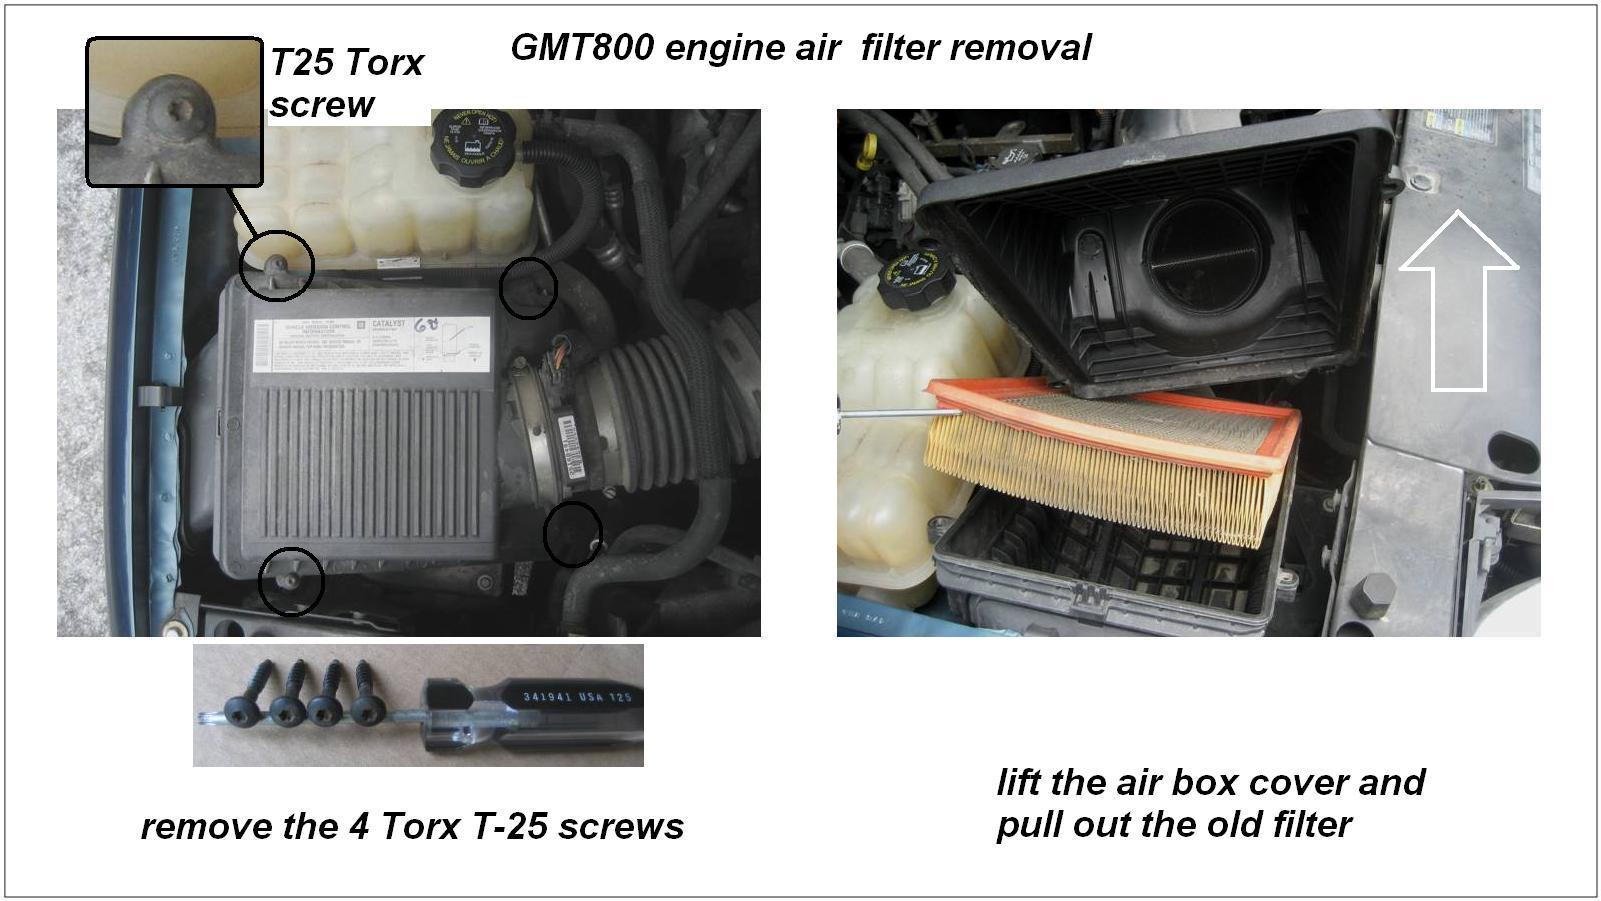
Step 1 – Remove the air box cover and air filter
Always wear mechanic's gloves or work gloves to protect your hands while working under the hood.
- Use the T-25 Torx driver to remove the 4 Torx screws at each corner of the air box as shown. Be careful not to drop the screws into the engine compartment. A magnetized driver is extremely helpful in retaining the screws. Place the 4 screws in a box or baggie; don't lay them around on some convenient area under the hood (or you might spend an hour fishing for them with an extendable magnet).
- Lift the air box cover and tilt it up; the intake duct accordion ribs allow it to be flexed for this.
- Lift out the old air filter.
Pro Tip
Begin work when the engine is cold.
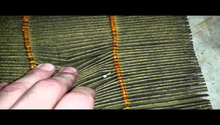
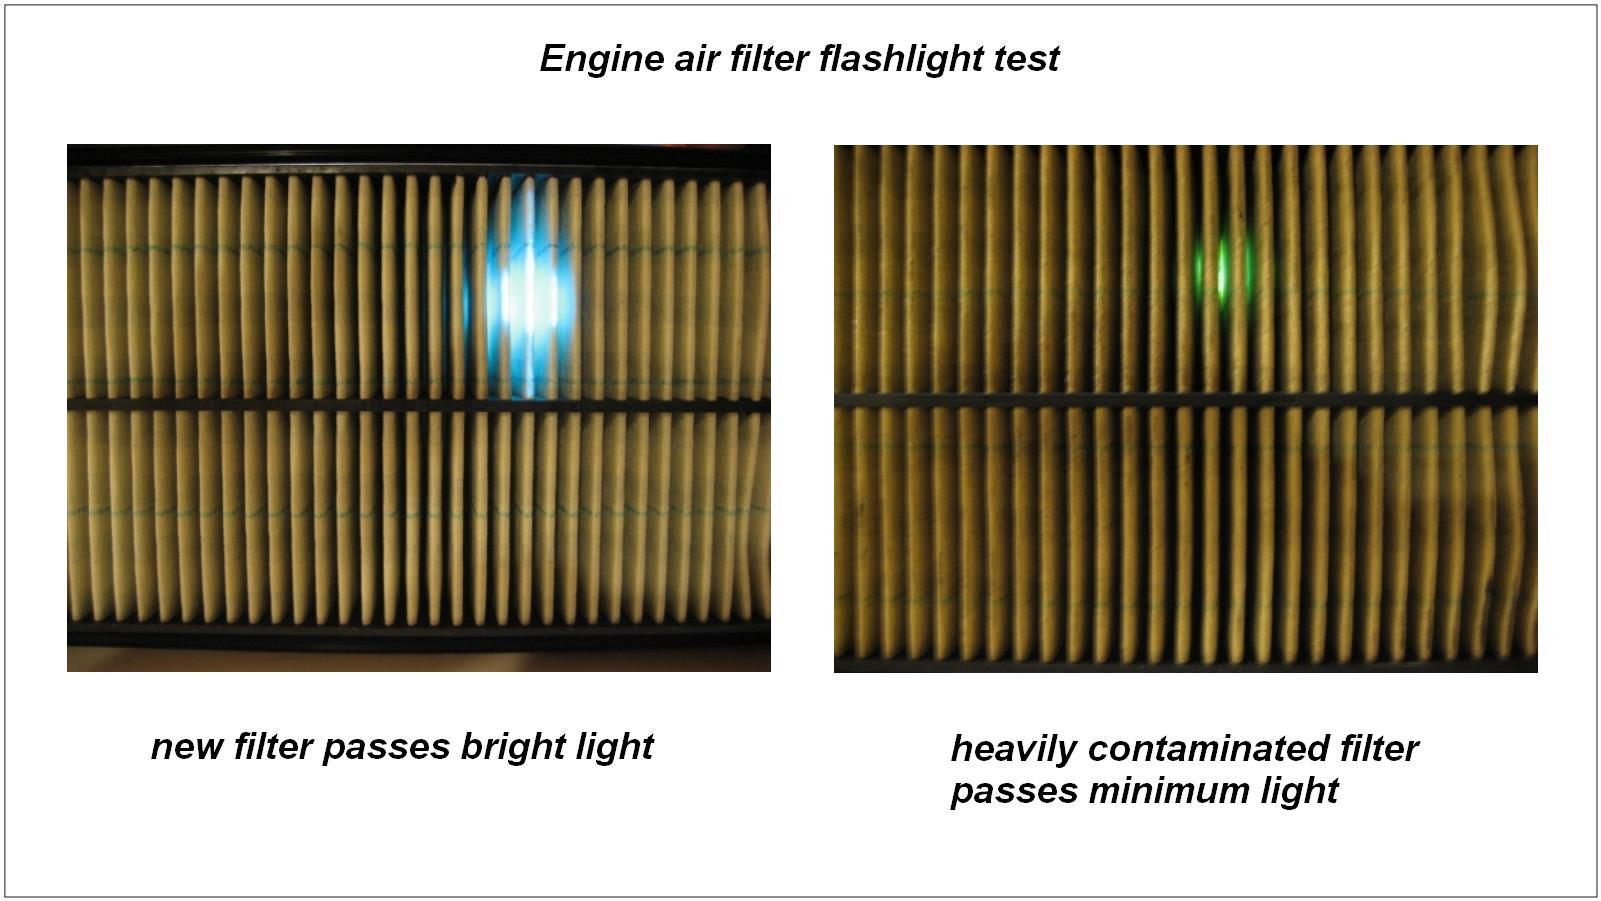
Step 2 – Perform the air filter contamination flashlight test (optional)
Hold a bright LED flashlight under the new air filter and note the brightness of the light it passes. Then do the same with the old filter and see how it restricts light passage. The light restriction is a fair comparison to the airflow it restricts and helps in judging how contaminated the filter is. In the picture below, a new filter is compared to a very dirty filter. Note how the dirt and crankcase breather vapor changes the bright, blue-white LED to dim green.
Step 3 – Clean the air box
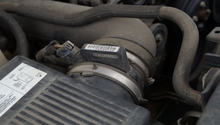
Brush out or vacuum the dirt and debris from inside the air box. If needed, very carefully and gently brush or vacuum the inlet screen to the Mass Airflow (MAF) sensor in the air box cover. The MAF is delicate and sensitive. If needed, use only MAF spray cleaner on the MAF element.
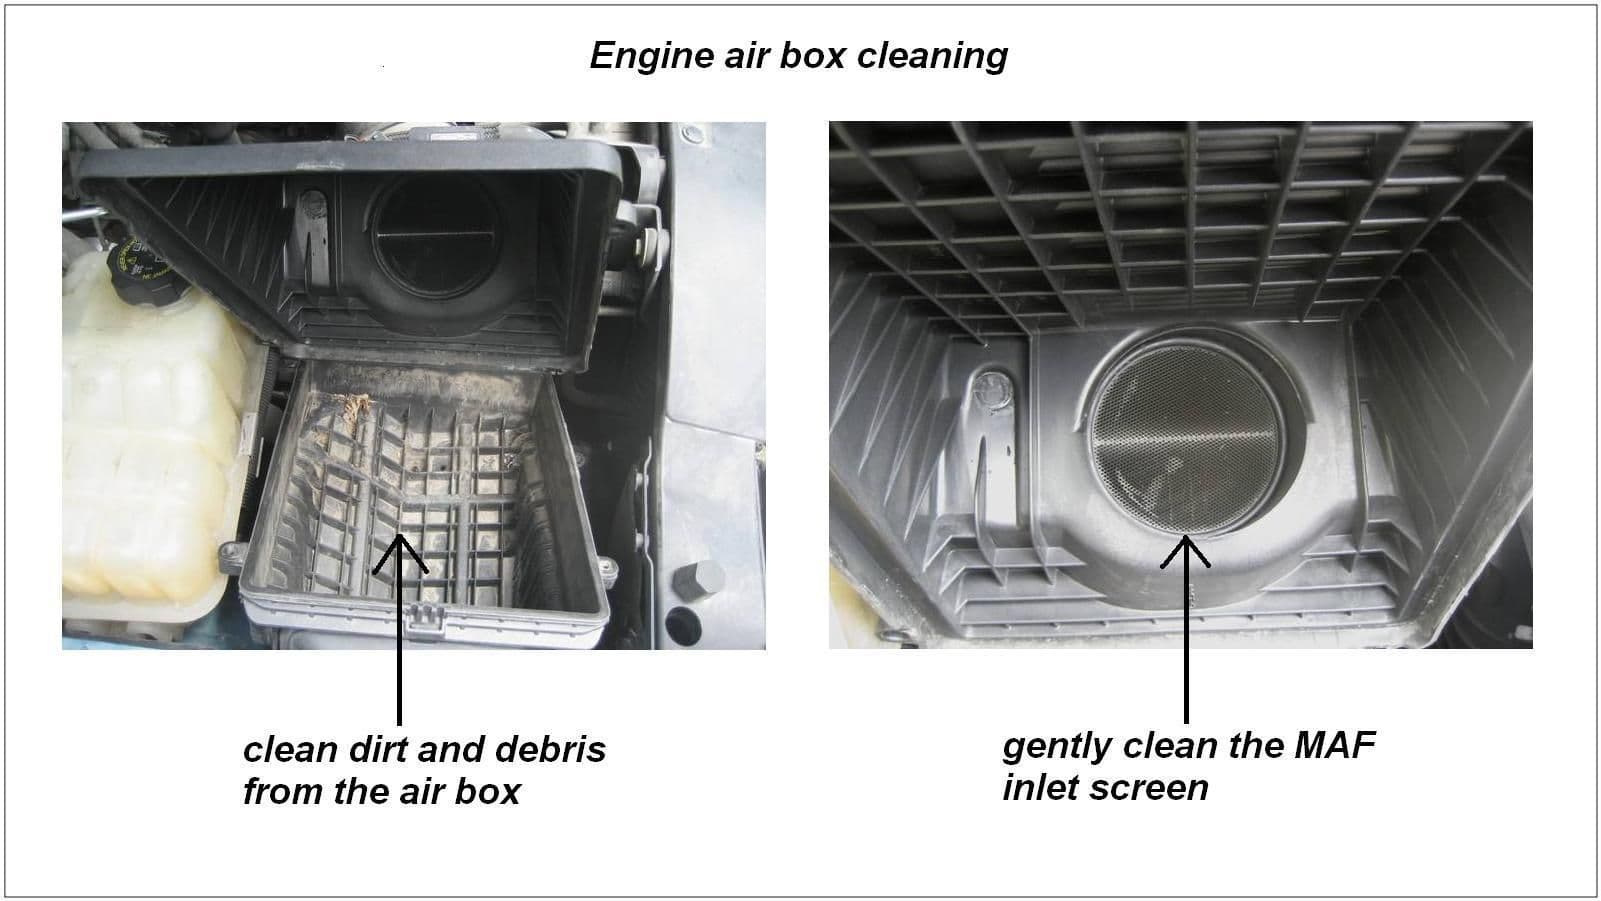
Pro Tip
Do not poke anything into the MAF housing, spray water, or spray any kind of cleaner into the MAF housing, except approved MAF cleaner.
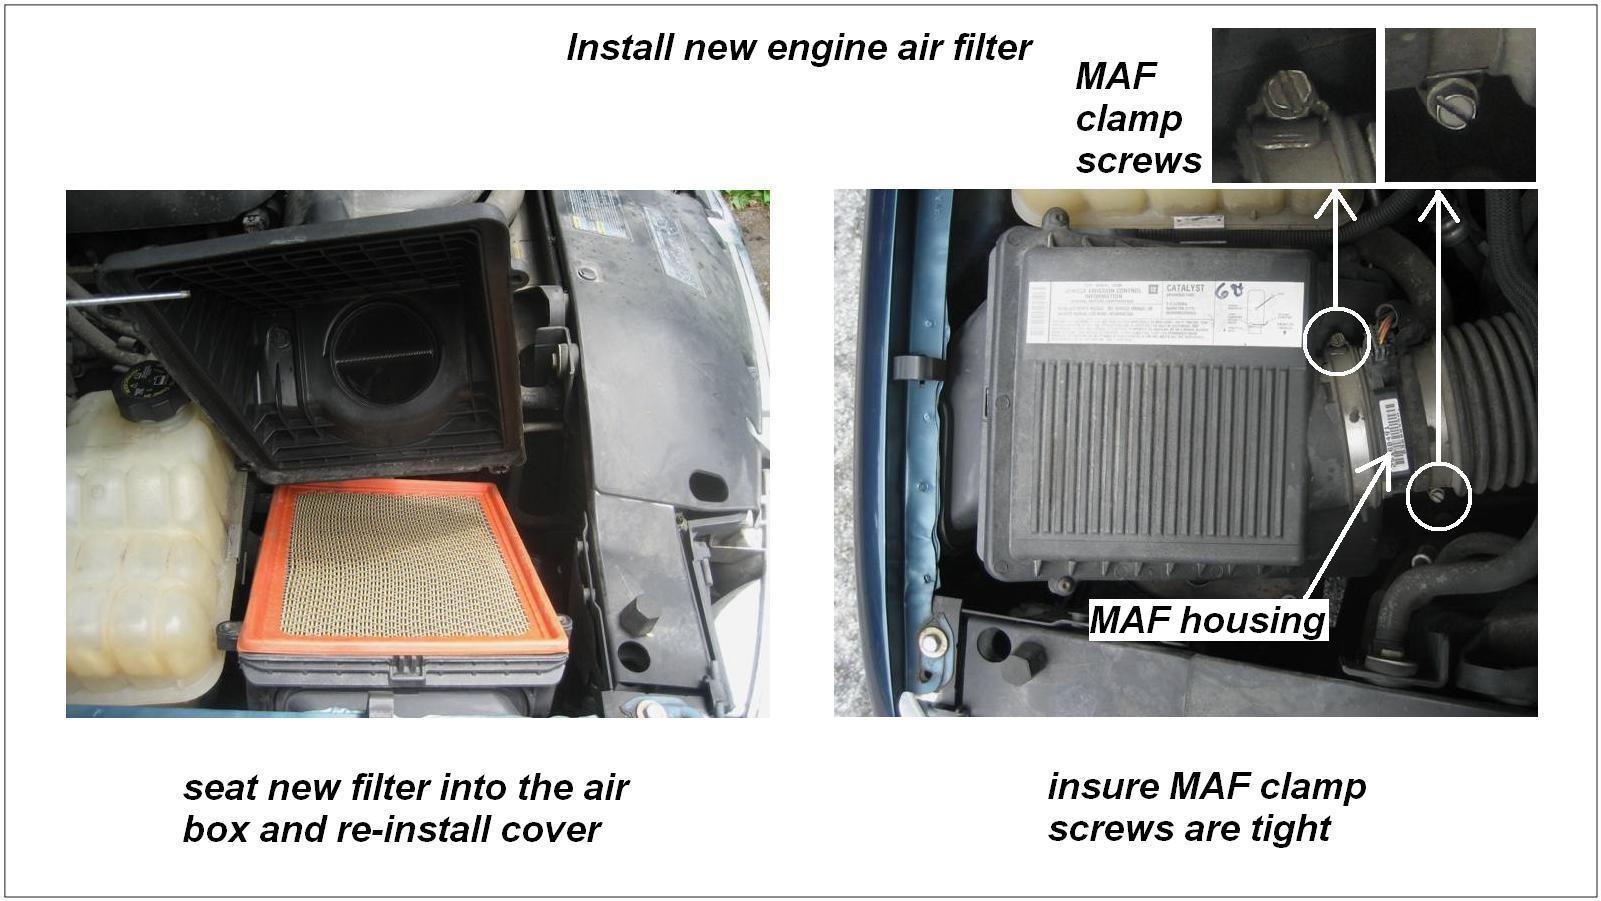
Step 4 – Install the new filter and attach the air box cover
Place the new filter into the air box with the pleated vanes down and seat the rubber bead around the edge of the air box. Fit the cover in place and tighten the 4 Torx screws. Keep in mind that the air box is plastic. Do not over tighten the Torx screws.
Over time, and during filter changes, the worm gear clamps on the MAF housing may work loose. Use an 8 mm socket driver, or a flat-tip screwdriver, to check and tighten them.
Pro Tip
Make sure you have not left any tools, parts or hardware laying in the engine bay.
Step 5 – Air leak and MIL fault check
Start the engine and ensure the multi-function indicator lamp (MIL) is out. Then listen near the air box and inlet duct for the tell-tail whistling or hissing of an air leak. If you detect an air leak, recheck the seating of the filter's rubber bead in the air box and that the cover is on properly and tight. Also, ensure that the MAF clamps are tight.
Pro Tip
An air leak may light the MIL. Once you find and fix the leak, the MIL fault can be cleared.
Featured Video: How to Install/Replace Air Filter Chevy Silverado 1500
Related Discussion
- Air Filter Replacement 2009 Silverado - ChevroletForum.com